JSON format allows users to move large amounts of data in real time and integrate data between apps much more easily. This one of the reasons why most APIs return data in JSON.
There are several options to import JSON to Power BI, including no-code solutions and custom integrations. We cover all the available methods in this tutorial to help you choose the best one for your reporting needs.
Ways to import JSON to Power BI
- Coupler.io (no-code)
This is a reporting automation platform to turn raw data into insightful reports. Coupler.io provides ready-to-use integrations for over 60 sources. At the same time, you can create custom ones by importing data from a JSON API to Power BI without coding. For this, you need to check the documentation of your source API for specific endpoints, authentication methods, URL queries, etc. Once you set up the connection, you can automate data refresh on a schedule.
- Power Query
Power BI allows users to get data from online JSON files and APIs using Power Query. This method does not require coding skills. However, users without any technical experience may encounter difficulties importing JSON data from APIs that require authorization and the use of complex queries.
- Manual file upload
Some source applications allow users to download data as JSON. After downloading the file, you can upload it to Power BI. However, this process is manual and time-consuming since you have to repeat the entire download/upload process every time you need to refresh your data.
- Custom integration (coding)
If you have good coding or technical skills, you can create a custom integration to import JSON to Power BI. However, the method also involves using an intermediary repository for your JSON data before it hits Power BI. So, you’ll need to write a script that fetches data from an API or JSON file and maps it into a tabular format for easier readability in a spreadsheet or database. Then, you connect this intermediary repository to Power BI using the built-in connector.
How to import JSON file in Power BI with Coupler.io
To begin, click Proceed in the form below. The source app (JSON) and the destination (Power BI) have already been selected. You’ll be asked to create a Coupler.io account for free (no credit card required).
Then, continue with the steps below to import JSON to Power BI:
Step 1. Collect data
- Enter a JSON URL and select the HTTP method. The JSON data source may include API endpoints and URLs to online published JSON files.
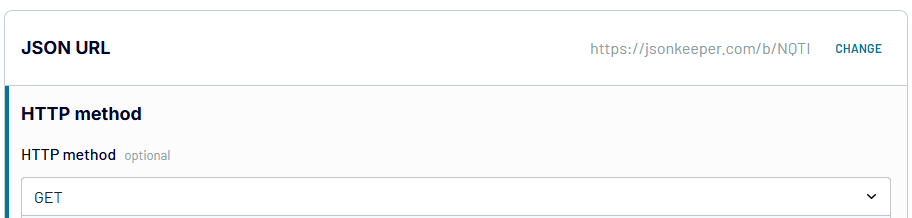
- Add a request header if it’s a protected/private API. Otherwise, leave it empty.
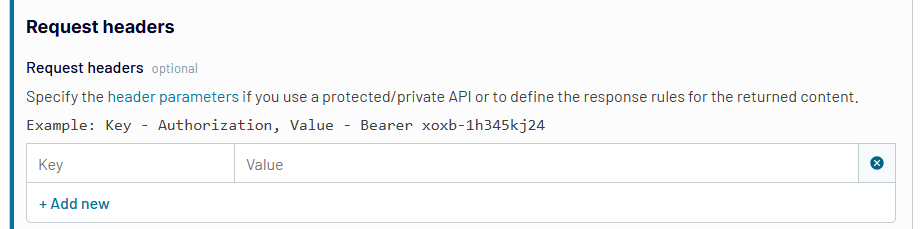
Request headers may include authentication credentials and other necessary info. Each header parameter consists of a key and a value pair. For example:
Authorization: Bearer abc123xyz
Accept: application/json
- Specify any required filter or query parameter.
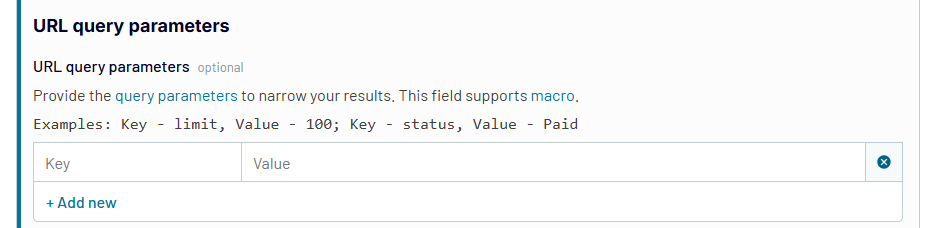
A query parameter helps filter and sort queries. It often comes after ? in the API URL. Here’s an example URL:
https://www.example.com/api/resource?userId=123&status=active
In the JSON connector, you need to specify the query parameters using the key and value:
userId: 123
status: active
Additional importer settings, such as Columns and Path, allow you to provide a list of columns to import and also retrieve nested objects. Keep in mind that these settings are optional and may not be needed for your JSON import. Refer to your application’s API documentation for the type of authentication, endpoints for each data category, and necessary parameters.
Step 2: Organize and transform data
Here, you’ll preview the JSON and transform it before loading it to Power BI:
- Hide, edit, or rearrange columns
- Filter and sort data
- Add new columns using formulas
- Aggregate data using operations like sum, average, count, min, or max on specific columns
- Merge data if you’re collecting data from two or more JSON files or sources
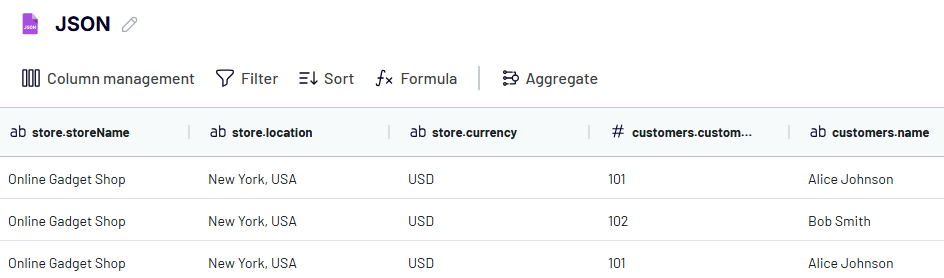
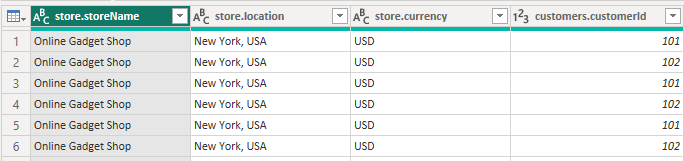
The data transformation settings apply to all incoming data. It allows you to send organized data so that you don’t have to parse JSON in Power BI before visualizing it.
Step 3: Load data and schedule transfer
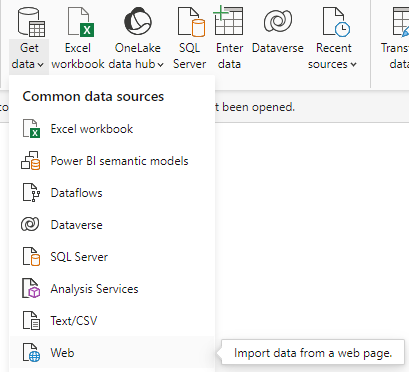
Follow the instructions to save your data to Power BI. Generate An Integration URL and copy it. Go to Power BI Desktop, create a blank report, click Get Data on the menu, and choose Web.
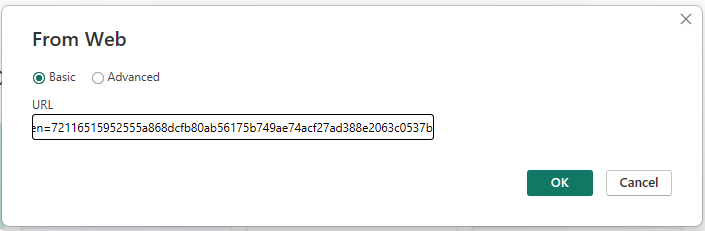
Paste the integration link and click OK.
It will open a preview of your data in the Power Query editor. You can edit or simply click Close & Apply on the menu.

In addition to Power BI, Coupler.io allows you to connect JSON to Looker Studio and import JSON to Excel.
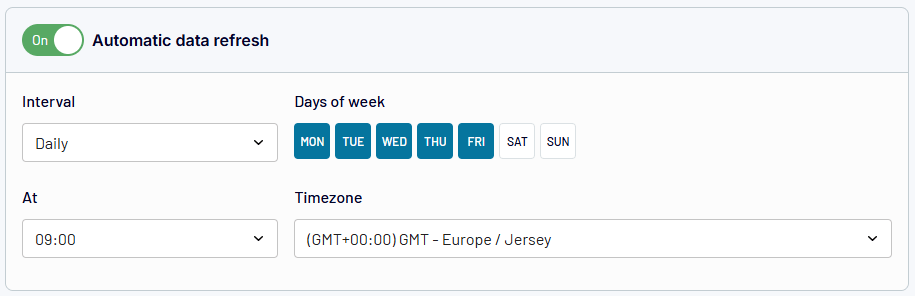
You may return to the importer to specify the optional source settings or transform the data further. Or, you can proceed to Set Up a Schedule. To do this, turn on Automatic data refresh and select the interval, days of the week, and preferred time zone.
Once you’re done, click Save and Run to save the settings. Your JSON data will be automatically refreshed in the destination/report depending on the set schedule.
How to load a local JSON file in Power BI?
Power BI allows users to upload CSV and JSON files from their computers. If you have a local JSON file, use the steps below to upload it to Microsoft Power BI:
- Click Get data from another source.

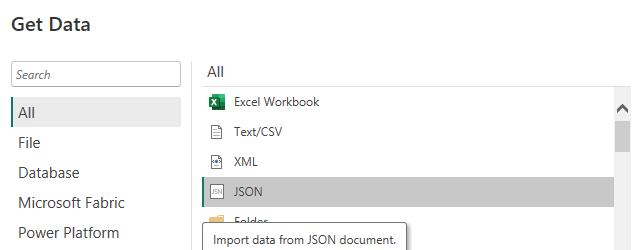
- Select JSON and click Connect.
You’ll select the JSON source file on your computer and click Open.
- A preview of your data will open in Power Query Editor.
The platform detects the JSON structure and automatically parses it into tabular format. However, you can also parse JSON in Power BI and transform the data in Power Query.
- Click Close & Apply to close the Query Editor and apply the changes.

Then, you can continue to add visuals and analyze the data in your Power BI report.
How to import data from a cloud JSON file to Power BI using Power Query?
If you have JSON files stored in the cloud, you can load them to Power BI easily. You need to copy the URL where the file is being hosted and use these steps to load data.
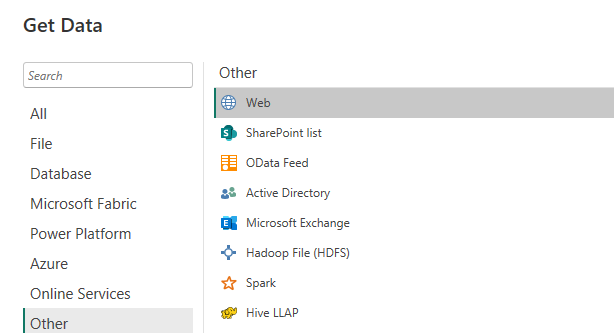
- Click Get data from another source.
- Click Other and select Web.
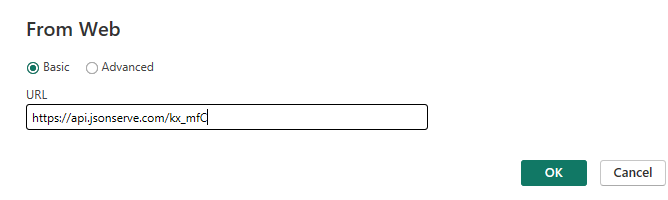
- Paste the URL of the cloud JSON file and click OK.
- A Power Query window will display a preview of your data and you can apply the necessary transformation.

Click Close & Apply on the menu to load the data to your Power BI report.
How to use a custom script to import JSON
You can use a custom script to load data from an API to an intermediary app that connects to Power BI (e.g. a spreadsheet or database). If you’re familiar with JavaScript and Google WorkSpace tools, you can write and run your scripts in Apps Script. If you have some experience with Python or R, you can use an IDE to perform the integration.
Our example below gets JSON from a basic API and sends it to Google Sheets. Next, we’ll open Power BI and use the Google Sheets native connector to import the data.
Step 1. Move JSON from API to Google Sheets
We’ll use Apps Script to create a function that pulls data from a source.
- Go to script.google.com and click New project in the top-left corner.
- In the script editor, write or paste a script and click Save.
This is a script that extracts JSON data from an API and sends it to Google Sheets: (Our API has no auth, so we don’t need to handle that).
function fetchDataAndWriteToSheet() {
  const url = 'https://jsonkeeper.com/b/N6DY'; //The JSON API URL

  const options = {
    'validateHttpsCertificates': false
  };

  try {
    // Fetch data from the API, ignoring SSL errors
    const response = UrlFetchApp.fetch(url, options);
    const data = JSON.parse(response.getContentText());

    // Check if data is fetched successfully
    if (response.getResponseCode() !== 200) {
      throw new Error('Failed to fetch data. Status code: ' + response.getResponseCode());
    }

    // Open the spreadsheet by ID
    const ss = SpreadsheetApp.openById('1Y5rUBRZcK-HE5UMp2VvAPyBx8RpZdUNFE9Qs4SgyDlQ');

    // Get the sheet with the specified name
    const sheet = ss.getSheetByName('data');

    // Clear the sheet contents
    sheet.clearContents();

    //Prepare the data for writing, including headers
    const headers = ['Customer ID', 'Customer Name', 'Customer Email'];
    const formattedData = [headers, ...data.map(item => [item.customerId, item.customerName, item.customerEmail])];

    // Write the data to the sheet
    sheet.getRange(1, 1, formattedData.length, headers.length).setValues(formattedData);

    Logger.log('Data written to sheet successfully.');

  } catch (error) {
    Logger.log('Error fetching or writing data: ' + error.message);
  }
}
The script fetches data from the URL and parses the JSON into a JavaScript object. Next, it creates header rows, formats the data, and combines the header with the data. Following this, it clears the existing content in the specified sheet and writes data to it.
Please note that our example uses a basic API that requires no form of authentication.
- Save and run your script.

If you haven’t authorized a Google Account previously, you’ll be prompted to do so. This enables full access for Apps Script to read/write data into your spreadsheets.
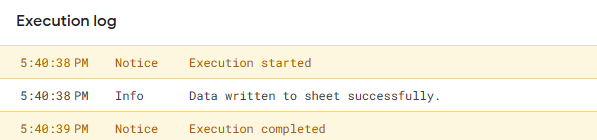
Then, Apps Script will execute the code and import data into the sheet. Keep in mind that scripts are very prone to errors, so it’s important to be prepared to handle them. If your import was successful, the execution log should be free from errors like this:
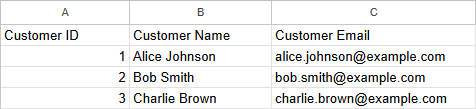
The sheet will be populated with JSON data from the API.
Step 2. Connect Google Sheets to Power BI
Open Power BI and click Get data from another data source.

Search for Google Sheets, select it, and click Connect.

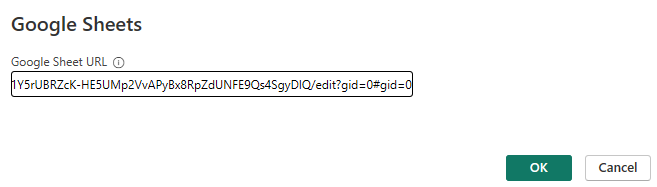
Paste your Google Sheet URL and click OK.
You’ll be redirected to a web page to select a Google account and grant access. Once you’re done, return to Power BI Desktop and click Connect to continue.

Now, you can choose to load the dataset or transform it before loading it to a report.
Step 3: Automate imports on a schedule
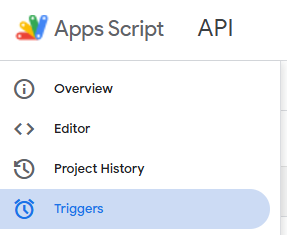
Apps Script allows users to refresh data using Triggers (the feature is on the left menu)
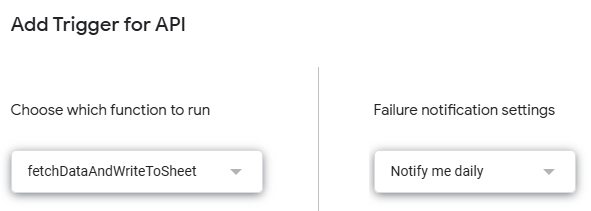
Click the Add Trigger button on the bottom-right corner.
Next, you need to set up the settings for your Trigger. These include the function to run, deployment to run, event source, type of time-based trigger, interval/time of the day, and failure notification settings. Click Save to automate imports with the JSON API function.
The trigger will enable the script to run based on the schedule. You can use the trigger settings to edit or delete as well as check error rates and failed/successful executions.
What’s the best method to connect JSON data to Power BI?
Connecting JSON to Power BI enables faster and more efficient data analysis. If you have a local or cloud JSON file, you can manually connect to Power BI and share reports quickly. If you have solid coding skills, a custom script can help extract data from APIs at no cost, parse/prepare the JSON, and send it to your destination.
If you’re looking to build dynamic reports, use Coupler.io to automatically import JSON from APIs to Power BI. This no-code reporting automation platform provides over 60 Power BI integrations and enables you to load data to other spreadsheet apps (Microsoft Excel, Google Sheets), BI tools (Looker Studio, Tableau), and data warehouses (BigQuery, Redshift). What’s more, Coupler.io offers ready-to-use dashboard templates to analyze data with ready-made reports and access insights much faster.

Automate reporting with Coupler.io
Get started for free