You can store an enormous amount of data on your Airtable workspace – data you certainly wouldn’t ever want to lose. It’s important to know there’s not only one way to back up Airtable; keep reading to learn about each of the three options.
How to back up all Airtable workspaces?
Airtable doesn’t have a utility to easily back up an Airtable workspace. Instead, you’ll need to approach the process step by step, using the method most appropriate for your needs.
Snapshots
The native ability to take base Snapshots is probably what most users have in mind when discussing an Airtable backup. Airtable takes automatic snapshots of specific boards and stores them for a certain period of time. If the need arises, you can restore a base from a particular snapshot.
The limitation of this method is that you don’t have any control over how frequently a snapshot is taken. On very active bases, it could be daily. On those you use less frequently, it could be weeks before a snapshot is synced. You can also take a manual snapshot as the need arises.
Coupler.io
Coupler.io is a reporting automation solution that lets you automate exports of Airtable data on a schedule. You can easily connect Airtable to spreadsheets, data warehouses, or BI tools. It does not require any coding or technical background although the connection is done via the Airtable API.
With Coupler.io, you can fetch specific Airtable views automatically and set a schedule for your importers. You may also pull data from 60+ other applications and combine it all in your preferred destination. Although you’ll have a hard time restoring the data exported this way back into Airtable, it’s by far the easiest tool for pulling data out of Airtable.
Manual CSV exports
Another approach that you can use for Airtable backup is to manually download a view as a .csv file. This approach is more suitable if you wish to work with Airtable data outside of the platform, for example, in a spreadsheet. An exportable .csv file includes all the field values from a given view, and can be imported into many other applications.
The obvious limitation of this method is that you’ll need to download each view manually. You might also have a hard time restoring Airtable from a .csv file. Although Airtable supports .csv imports, that file format isn’t capable of properly maintaining the complex structure of an Airtable base, such as formulas, relations between fields, or database schema.
Airtable automatic backup with Coupler.io
If you wish to back up an Airtable base and access your data elsewhere, the best approach is to schedule automatic data exports from Airtable. This can be done with Coupler.io, which can export any of your views and import them into a chosen destination at a frequency that you select.
To get started, select your desired destination in the form below and click Proceed. You’ll be offered to create a Coupler.io account for free.
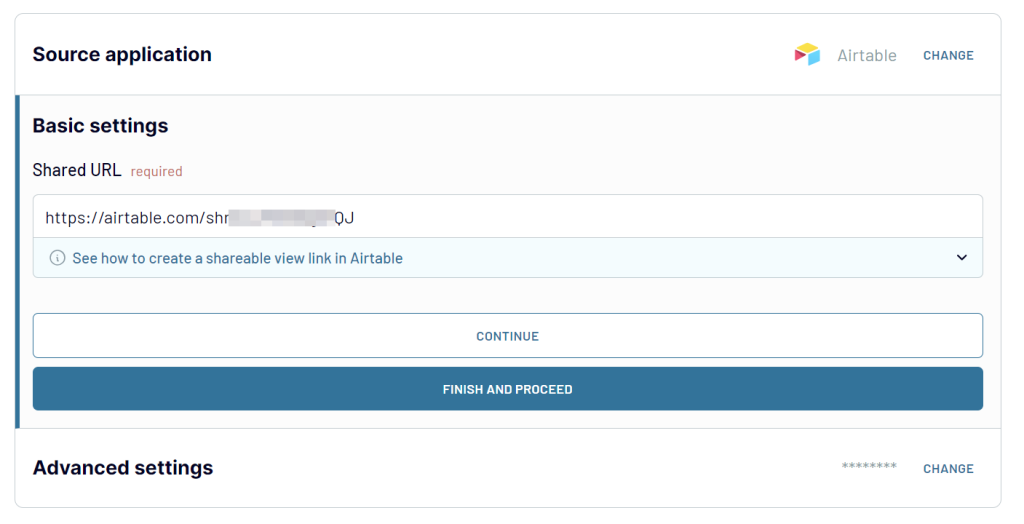
1. Collect Airtable data
Create a shared view link for your Airtable view and insert it into the Shared URL field.
Note: You can obtain a shared view link by clicking the Share and sync button => Create link to view.
If your view is password-protected, enter the password in the provided field in Advanced settings.
2: Organize & transform data
In the next step, you can preview and organize Airtable view data directly within the app’s interface:
- Manage columns: Hide unwanted columns, rename and reorder columns, change column data types, and add calculable ones using the supported calculation formula.
- Filter and sort data: Apply filters to extract only the required data based on specific criteria.
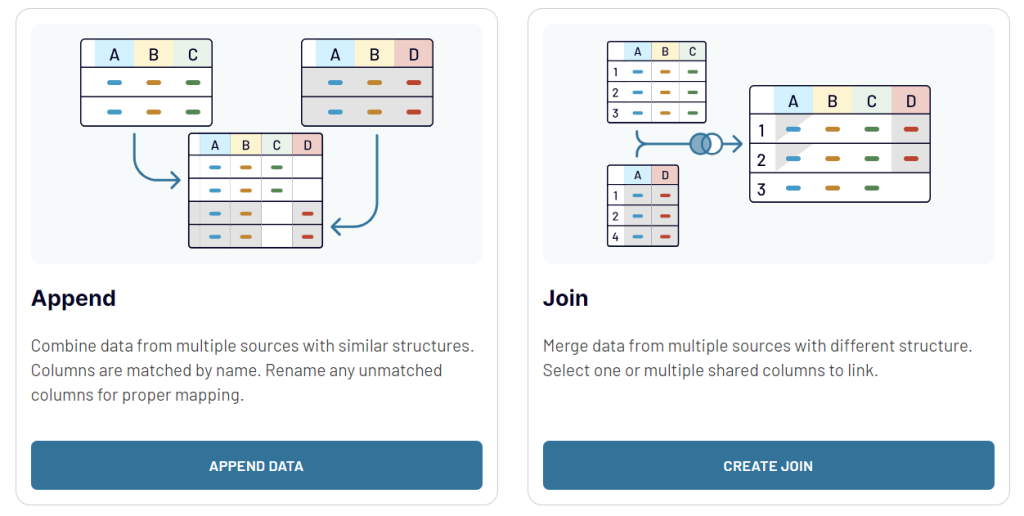
- Blend data: Combine data from multiple Airtbale views or other apps into a single dataset.
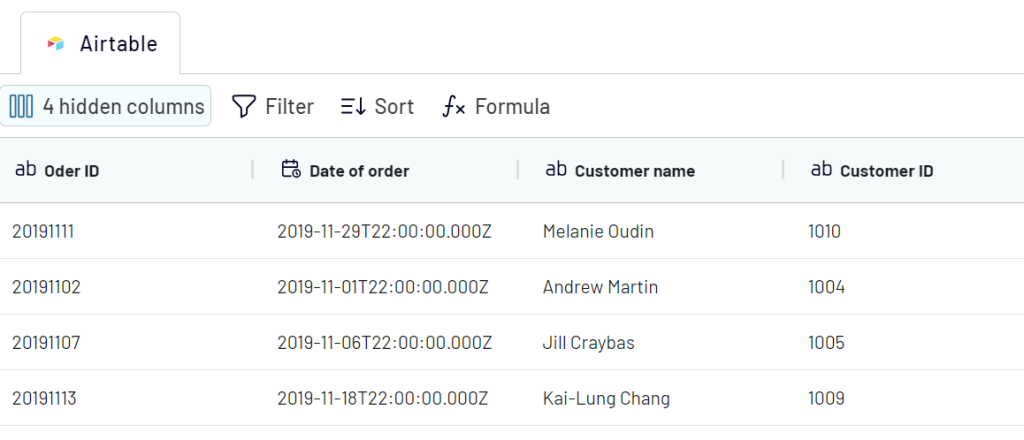
Once the data is ready, connect your destination app account and specify where to load your Airtable data.
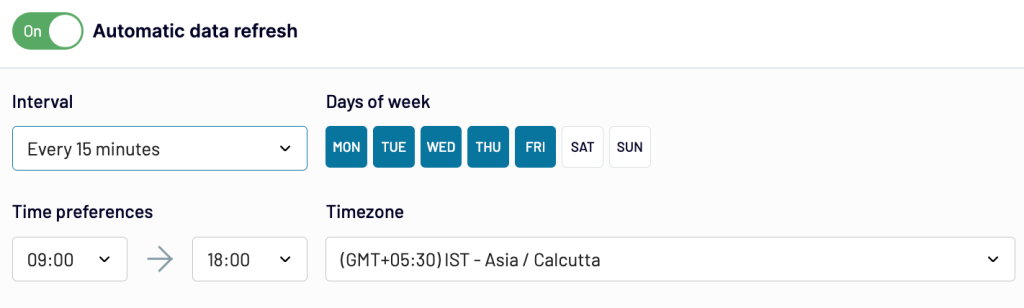
3. Schedule data refresh
Finally, specify how often the data should be refreshed. You may be interested in a daily Airtable backup performed right before you start your workday. Or perhaps you’d like for the data to be refreshed hourly or even more frequently? It’s all up to you.
Backing up multiple Airtable views
Chances are you want to import more than just a single view. To correctly back up Airtable, you may want to add multiple views. You can easily do this by clicking the respective button.
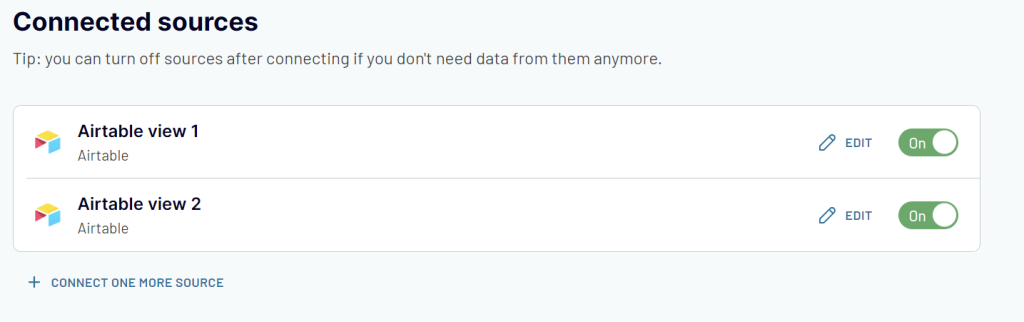
Then you’ll need to specify how to blend data from these views: append or join.
After that, proceed with the setup as usual.
How do I back up an Airtable base with a snapshot?
Snapshots are taken automatically for each of your bases. You don’t need to enable them, but you also can’t adjust their frequency.
Airtable has its own logic to determine the frequency of taking automatic snapshots; it depends largely on the number of changes made to a base, rather than a specific period of time.
To view the stored snapshots, select the base you want to backup, and click on the History icon, which is represented by a clock with an arrow turning counter-clockwise.
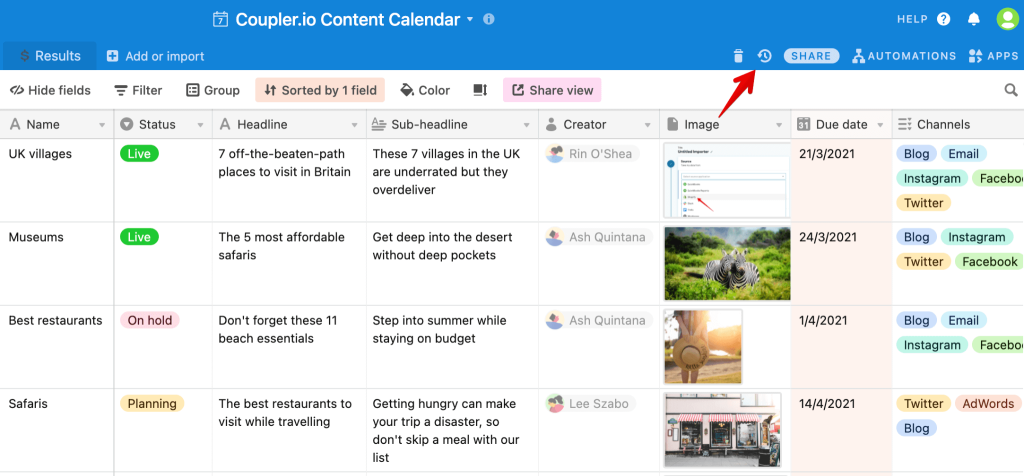
Then select Snapshots and you’ll see the list of available snapshots.
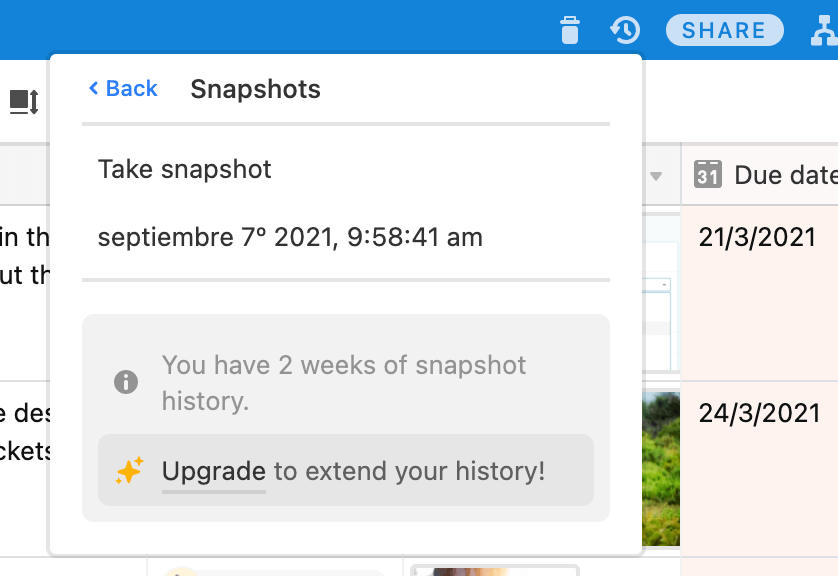
The Airtable plan you’re on determines how long the snapshots are stored:
- The Free plan offers only 2 weeks of snapshot history
- The Plus plan provides 6 months of history
- Users on the Pro and Enterprise plans can store up to a year’s worth of snapshots
From the same window, you can also export an Airtable base by taking a manual snapshot. To do so, click on Take snapshot.
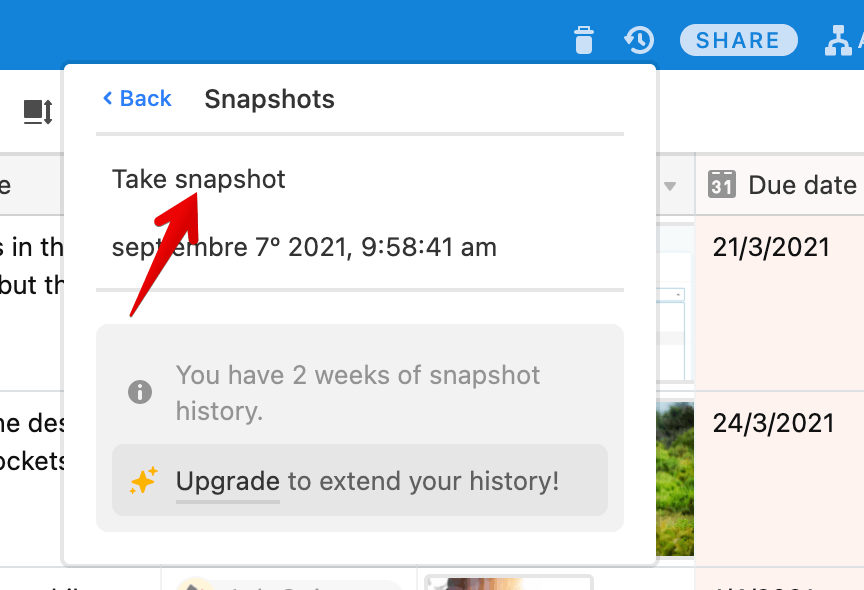
If you’d like to take another manual snapshot, you’ll need to wait a few hours before you can process another snapshot.
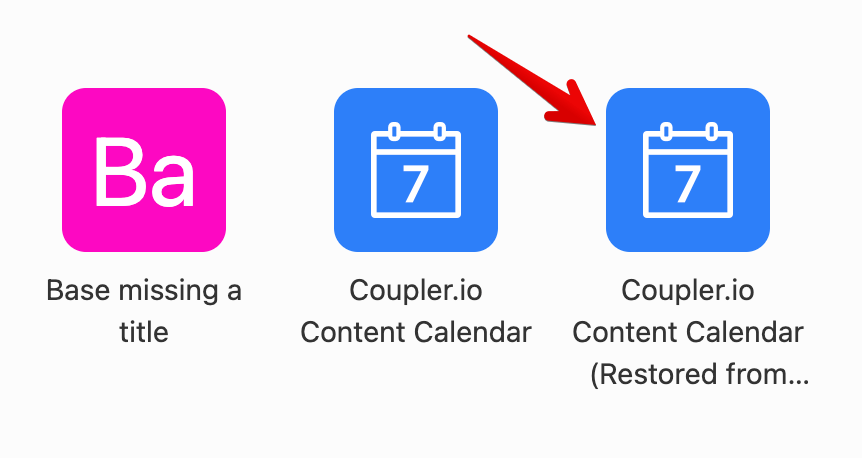
To restore a base, open the History menu, choose Snapshots, and pick the snapshot you want to restore. A confirmation window will appear, where you can choose the workspace into which a base will be restored.
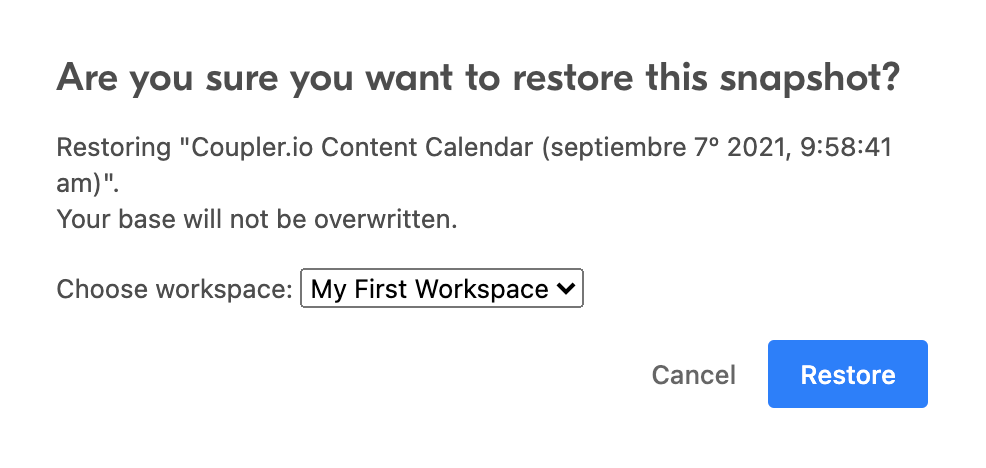
Note that the restored base won’t override the existing one. Instead, Airtable will build a new table with the data from your snapshot.
Back up Airtable data (.csv file method)
If you’re planning to use the data in a separate application, backing up Airtable views is a much better option. The .csv format is widely utilized, and can easily be uploaded into many other applications. However, if you plan to drop it into a Google Sheets file or an Excel workbook, the automatic backup method is more efficient.
A .csv download is available only on Airtable web and desktop apps.
To fetch a backup of any of your views, enter a base and the desired view. Then, click on the view’s name and select Choose CSV.
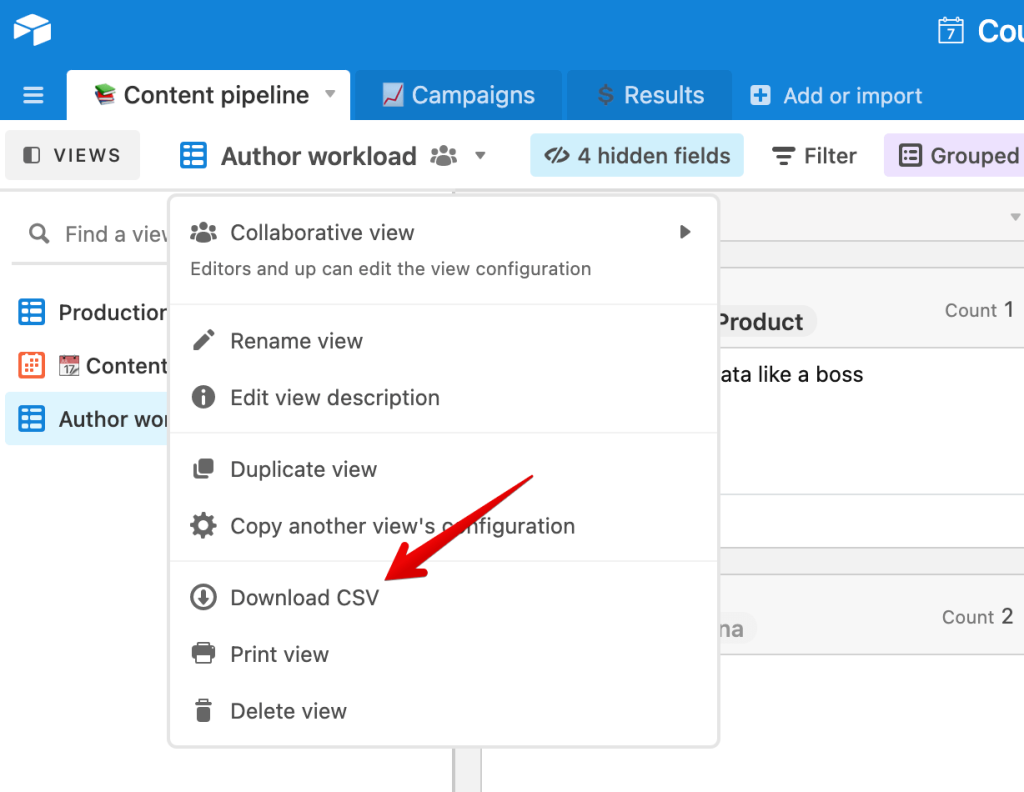
A file will download containing all the field values from the selected view.
Which method to choose for Airtable database backup
The choice of tools for running an Airtable backup depends on your needs. Snapshots are taken by default, and although they’re pretty limiting (especially on a free plan), they’ll be helpful when all hell breaks loose.
Exporting as CSV and Coupler.io is more useful when you need easy access to your Airtable data or plan to process it further.
By the way – if you choose to export a view as a CSV, you may have to do some extra work to bring it into the desired shape after you import it to Google Sheets or Excel. Coupler.io also has a CSV to Google Sheets integration (among others) that will simplify the process.
Automate Airtable data export with Coupler.io
Get started for free