Whether you ask Google, ChatGPT, or experts in community forums, they will all tell you the same thing: it’s impossible to directly connect Airtable to Tableau. Frustrating, isn’t it? But don’t despair. In fact, there are several ways to connect these tools with just a few clicks.
In this article, I will explain the process of automatically transferring data between Airtable and Tableau. Additionally, I will share some manual workarounds and provide a free dashboard template for Tableau.
Methods to connect Airtable to Tableau
There are five different methods for syncing data between Airtable and Tableau. Let’s briefly examine them:
- Automated no-code integration with Coupler.io. You can use Coupler.io, a dedicated reporting and automation tool, to seamlessly transfer your Airtable data to Tableau. The process takes about 5 minutes and doesn’t involve any coding. You can also configure your data to update on schedule, eliminating the need for regular manual refreshes.
- Connect with the ready-made Airtable WDC. Airtable created its own WDC for transferring data to Tableau. While it’s fairly easy to implement, it lacks the sophistication of other WDCs developed for Tableau.
- Workaround using a supported connector (GDrive). This option uses a Tableau-supported connector as a platform go-between. You will need to integrate your Airtable account with GSheets and then use the native GDrive-Tableau integration to visualize your data.
- Custom-built Web Data Connector for Airtable. If you need a more customized solution, you can build a WDC to sync your Airtable data with Tableau. Keep in mind that this is a highly technical approach. You won’t be able to do it without programming knowledge or help from your development team.
- Manual data transfer via CSV import. A straightforward approach that involves downloading your Airtable base as a CSV file and uploading it to Tableau.
Looking for the fastest and most reliable way to connect these tools? I’ve got you covered.
As a marketer, I highly recommend using Coupler.io to manage data transfer between these apps. It simplifies scheduling and ensures you won’t have to write a single line of code.
How to automatically connect Airtable to Tableau with Coupler.io
Like I said, it only takes a few minutes to set up an integration in the Coupler.io app. Click Proceed in the form below where we’ve preselected Airtable as a source and Tableau as a destination.
Then, follow the steps below.
1. Collect data from your Airtable base
Specify which Airtable data you want to share. Sign in to your Airtable app and navigate to the view (table) you plan to visualize in Tableau. Click on the Share and sync button in the top menu and copy the link.
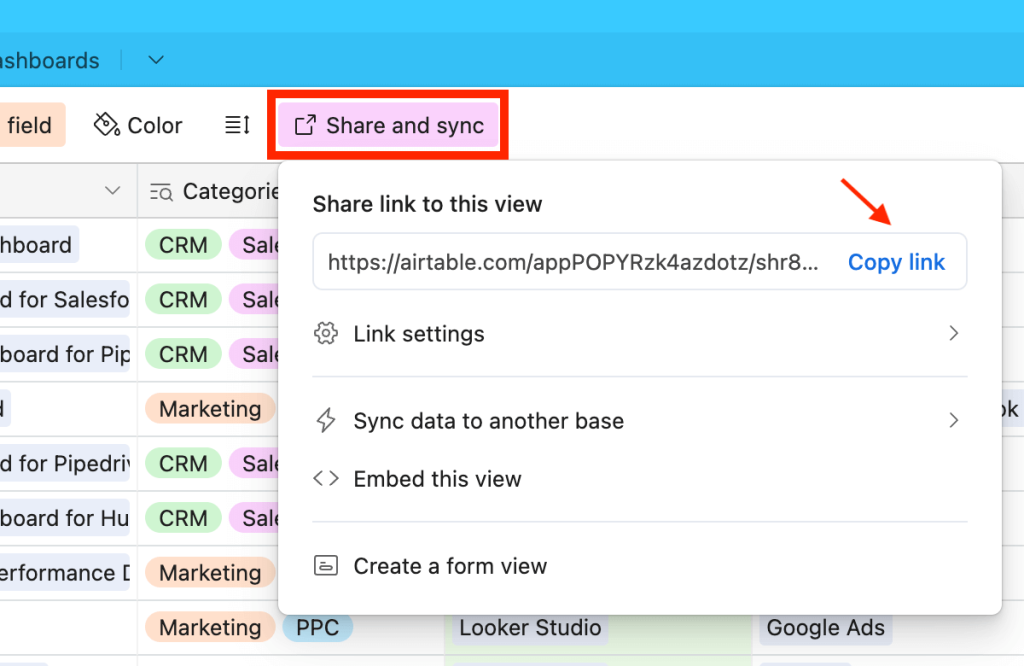
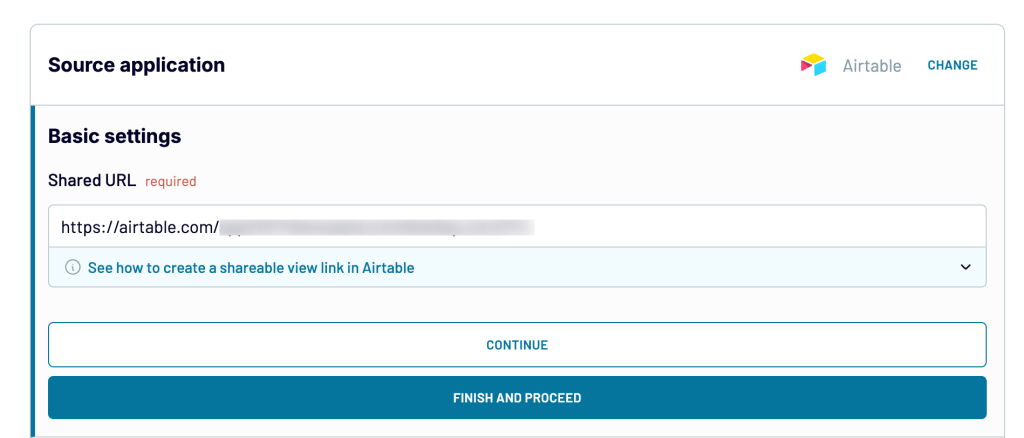
Go back to your Coupler.io tab and paste the Airtable link in the Shared URL box. If your base is password protected, click continue to input the password.
Otherwise, click Finish and proceed, then click Transformations in the bottom-right corner of the next screen.
2. Organize and transform your data
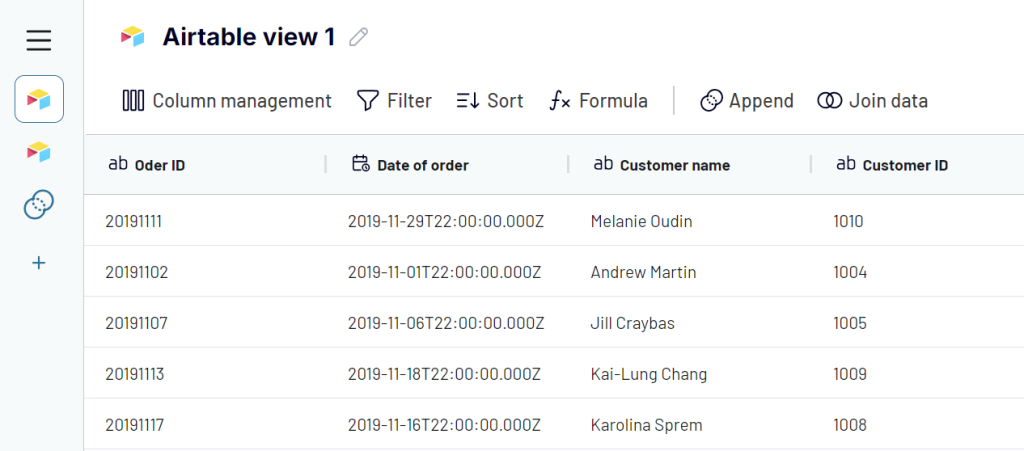
Here’s where you can preview your data and make strategic changes before visualizing it in Tableau. For instance, you may want to:
- Apply custom filters or sort the table alphabetically
- Hide, rename, reorder, or add columns
- Merge or combine data from multiple Airtable views
3. Load data and schedule automated data refreshes
Once you have reviewed or amended the data, click Destinations. This will take you to the Connector setup stage with instructions on how to finalize the connection between the tools. But don’t open your Tableau desktop app just yet. Instead, generate a link, copy it and save it somewhere for later. Proceed to Set up a schedule.

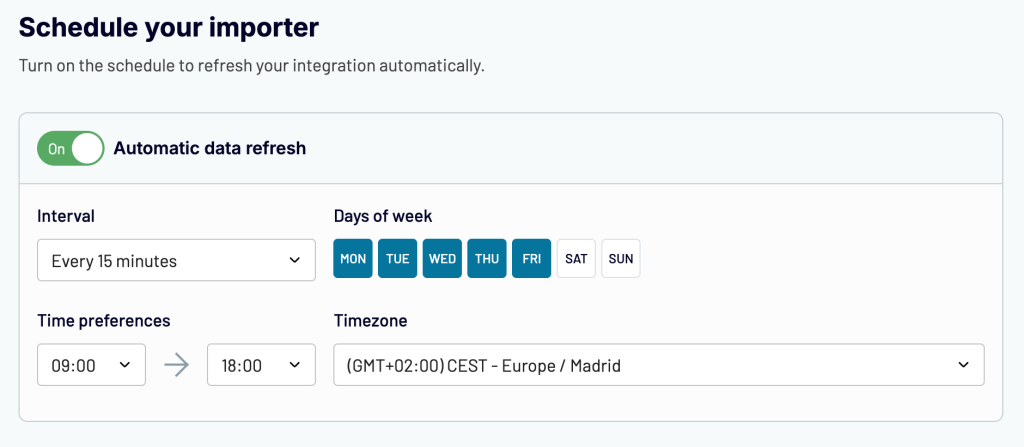
Turn on the schedule to ensure your Airtable data updates automatically in Tableau. Configure it to refresh every 15 minutes, hour, or month. You can even specify days of the week or time of day, so you’ll always have the most up-to-date insights while at your desk. After scheduling is done, click Save and run Importer.
Now, it’s time to launch your Tableau desktop app and finalize the connector setup. In the left-side menu, select Web Data Connector. You’ll see a popup asking you to insert a WDC URL.
Copy and paste this link – https://app.coupler.io/tools/tableau – into the field provided, then press enter to load the next page.
In the Integration URL field, paste the link you generated and saved earlier. Click on Get data and it will take you to a workbook created from your Airtable data.

To customize your dashboard, drag and drop data from your table into the column and row fields. You can also use the Marks feature to change the layout, color, design, and size of your new viz.
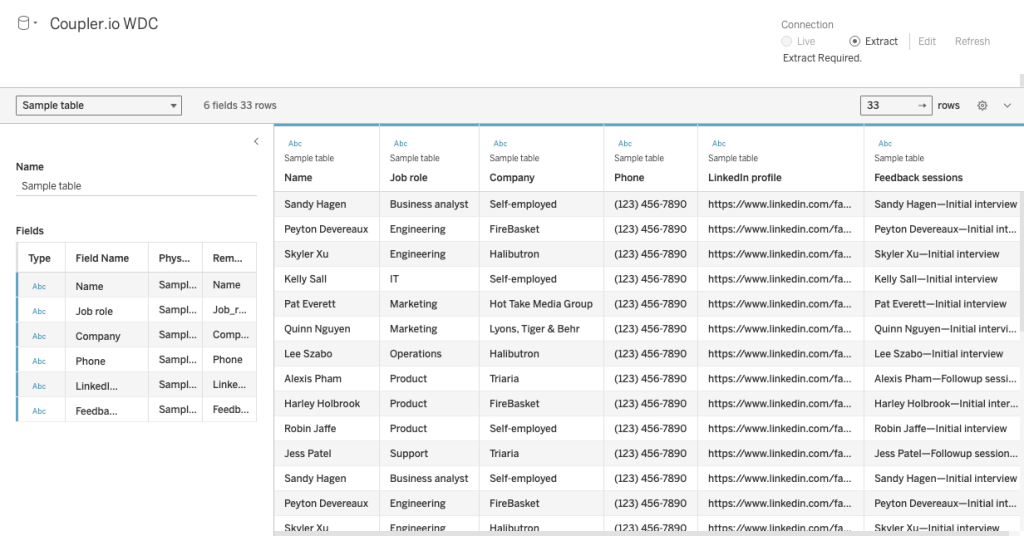
There you have it! Your importer is running and Coupler.io will automatically update the dashboard on your chosen schedule.
Use case example: analyzing your entire Airtable base in Tableau
I’ve previously described how to visualize your Airtable views in Tableau, but what about an entire base? Imagine you’re involved in a customer development project and need to analyze data in Tableau. For instance, you want to extract data from all views in the base, such as Customer Demographics, Feedback Surveys, and Customer Interviews. You can accomplish this using Coupler.io in two different ways.
The first approach involves creating as many importers as the number of views in your base. It’s a matter of repeating the process I described above and syncing one Airtable table at a time. In the end, you’ll have created several stand-alone dashboards in Tableau, each ready for customization and analysis.
The alternative is to add multiple sources (in this case, views) to a single importer and append the data. The only downside of this approach is that you will see your data presented in Tableau as a unified source. So, you won’t be able to analyze tables individually, and this could be confusing.
If that’s not an issue for you, here’s how to use the append function in Coupler.io:
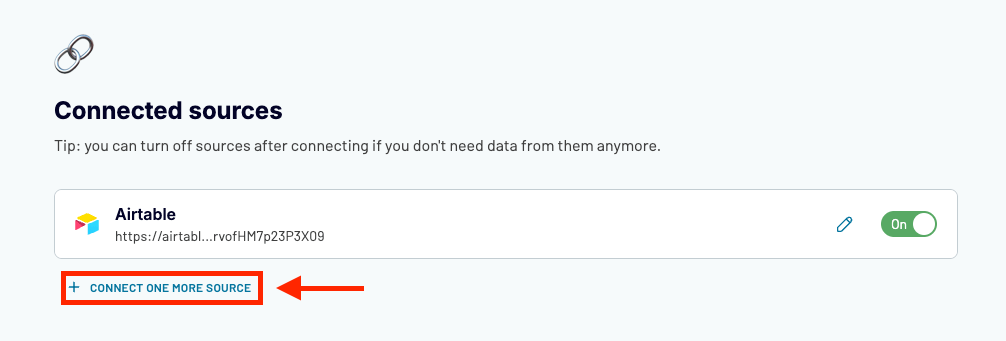
- When setting up an importer from scratch, select Connect one more source before proceeding to the Transformations stage.
- Add as many additional sources as the amount of views you want to connect. Remember, you can find the links for views you want to share by clicking on the Share and Sync button in your Airtable app.
- Proceed to the Transformations step and click on Append in the top menu.
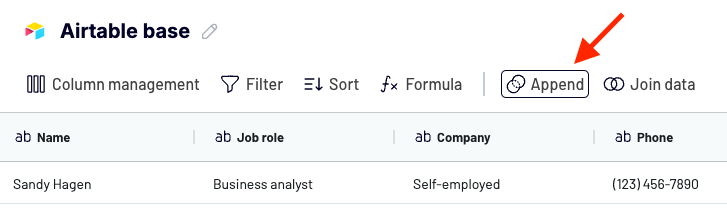
- Select all connected sources you want to visualize in a Tableau dashboard, then click Append Data.
- Coupler.io will stitch data from all views and present it in a single table. You can make any necessary changes (like filtering, renaming columns, etc.) before finalizing the importer setup and scheduling.
Let’s move on to the next method of connecting these tools: a sort of native workaround created by Airtable.
Use Airtable’s ready-made WDC for Tableau
Airtable has developed its own WDC which allows you to extract and send data to Tableau. With this method, you don’t need to use a third-party tool or download/upload files. It also lets you bring an entire base into Tableau without any extra steps. However, the WDC lacks convenient features like a user interface and the ability to transform data before integration with Tableau.
So, it’s not the most sophisticated option on my list, but it works. Here’s how to set it up:
- Open Tableau Desktop or Server.
- Under Connect in the left-side menu, click More.
- Search for ‘Web Data Connector’ from the connectors list and open it.
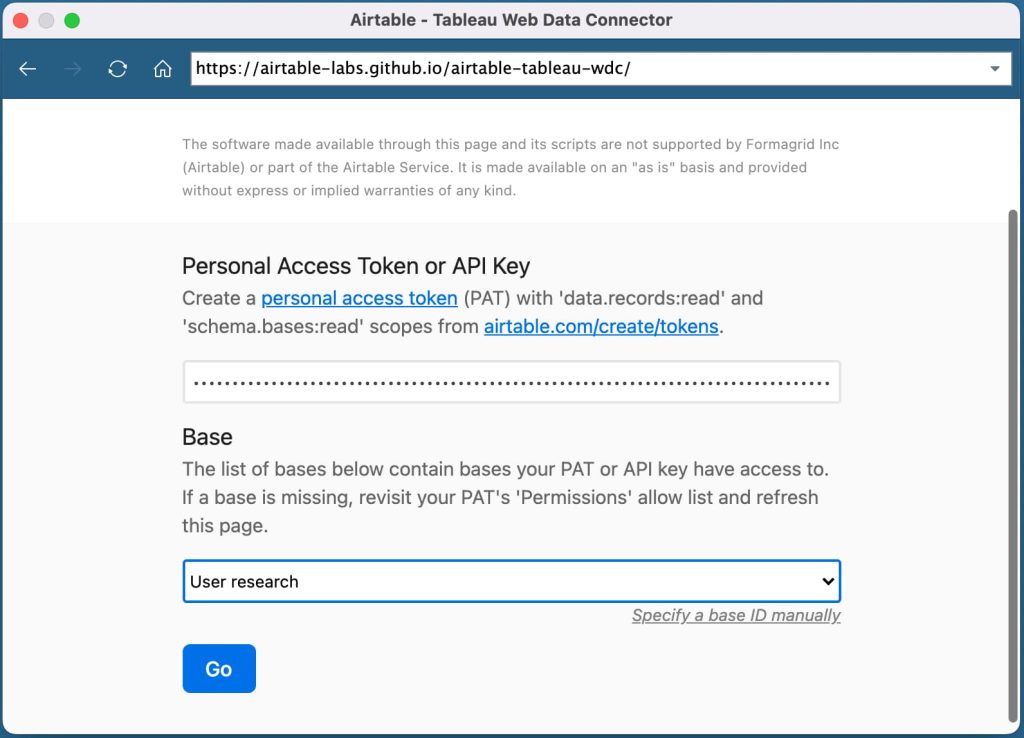
- Paste this URL – https://airtable-labs.github.io/airtable-tableau-wdc – into the provided field and press enter.
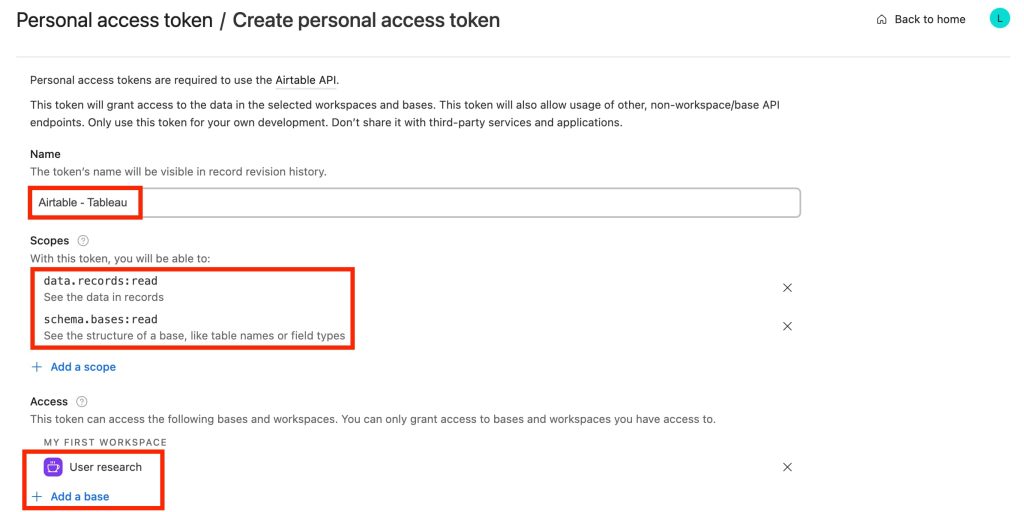
At this point, you will be asked to create a personal access token (PAT) to permit the WDC to fetch data from your Airtable base. Here’s how to do it:
- Sign into your Airtable account.
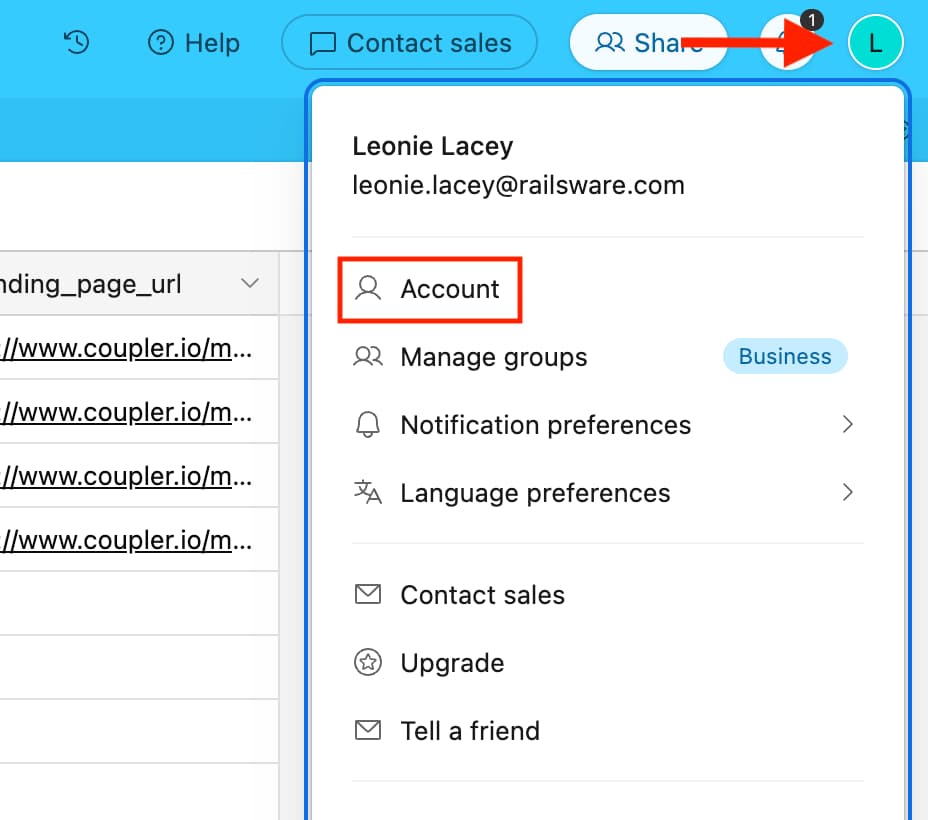
- Go to your Airtable account avatar in the top-right corner and select Account from the drop-down menu.
- On your Account page, click on the Go to Developer Hub button.
- Within the note explaining that API (not PAT) tokens will be deprecated, click Create Token.
- In the right-hand corner of the next page, click Create New Token.
Now you will need to choose the name, scope, and source for your PAT. The name isn’t important here, so you can use a placeholder that simply describes your integration. Next:
- Click Add a scope and choose the 2 options shown below.
- Choose the base you want to visualize in Tableau.
You will see a pop-up with your PAT token. Copy it and head back to the Tableau app. Once there, paste your PAT into the corresponding field, select your base, and click Go.
This will generate a workbook with your data in Tableau. You can further customize and enhance the dashboard using Tableau’s range of data visualization features.
Important note: From 2025, the 2.0 version of WDCs (like this one) will be deprecated. If you choose this method, you may need to switch to another soon. The WDC may work for a while after 2025, but it won’t be subject to critical security updates and other performance improvements.
Use the Google Drive connector as a go-between
Alternatively, you can use a Tableau-supported connector to link your Airtable data. Multiple options are available, but the Google Drive connector is particularly convenient.
Simply ensure that your Airtable records are synchronized with Google Sheets. You can set up an integration using a tool like Coupler.io or download views as CSV files and then manually upload them to Google Sheets.
Once your Airtable records are accessible in Google Sheets, you can start the GDrive connection process by:
- Signing into your Tableau Public or Server account (you can also use Tableau Desktop, as the process is similar).
- Go to Create in the top left-side menu and select Web Authoring. You will be asked to connect your data, but instead of uploading a file, choose Connectors.

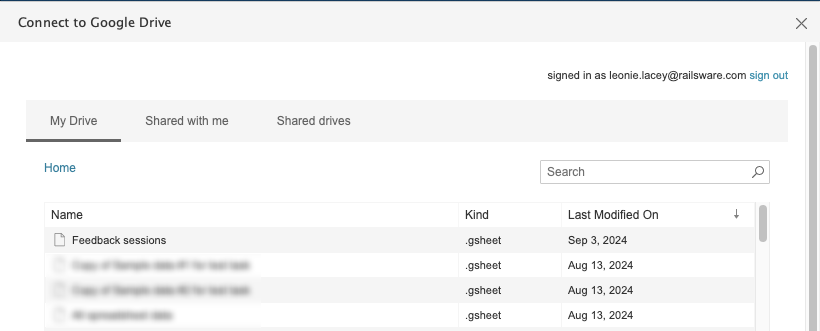
- Select Google Drive from the list of options and follow the instructions to sign into your Google account.
- Choose the Google Sheet with the base you want to visualize.
This will create a new workbook in your Tableau interface where you can make changes to your data before publishing. For example, you can add custom filters to your table, rename/hide/change the data type of columns, or create relationships between other tables you have in Tableau.

When you are finished making changes, click ‘Publish As’ in the top-right corner, specify the name of your workbook, and publish it.
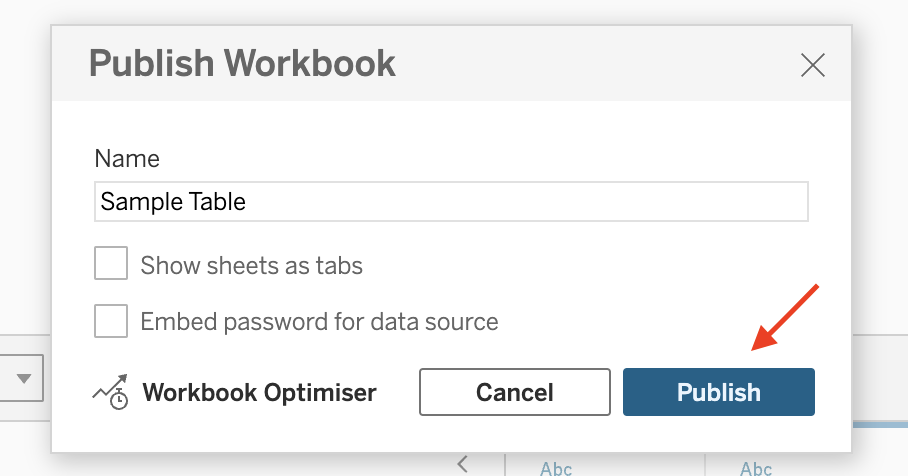
Your published workbook will appear in Tableau. Customize the dashboard to your preference and share it with your team.
Create a custom Web Data Connector
If none of the previous methods are suitable for your needs, you have the option to create your own Web Data Connector 3.0 using the Tableau Connector SDK. However, please be aware that this is not a quick or easy task. Building a WDC requires writing code, so you will need programming skills, especially familiarity with HTML and Javascript.
When is it worth your while to create a custom Tableau WDC?
- When you need to perform advanced data transformations before sending your base to Tableau.
- When you want to configure your dashboard to refresh Airtable data in near-real time (faster than 15-minute intervals).
On the other hand, here are some reasons not to build one:
- Again, it’s a job for your development team. If you’re not a programmer, you likely won’t be able to implement it on your own.
- It requires manual configuration and can take a while to set up, depending on your dev team’s capacity.
- You will have to maintain it over time. If you don’t need to visualize large, complex datasets in Tableau, it’s probably not worth the hassle.
I won’t go into the details of this approach here as Tableau already provides step-by-step instructions on how to build a connector from scratch. You can check out the official documentation and find all SDK-related materials on GitHub.
Manual way to transfer data from Airtable to Tableau
The quickest way to connect these two platforms is to export your Airtable data as a CSV file and upload it to Tableau. Let’s go through the steps.
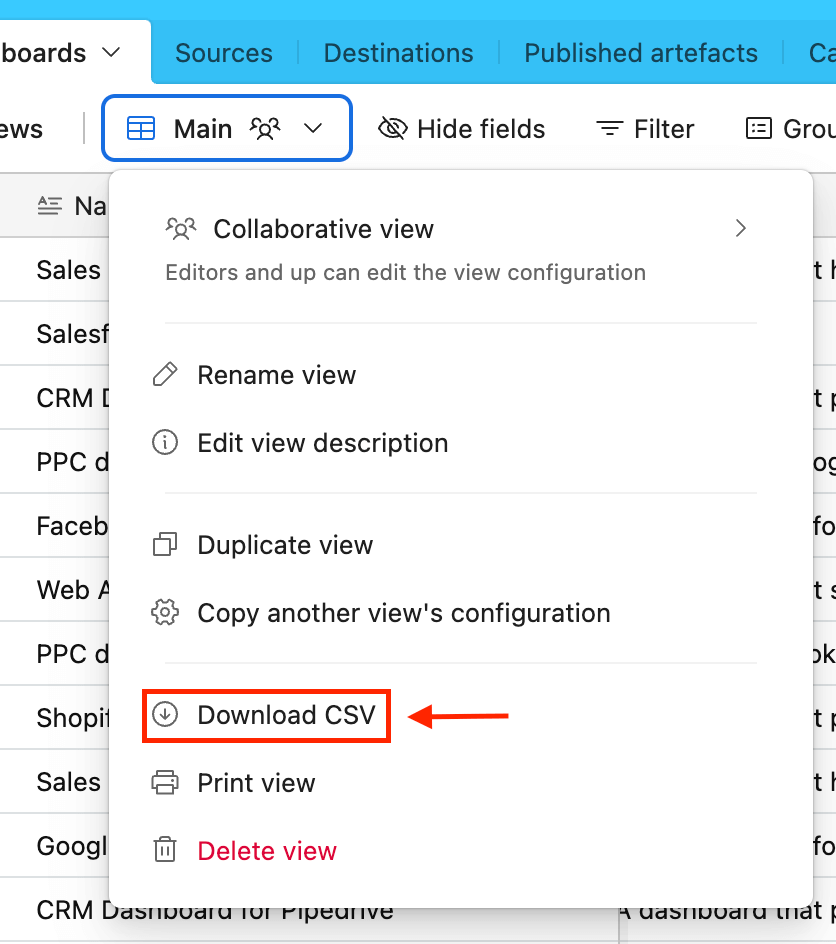
- Sign into your Airtable account.
- Locate the Airtable view you want to visualize in Tableau.
- Click on the Main drop-down menu in the top-right corner.
- Select Download CSV.
Once the CSV file has been downloaded, launch your Tableau Desktop app. In the main menu, select Text file and upload the CSV in question.

That’s it! You can now visualize your data in Tableau. The only catch is that you will have to regularly repeat this process to keep your dashboard up to date. This shouldn’t be a problem if you only need to access the dashboard on a monthly or quarterly basis.
What’s the best way to connect Airtable and Tableau?
The ‘right’ option for your team will depend on criteria like scheduling capabilities, complexity of setup, and the level of data customization you need. Here’s a brief comparison of the different methods based on such factors.
| Factors | Coupler.io | Airtable WDC | Custom WDC | GDrive Connector | CSV Import |
| Ease of setup | Easy, less than 10 minutes | Moderate | Difficult | Easy | Easy |
| Technical knowledge required | Basic, no coding necessary | Moderate, contains some extra steps | High, coding is necessary | Basic | Basic |
| Ability to connect views or bases | Can create multiple importers to connect views, but not export a base in one go | Can connect the entire base in one go | Can be configured to do both, either, etc. | Can connect a base that is synced with GDrive | Can only load one view per import |
| Real-time data sync | No | No | Yes | No | No, requires periodic manual updates |
| Scheduling capabilities | Yes, up to every 15 minutes | No | According to your preference | No | No |
| Data customization options | Ability to append or join tables, sort and filter, etc. | None | Possible, it’s up to your team | None, must be done in Airtable before | None |
| Documentation & support | Knowledge base and email support | No | From your dev team | Knowledge base, Airtable support | Knowledge base, no dedicated support |
My two cents? From a convenience standpoint, tools like Coupler.io are the best option for Airtable ? Tableau connection. But if your datasets are super complex, then it’s better to go with a hard-coded solution.
That said, our team is always up for a challenge! If you’ve got a special case, feel free to reach out to us. Our data experts can discuss potential options (if they do exist) over a short call and provide you with a custom solution.

Connect Airtable and Tableau with Coupler.io
Get started for free