To create a report in Looker Studio, you need to load data. If your data is in a CSV file, you can either upload it manually or connect it, if your file is stored in the cloud. Let’s explore all the options so you can choose which way is best to get data from CSV to Looker Studio.
Methods to import CSV to Looker Studio
When it comes to importing CSV files with Looker Studio, the method to use depends on the type of CSV file you have.
- For cloud-based or online published CSV files, you should use an automated CSV connector.
- For static CSV files that need a one-time upload to Looker Studio, it’s better to use the built-in method.
Let’s now look at these options in detail:
1. Partner connector by Coupler.io
Coupler.io is a reporting automation platform that offers a CSV connector for Looker Studio. It lets you seamlessly integrate CSV files stored on Google Drive, OneDrive, Dropbox, or anywhere else on the internet to Looker Studio. If an API you work with returns data as a CSV file, you can also be fetching its contents at a regular frequency.
Coupler.io allows you to set up automatic data updates eliminating the need for manual uploads and ensuring your data is always up-to-date and consistent. You can also manipulate and clean up your data before visualizing it in Looker Studio. This comes in handy when dealing with multiple CSV files or large datasets that require transformation and preparation before an upload to the visualization tool.
2. Looker Studio’s built-in method
Looker Studio offers a native method to directly upload CSV files stored in your local computer. With a few simple clicks, you can navigate to the desired CSV file, select it, and import it into Looker Studio for analysis and visualization.
Unlike the automated CSV connector, Looker Studio requires manual work to reflect any changes made to the source file. To keep the data up to date, you will have to manually upload the latest version of the CSV file each time you need fresh data. Due to these limitations, Looker Studio’s native CSV to Looker Studio upload is best suited for one-time or occasional analyses rather than continuous or real-time data monitoring.
Check out other Looker Studio connectors that may be useful for you.
How to set up an automated integration to upload CSV to Looker Studio
Uploading CSV files manually to Looker Studio can be a time-consuming task, especially when dealing with frequent updates or multiple data sources. This is where Coupler.io comes in. Here’s how you can connect CSV to Looker Studio with this tool.
Step 1: Collect data
Click Proceed in the form below where we’ve preselected CSV as a data source and Looker Studio as a data destination.
Configure the CSV connection by entering the URL of your CSV file and configuring other parameters if needed.
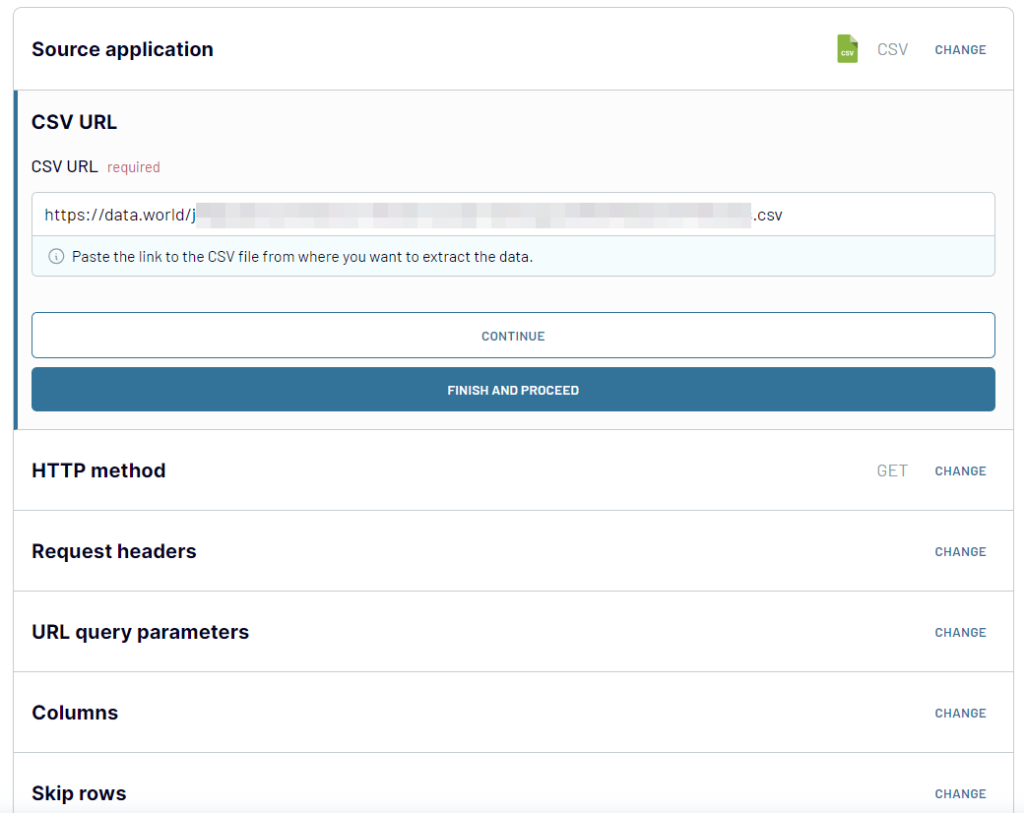
If you need to export data from multiple CSV files or additional data sources, click on Connect one more source and complete the setup. Coupler.io allows you to add as many sources as you need, depending on your specific requirements.
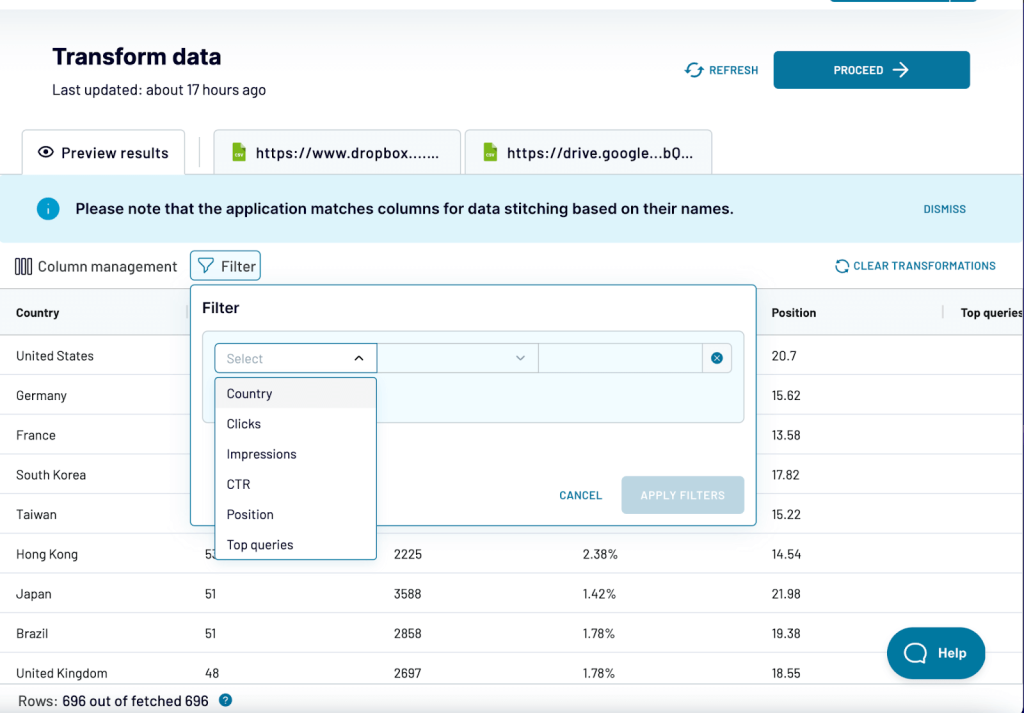
2. Transform data
Coupler.io allows you to modify and manipulate the CSV data before connecting it to Looker Studio. This step is optional but can be beneficial for data blending and preparation.
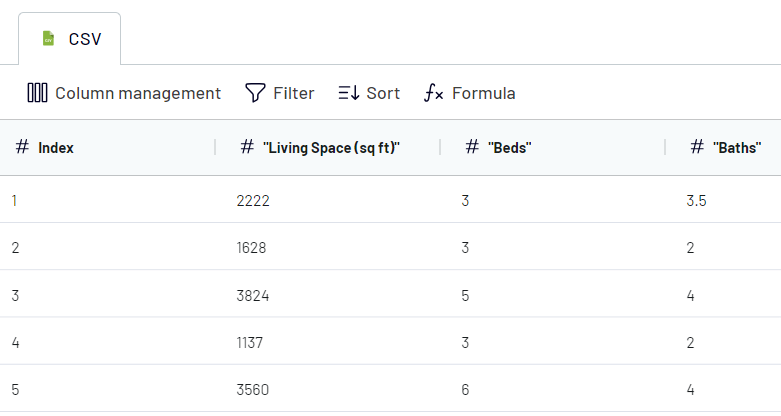
You can view and work with the columns of your CSV data. The column management menu provides various options to manipulate the data: rename columns, rearrange their order, filter data, and so on.
3. Load data and schedule refresh
Follow the app instructions to connect Coupler.io to your Looker Studio account. You’ll need to make a few clicks to create a new data source in Looker Studio with your CSV data.
Note: Authorization is only required the first time you connect Coupler.io to Looker Studio. For subsequent interactions, you can skip this step.
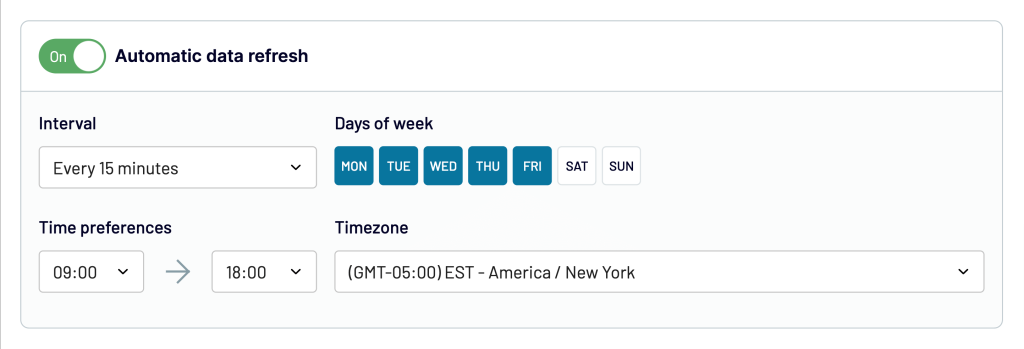
Once you connect CSV to Looker Studio, you can configure automatic updates for your data. This ensures that your data remains up-to-date effortlessly.
You can now start exploring the data from the uploaded CSV file in Looker Studio by creating reports, and dashboards or performing data analysis using Looker Studio features and tools.
Native method to import CSV file to Looker Studio
This method is suitable in cases where you have a standalone CSV file that does not require ongoing updates or integration with other data sources.
To import CSV to Looker Studio:
- Log in to your Looker Studio account
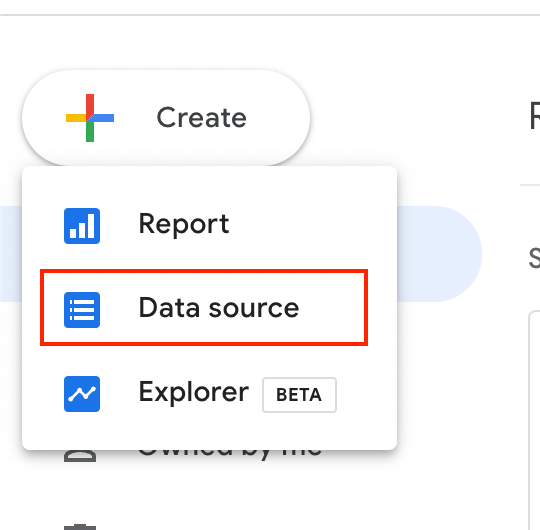
- Click on the Data Sources tab.
- Select file upload. Alternatively, you can search for it.
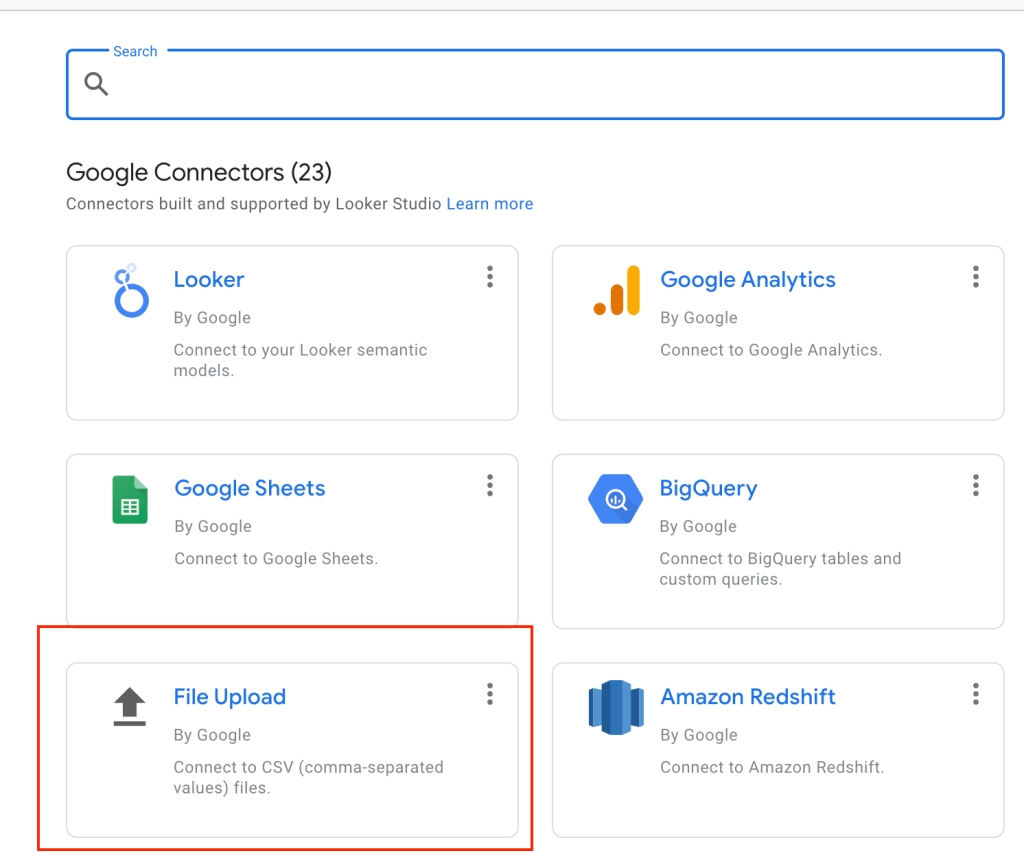
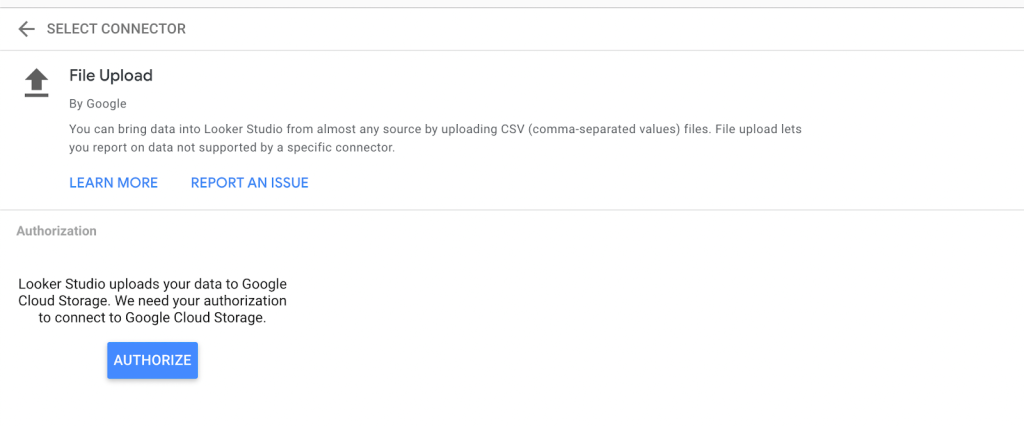
- You need to authorize to connect to Google Cloud storage as Looker Studio uploads your data there.
- Click on the Click to Upload Files button.

- A dialog box or a file browser window will appear, allowing you to select the CSV file from your computer. Browse your computer’s files and select the CSV file you want to upload.7. Once your file is uploaded, you’ll see the status Uploaded. 8. Click on the Connect button at the top right-hand of the page to complete the upload process.
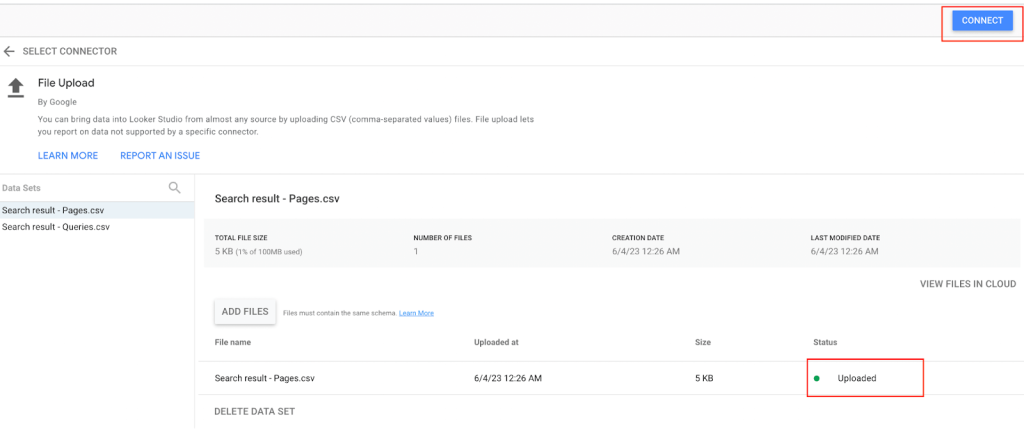
Looker Studio will process the CSV file and make it available for analysis and visualization within the project.
How to load large CSV files into Looker Studio
Managing large datasets in Looker Studio can pose challenges due to limitations such as file size restrictions and storage capacity. For example, you can upload files of up to 100MB each and can’t exceed the overall storage limit of 2GB. To overcome these limitations, you could opt to use data warehouses like Google BigQuery, which offers scalable capacity. However, you would first need to load a CSV file into BigQuery and then connect a table to Looker Studio.
A simpler and faster alternative is to preprocess and transform the data before loading it into Looker Studio without the use of data warehouses or spreadsheets. Coupler.io provides a Transform feature that facilitates the extraction of specific data from CSV files of any size. This eliminates the need to upload the entire file to Looker Studio, saving valuable time and resources.
For instance, if you possess a historical record of all store orders, you could apply filters to fetch only the orders from 2022 onwards or exclude those with a value lower than $10 if it makes sense for your analysis. What’s more, you could remove a number of unnecessary columns, rename them using a chosen convention, and add additional calculable columns to use in Looker Studio straight away.
Not only would this limit the size of an import but it would further boost the performance of Looker Studio thanks to fewer calculations it would need to perform itself. As an added bonus, a dataset limited to just the essential elements would be more convenient to work with.
By adopting this approach, you not only save time and resources but also unlock the potential to derive meaningful insights from your data and create comprehensive dashboards and reports.
Which is the best way to use connect CSV to Looker Studio?
Arguably, the most convenient way to upload CSV to Looker Studio is to use partner connectors by Coupler.io. This approach offers seamless extraction and transformation of your data, ensuring a smooth transfer into Looker Studio. By eliminating the need for manual data handling, Coupler.io simplifies the overall workflow and saves you valuable time and effort. Try it yourself for free right away!
Connect your data sources to Looker Studio with Coupler.io
Get started for free