This article will be useful for professionals who need to transfer data between these two apps. We will explore several methods for setting up data flows in both directions:
- from Excel to Tableau
- from Tableau to Excel
Case 1: Transfer data from Excel to Tableau
Integrate the two apps with Coupler.io
To link these apps, you will need a connector that can load data from Excel to Tableau automatically. You can use a connector offered by Coupler.io. This reporting automation platform can collect your data across 60+ business apps, including various marketing data sources, financial apps, CRMs, ecommerce platforms, and more. The collected data can be transformed and sent to various destinations. In particular, Coupler.io can load data from Excel to Tableau on a schedule, ensuring that your report stays up to date.
This platform allows you to connect Excel to Tableau in three steps.
1. Extract Excel data
Press Proceed in the widget below to start transferring data.
Sign up for Coupler.io to use the platform – it’s free, and no credit card is required.
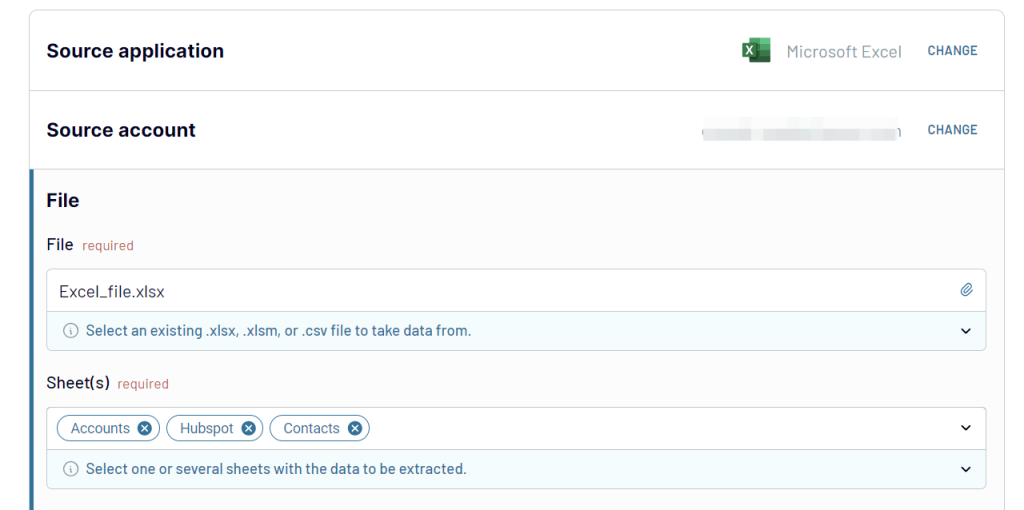
Then, connect your Microsoft account (if you signed up using this account, it should already be connected). Select the Excel file and sheet to extract data from.
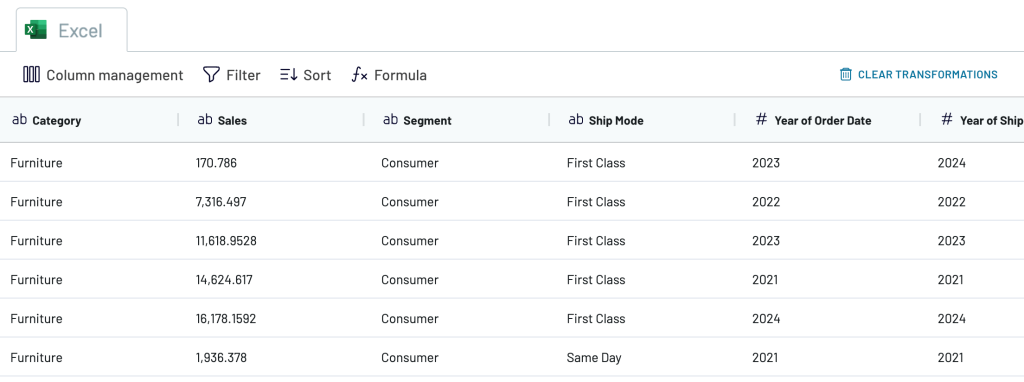
2. Preview and transform data
Coupler.io has ETL functionality that allows you to perform various data transformations before your dataset is loaded to Tableau:
- Hide the columns you don’t need
- Rename and rearrange columns
- Use formulas and perform calculations
- Sort and filter data
- Blend data from multiple workbooks or apps in a single dataset
All data transformations you make will be preserved during the automatic updates – your filters and settings won’t be lost.
3. Schedule updates and load data
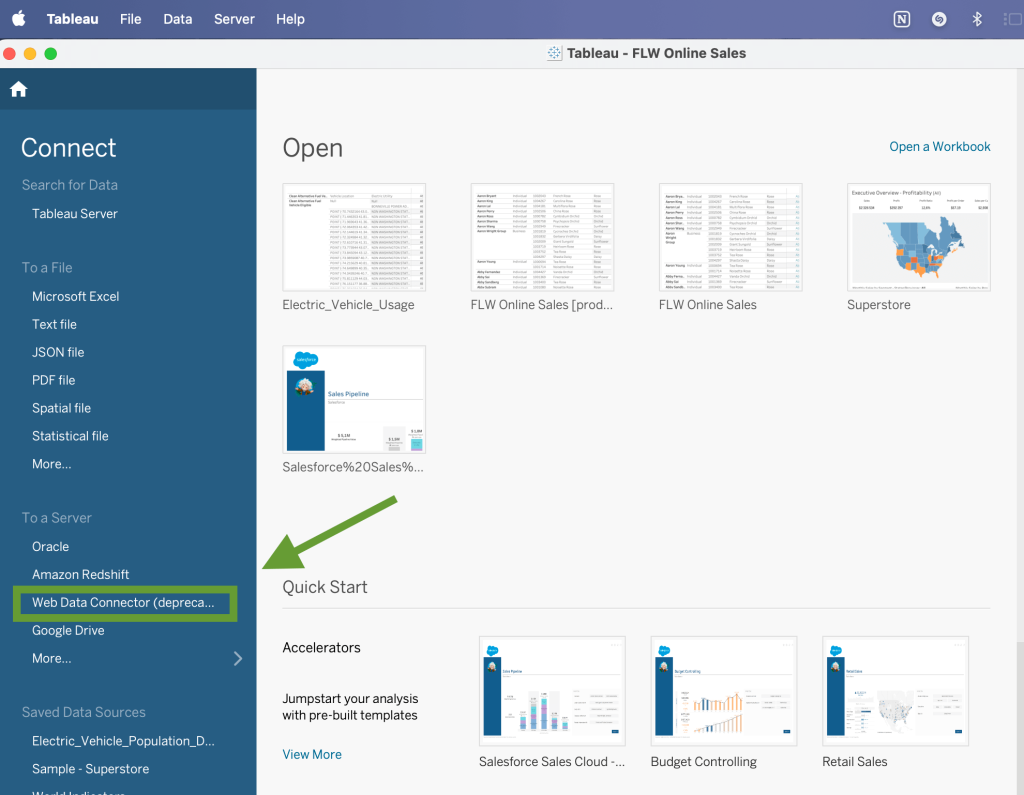
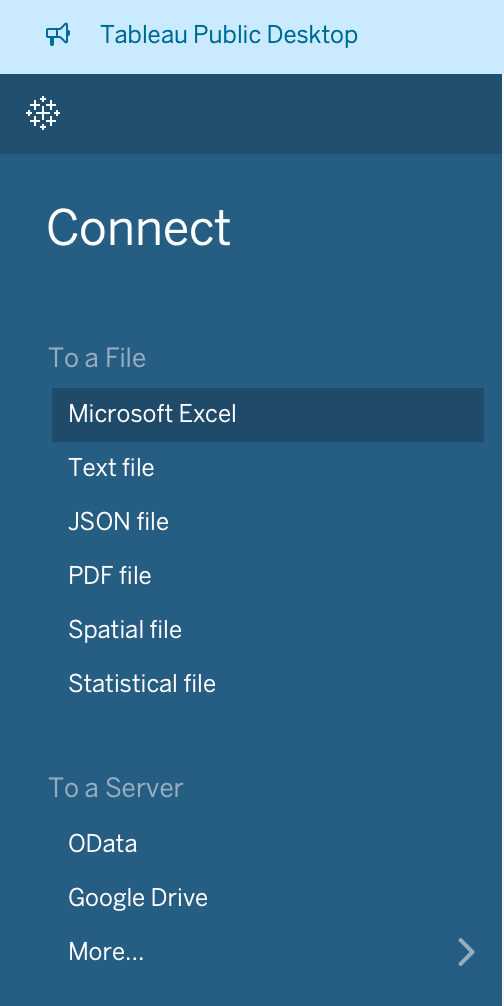
Go to Tableau Desktop. In the Connect pane, find To a Server -> Web data connector.
If you are using Tableau Desktop Public Edition, then the steps are slightly different: To a Server -> More -> Web data connector.
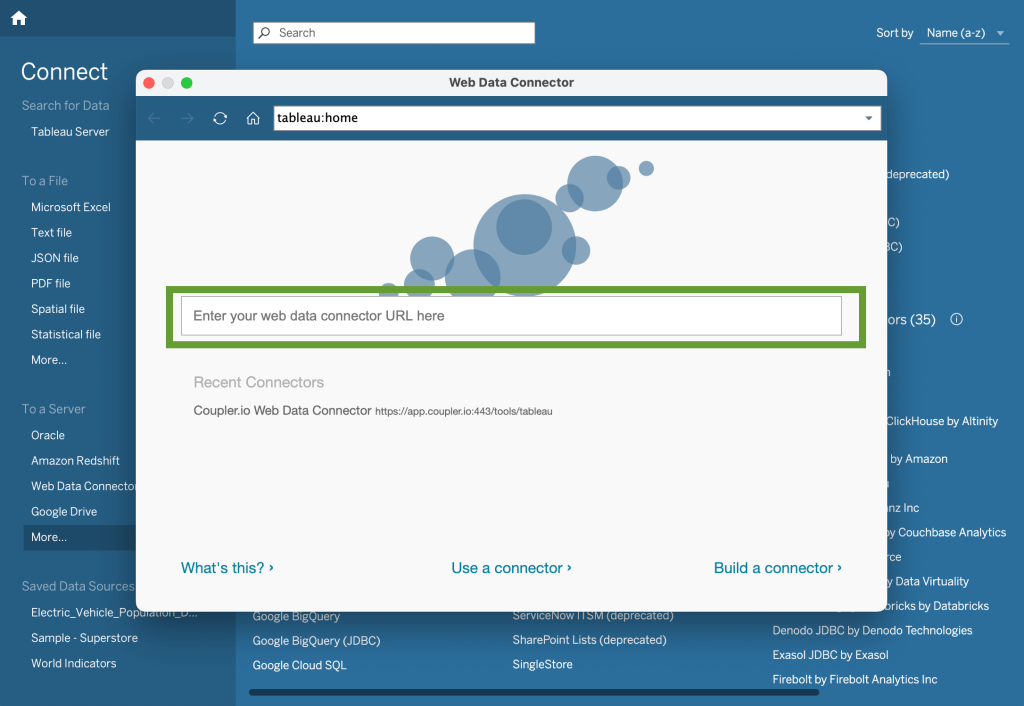
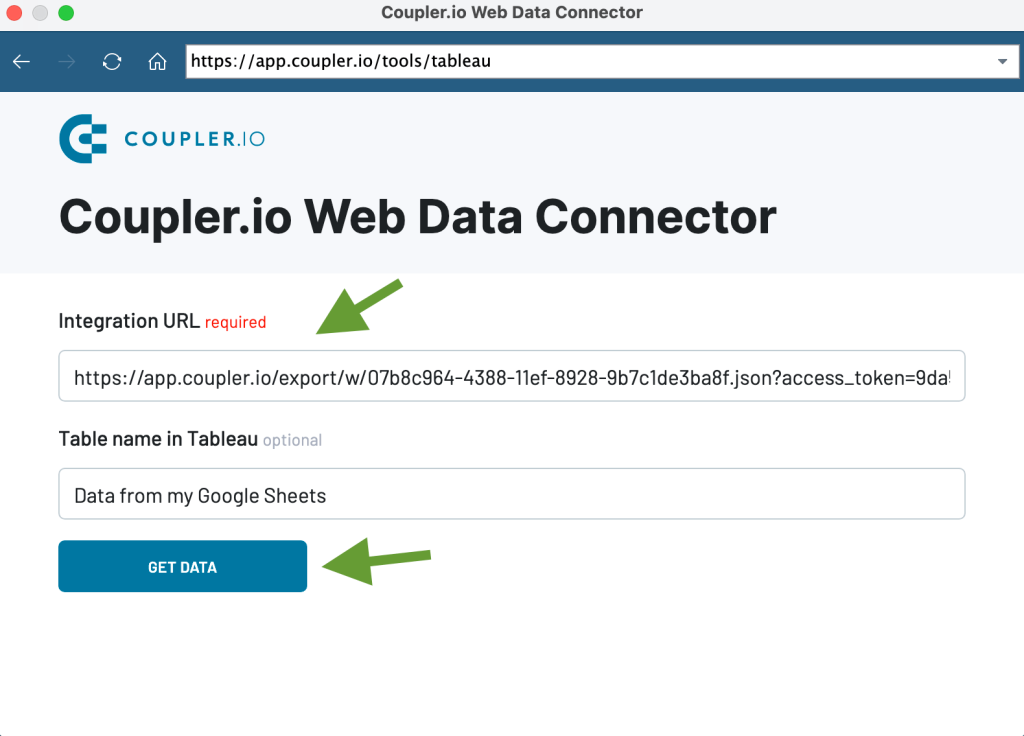
In the new pop-up window, insert this link into the data connector URL field and press Enter:
https://app.coupler.io/tools/tableau
Now, return to the Coupler.io interface and click the Generate button in the Connector setup instructions. Copy the generated integration URL and save it – you will need to use it later.

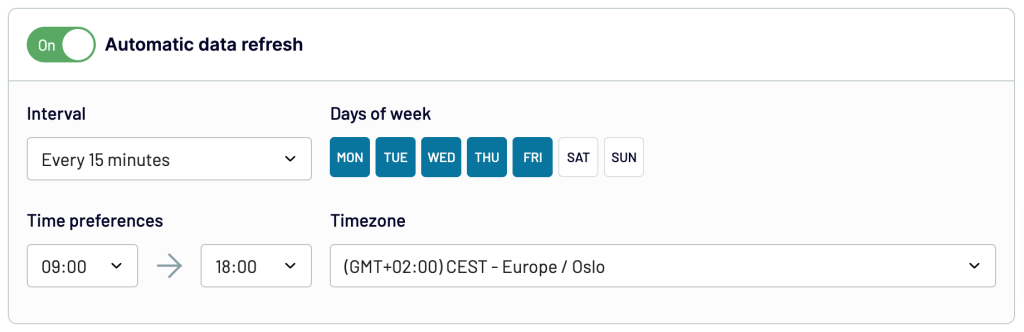
Then, specify your preferences for automatic updates. Select the update interval (up to every 15 minutes) and choose other parameters. Coupler.io will follow this schedule to regularly fetch fresh data from Excel to Tableau.
After this, Save and run the importer.
Come back to Tableau Desktop and paste the integration URL you saved earlier into the corresponding field. Then, click the Get data button. It may take some time for Tableau to execute your request.
Your Coupler.io importer that channels data from Excel will be connected as a data source.
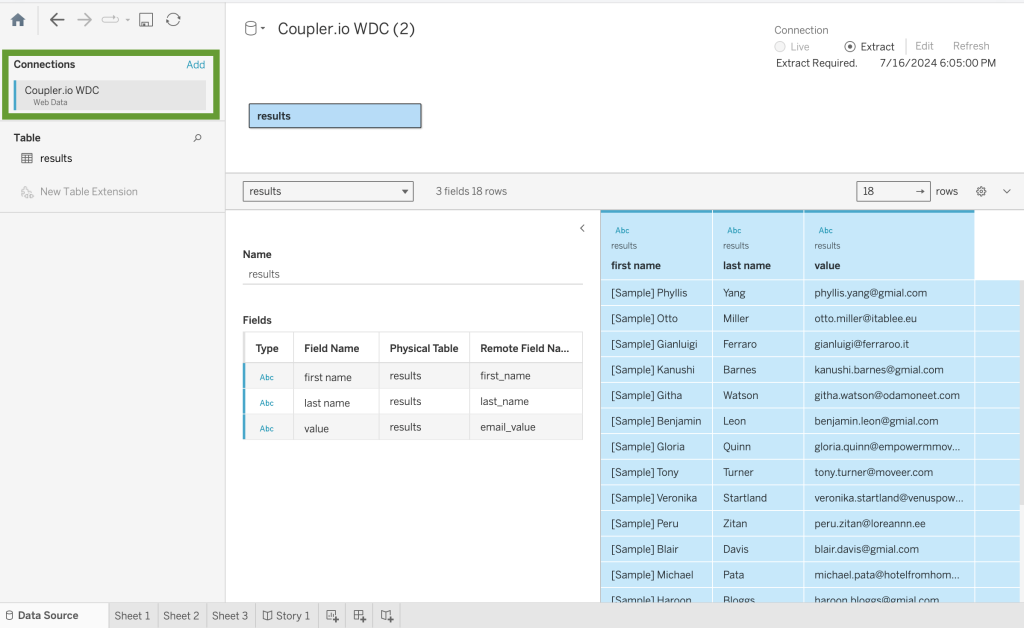
Now you can drag the imported information to a data pane and start working with it – add visualizations, write SQL queries, and so on.
Advantages of using Coupler.io to link Excel to Tableau
- Data transformations on the go before sending your dataset to Tableau
- Combining data from several spreadsheets or applications
- Connecting 60+ business apps to Tableau
- Automatic data refresh on a schedule
- Intuitive interface that is easy to use
- Free dashboard templates to create reports in minutes
Coupler.io allows you to manage multiple data flows from one place: you can connect dozens of business apps to Tableau even if you don’t have a paid Tableau license.
Connect Excel to Tableau with native functionality
Tableau offers a native connector that lets you link Excel to Tableau. We’ll cover two cases: for Excel Online files and Excel workbooks stored on your desktop.
- For an Excel Workbook stored on your computer
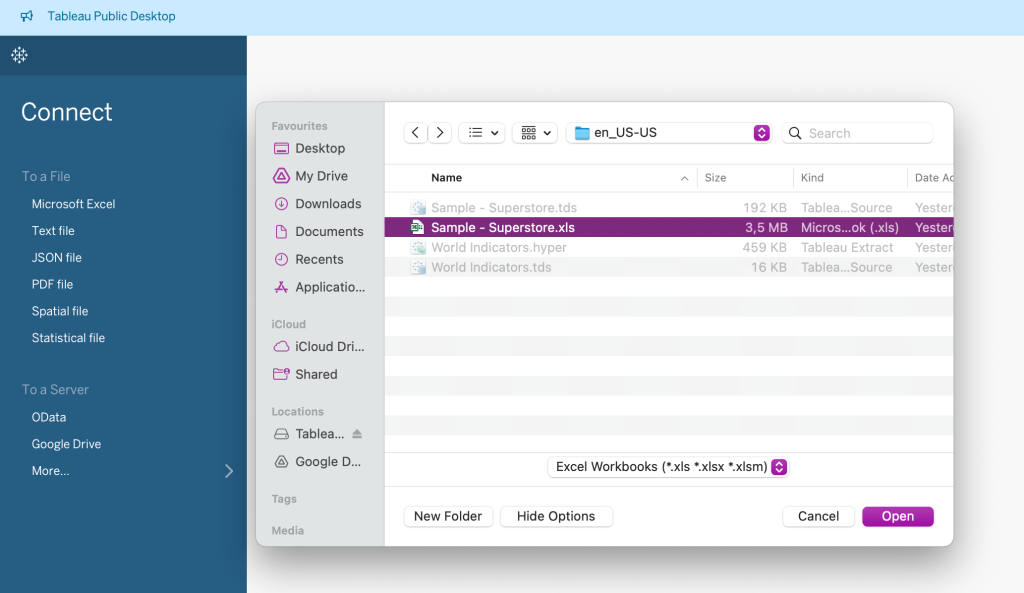
Open Tableau Desktop or Tableau Desktop Public Edition. In the Connect section, find To a file -> Microsoft Excel.
A pop-up window with the file picker will open. Browse locations on your computer and select the file you want to extract data from. Click Open.
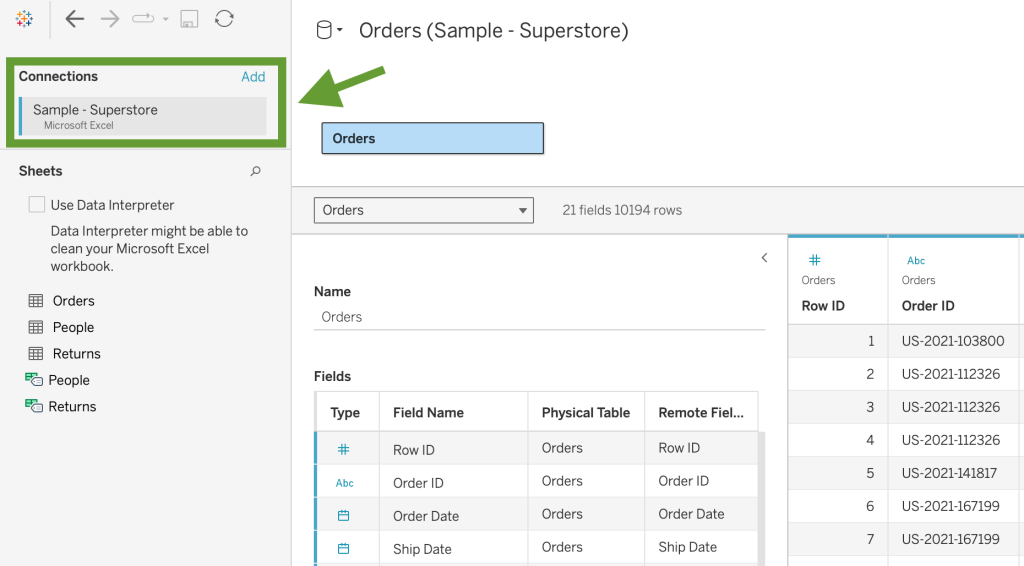
Your file will be added to the Connections pane as a new data source. If you want to link other workbooks, click Add -> Microsoft Excel.
- For an Excel Online workbook
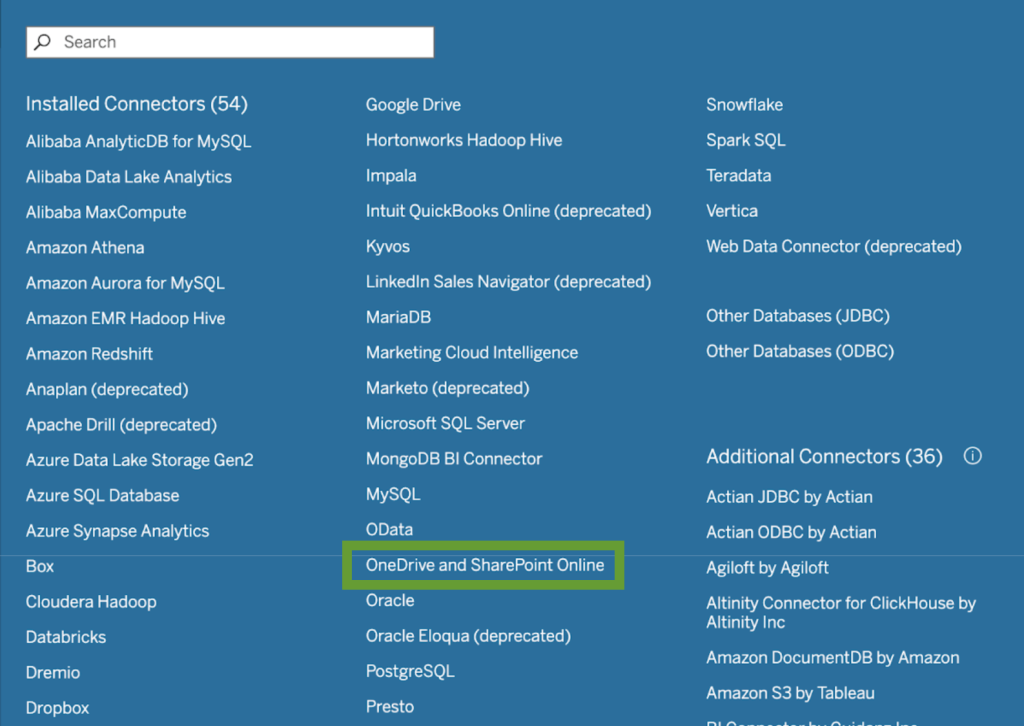
Tableau Desktop users with a paid license can connect to an Excel Online workbook with the help of the OneDrive and SharePoint Online connector.
Navigate to Connect -> To a server -> More and select the OneDrive connector from the list.
You will be redirected to your browser for authentication. Log in to your Microsoft account and grant Tableau the requested permissions.
Then, return to Tableau Desktop and choose the Excel workbook you need in the file selection pop-up.
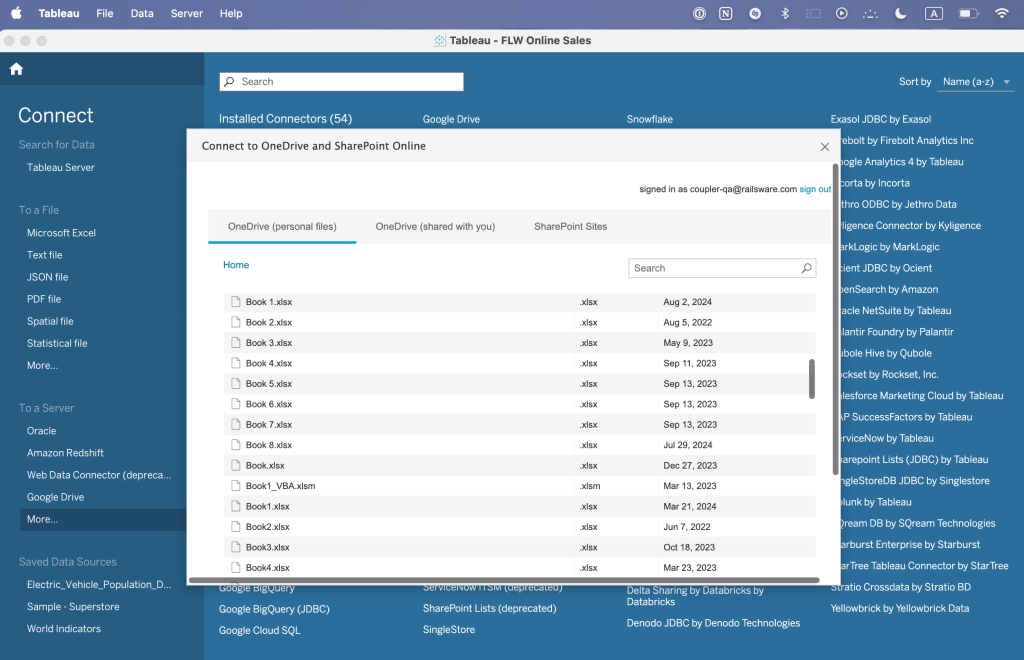
Wait for Tableau to execute your request. The selected spreadsheet will be added as a new Tableau data source.
Users of Tableau Desktop Public Edition don’t have access to this connector. They can download their Excel Online workbook and then use the native Microsoft Excel connector. Alternatively, you can use Coupler.io, which can load data from Excel Online to Tableau on a schedule regardless of whether you have a paid Tableau license.
Case 2: Load data from Tableau to Excel
There is no native functionality that would allow you to automatically transfer data in this direction. Your options are to export-import data manually or to use Coupler.io to automate the connection. For the latter option, you can use a browser version of Coupler.io or install an add-in to manage your data sources directly from an Excel spreadsheet.
Let’s now take a closer look at these options.
Connect the two apps automatically with Coupler.io
Start transferring data by clicking Proceed in the form below.
- You will be asked to sign up for Coupler.io in order to use the platform. It’s free, and no credit card is required.
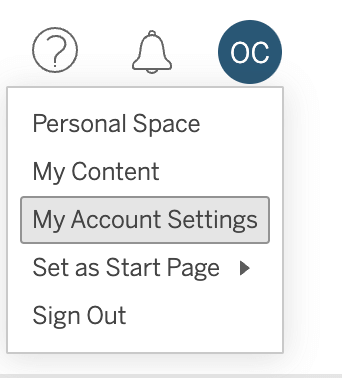
- After this, provide your token name and token secret to grant access to your Tableau reports. To get an access token, sign in to your Tableau Cloud account, click your profile picture in the upper right corner, and select My Account Settings.
- Scroll down and find the Personal Access Token section. Type in the token name and press Create. If the Create token button is inactive, navigate to general Settings and tick Enable personal access tokens. Then save the changes.
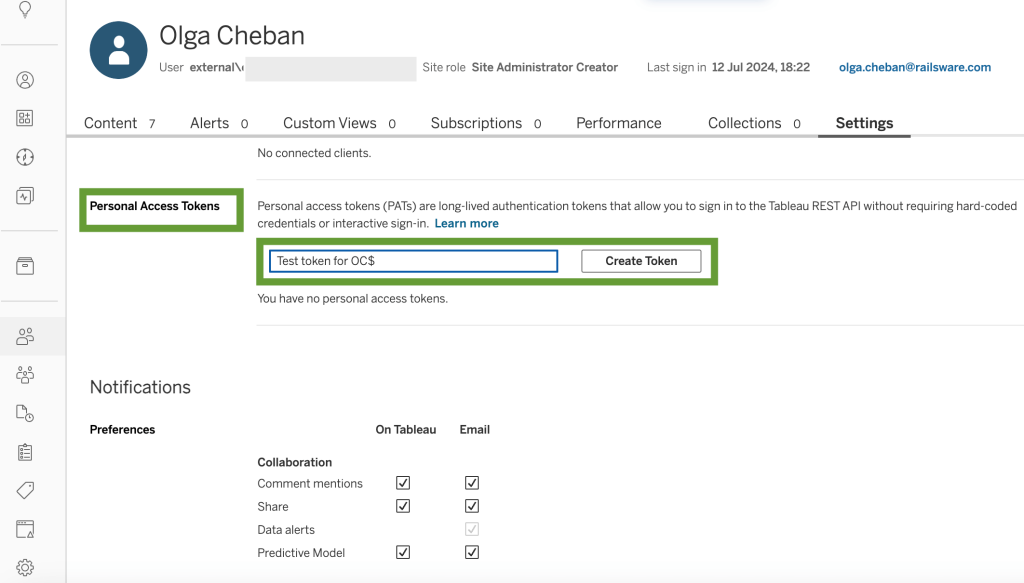
- Copy the token secret and save it. Be careful, it will only be shown once.
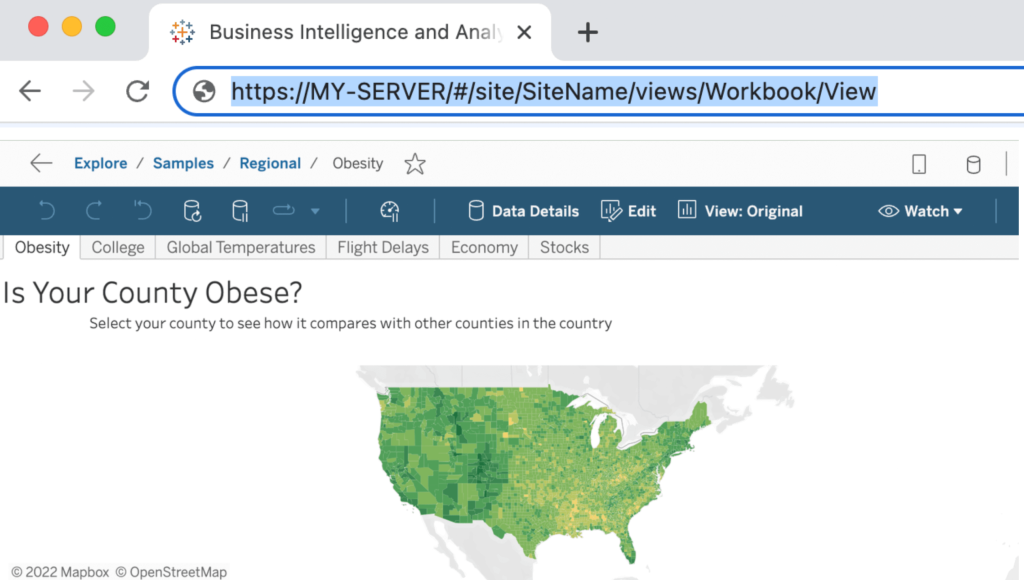
- Open the Tableau view you want to export and copy the link as shown in the example below. Then, insert it into the corresponding field in the Coupler.io interface. If your dataset is in Tableau Desktop, you will need to publish it in Tableau Public (Online) first.
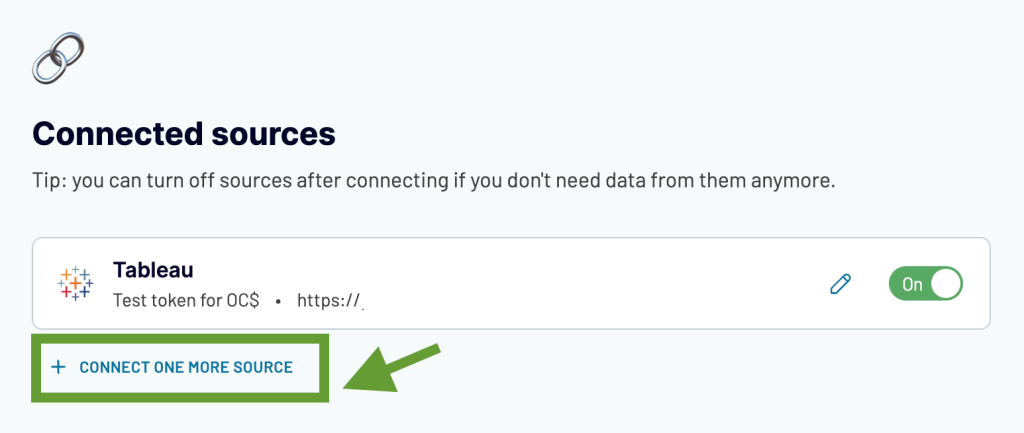
- In order to export data from multiple views, create a separate importer for each of them. Alternatively, you can include several views as additional data sources in the same importer. This will allow you to blend data from these views into a single dataset.
As a next step, preview your data and perform any necessary transformations. After this, specify the Excel workbook and the sheet where to send the extracted data. Toggle on automated data refresh and set up a schedule for the updates.
Once this is done, save and run the importer. Coupler.io will export data from your Tableau view/views and load it to Excel according to your schedule. But please note that not all data types can be imported: if the exported view contains images, they won’t be transferred to the spreadsheet.
Send data to Excel with a Coupler.io add-in
The add-in works in pretty much the same way as Coupler.io’s browser version. The difference is that add-in allows you to manage data connections directly from the spreadsheet, which is quite handy when you export multiple views or need to load data from several apps.
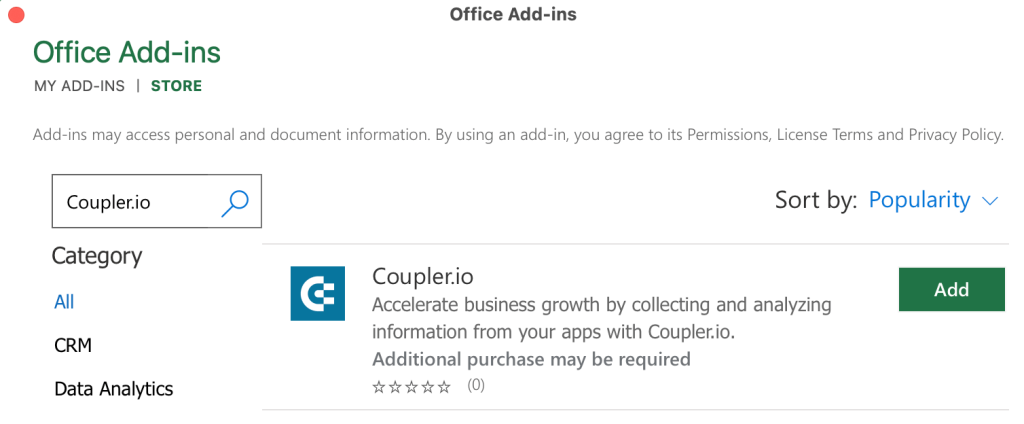
Open Excel and navigate to Insert -> Add-ins -> Store. Type “Coupler.io” into the search bar, find Coupler.io on the list, and press Add.
Once you installed the add-in, log in to your Coupler.io account or create a new one.
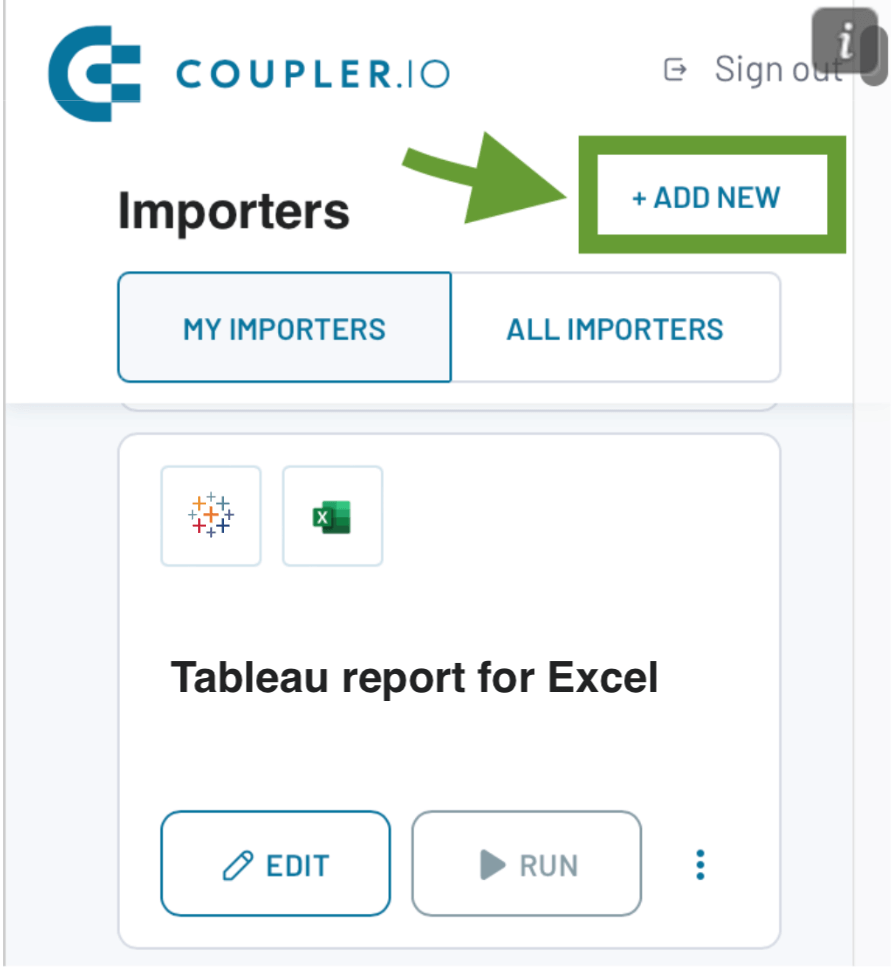
Then, click +Add new and add your first importer. For more details, use the instructions we provided in the section above for the browser version – the steps for creating a new Importer are the same.
When added, your importers will appear in the add-in pane. You can easily add new connections, import data from 60+ business apps, adjust your schedule, and more – all this without leaving your report page in spreadsheets.
Import Tableau data into Excel manually
If you don’t need automatic updates, then, loading data to Excel manually can also be an option. However, if you need to work with fresh data regularly, manual updates can get cumbersome, so it’s better to connect Excel to Tableau automatically in such a case.
Let’s see how to download data from Tableau and upload it to Excel manually.
- Exporting data from Tableau Desktop
Go to the view with the data you need to extract. Select Worksheet -> Export -> Crosstab to Excel. In the new window, type in the name of your export file and select where to save it.
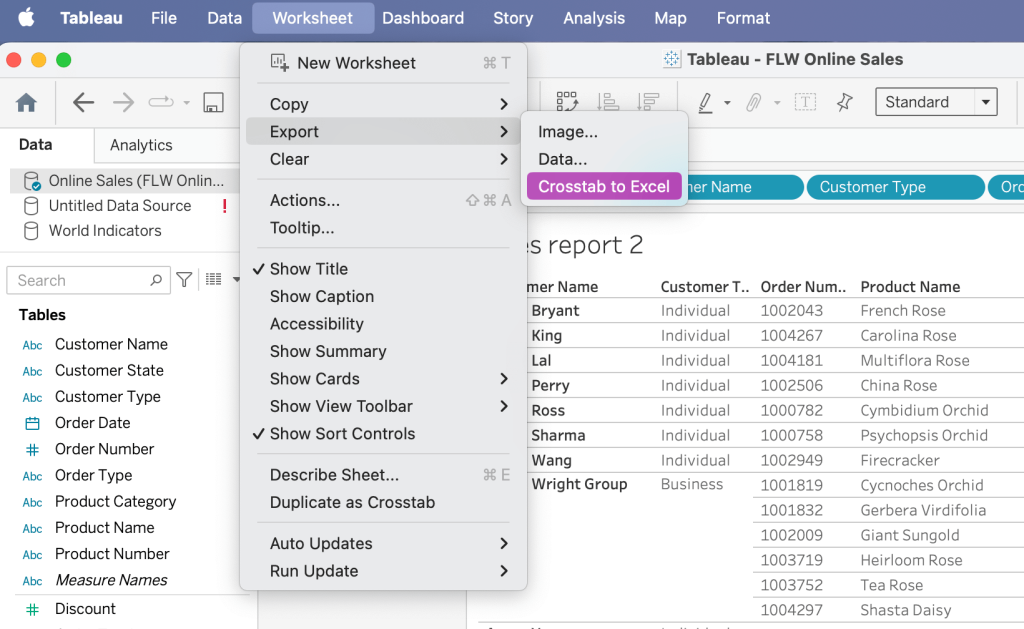
Your data will be downloaded automatically as an .xlsx file. Open it in Excel to start working with your data in spreadsheets.
- Extract data from Tableau Online
Open the view with the data you need, press the download icon, and select Crosstab.
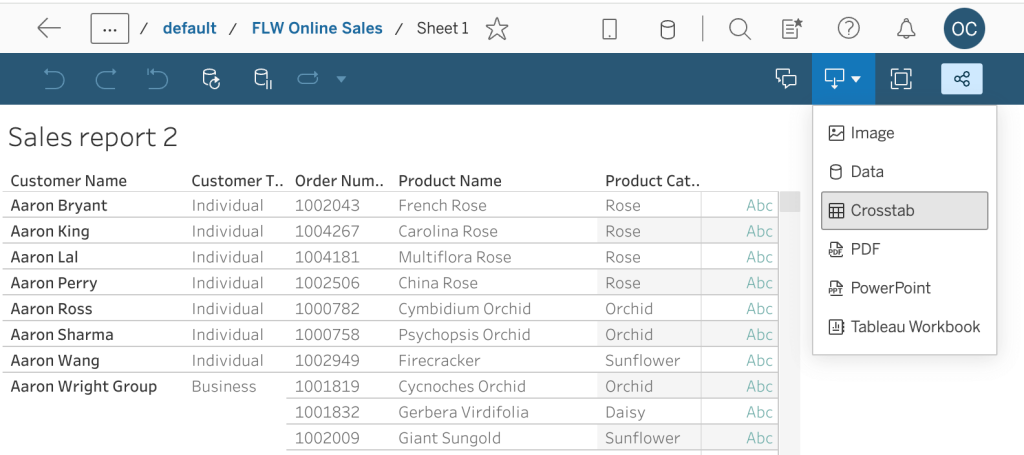
Next, pick a format: you don’t need a CSV file in this case as you can select Excel. Download the exported file and simply open it with Excel.
Bonus: free dashboard templates for Tableau
Once your data is imported into Tableau, you can start creating rich data visualizations. However, you don’t have to start from scratch. Many professionals use Tableau templates to save time on creating reports and optimize resources. Even if a template isn’t a perfect fit for your needs, you can always adjust it using Tableau’s native features.
The Coupler.io team developed free customizable templates for Tableau users. These templates are connected to pre-set importers and allow you to build live self-updating dashboards in minutes.
Web Analytics dashboard template
For any business, a website can be an extremely powerful instrument for engaging customers and driving sales. But to make the most of it, it’s necessary to monitor website performance and analyze your data. With this dashboard, you can see what your main traffic sources are, explore customer acquisition trends, and drill down into the key metrics by channel and campaign.
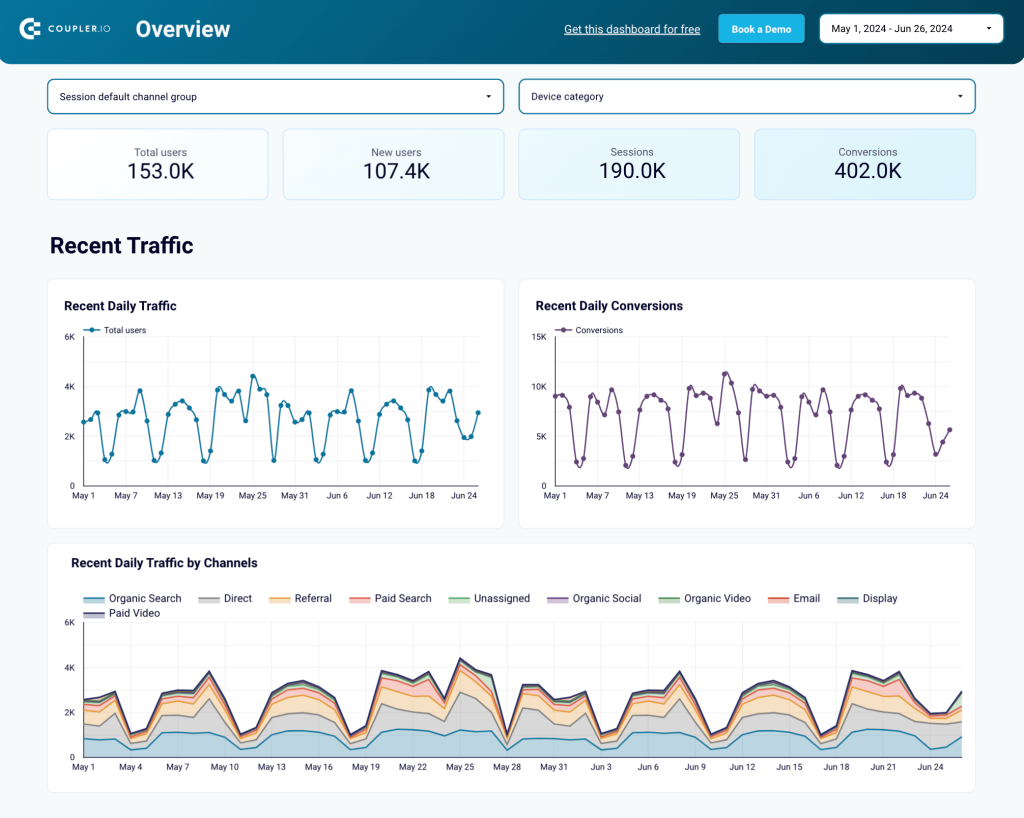
The dashboard has a separate tab for user behavior overview and conversion funnel. This helps you better understand your audience and provides important insights into how website visitors turn into customers. You can use filters to select different events for the conversion funnel stages, which lets you explore data from various points of view and analyze it in-depth.
To begin using this template, you will only need to plug in your Google Analytics 4 account. A copy of this dashboard with your data will be ready in less than 3 minutes. After that, you can customize the result – add more graphs, change colors, insert your logo, and more. Open this template and see the Setup guide tab for details.
PPC multi-channel dashboard template
Pay-per-click advertising is an important part of the marketing strategy for many businesses, and it often involves working with several ad platforms. This dashboard is a valuable analytics instrument. It collects data from 8 different PPC apps and aggregates it into one report. Thanks to this automation, you don’t have to open each ad app separately and copy and paste data manually to create a cross-channel report.

The template connects to Facebook Ads, LinkedIn Ads, Google Ads, Microsoft (Bing) Ads, TikTok Ads, Quora Ads, Twitter Ads, and Instagram Ads. You can link all these platforms to your dashboard or select just a few, depending on your needs. The dashboard displays the main KPIs in near real-time and allows you to see which ad platforms give you the best value for money.
For instance, you can analyze how a campaign performs across several platforms and allocate a bigger portion of your ad budget to the top-performing combinations. To start using this template, check its Setup guide for instructions.
For more templates, see our article on the best Tableau dashboard examples.
Import Excel to Tableau on a schedule for an ongoing analysis
In this article, we’ve explored various options for connecting Tableau to Excel.
You can do this by using a native connector. This method is quite straightforward and is available to Tableau users even without a paid license. However, this option doesn’t allow you to transfer data in the opposite direction, from Tableau to Excel. For this, you can use Coupler.io. This platform allows you to import Excel to Tableau on a schedule. In addition, it offers ETL functionality to transform data before loading and blending information from several sources into one dataset.
It’s a good option, especially if you need to transfer data from multiple applications to Tableau. Coupler.io supports 60+ popular business apps. In addition to Tableau, the platform can load your data to other business intelligence platforms, such as PowerBI and Looker Studio.
And of course, users with strong technical expertise can develop their own solution to connect the two apps via the API. We didn’t cover this method in our guide as it would require a separate extensive tutorial.
Automate reporting with Coupler.io
Get started for free