
Redshift is a cloud data warehouse within Amazon Web Services. It enables you to store, query, and analyze petabytes of data at a time. For example, it’s possible to load data from Google Search Console to Redshift to report on Search results and Google News performance or Indexing. By doing so, you can make the most of your SEO analytics. This is achieved through automated, API-based, and manual methods. Let’s now explore each of them in more detail.
How do you connect Google Search Console to Redshift?
Although you can’t natively connect Google Search Console to Redshift, solutions are available for that. As an option, you can alternatively import your GSC data into Redshift without connecting these platforms. But if you want to link them, then it’s possible with the GSC API or a partner connector, for example, Coupler.io.
Here’s what these approaches involve:
- Partner connector: Coupler.io allows for automated data imports from GSC to Redshift. It also enables you to set up schedules for data refreshes. This is how you get your analytics constantly updated according to the latest changes to the source.
- API: Another way to link Google Search Console with Redshift is through the GSC API. This method requires basic coding skills for custom scripting, and you’ll need to monitor the code as well as adjust it to API updates. It works well for professionals with a specialized background or access to BI or data analytics teams.
- Manually: First, you export your data from GSC as a .csv file. Second, you load that file into Redshift for further analysis and visualization. This is a time-consuming option suitable for infrequent reporting only.
If you’re going to run frequent data imports without having any technical expertise, consider using a partner connector. Let’s have a look at this method in action to see how it can help.
Automated Google Search Console to Redshift integration
With Coupler.io’s Google Search Console to Redshift integration, you can save time and prevent human errors. It only takes three simple steps:
1. Collect your data
To begin with, click Proceed in the form below to create an automated GSC importer:

Once you sign up to Coupler.io for free, authorize your GSC account and select the Sites and Report type, which refers to the particular data you’ll export. We’ve preselected Search results performance, but you have other options to choose from:
- Search results performance by appearance
- Discover performance
- Google News performance
- URLs index performance

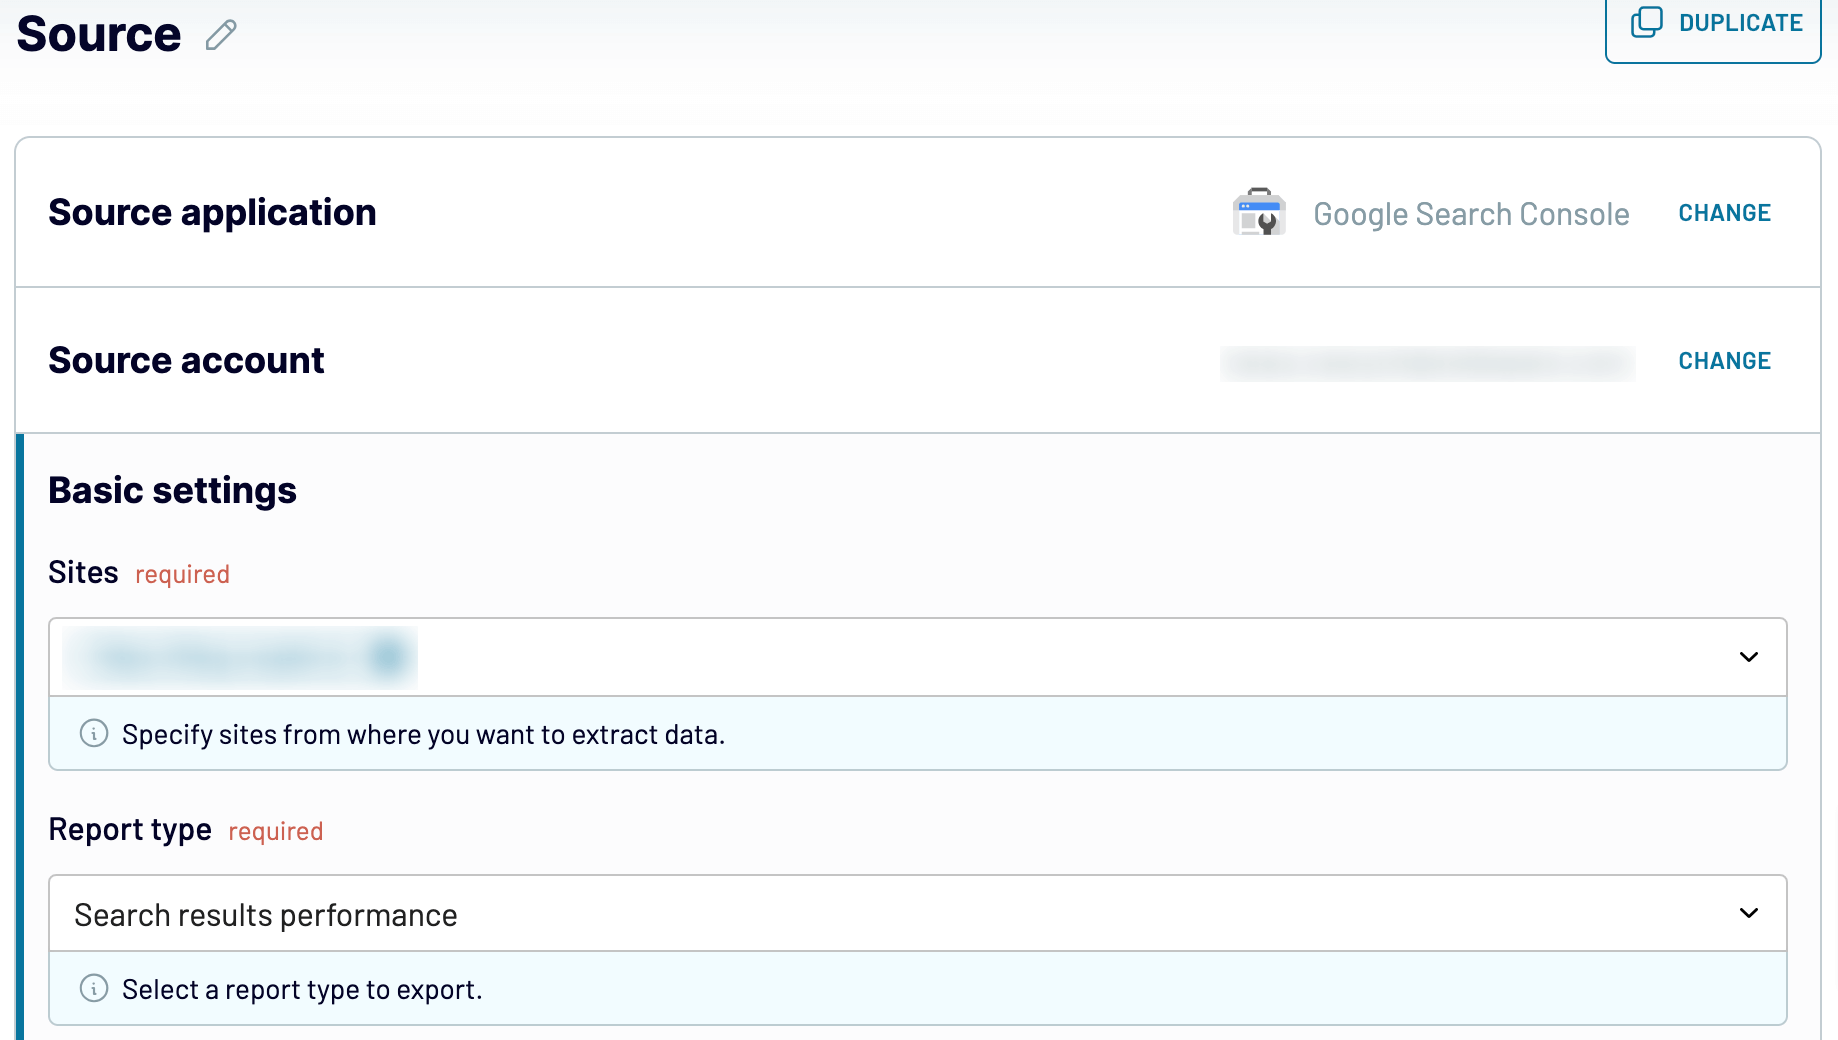
?lick Continue to select your Report period. After that, click Finish and proceed. Press Transform data to move next.
2. Organize and transform data
Now you can preview your data and perform diverse transformations:
- Hide unnecessary columns or add new ones
- Rename, split, merge, and rearrange columns
- Apply various filters and sort your data
- Create calculable columns with custom formulas
- Combine data from several accounts or apps

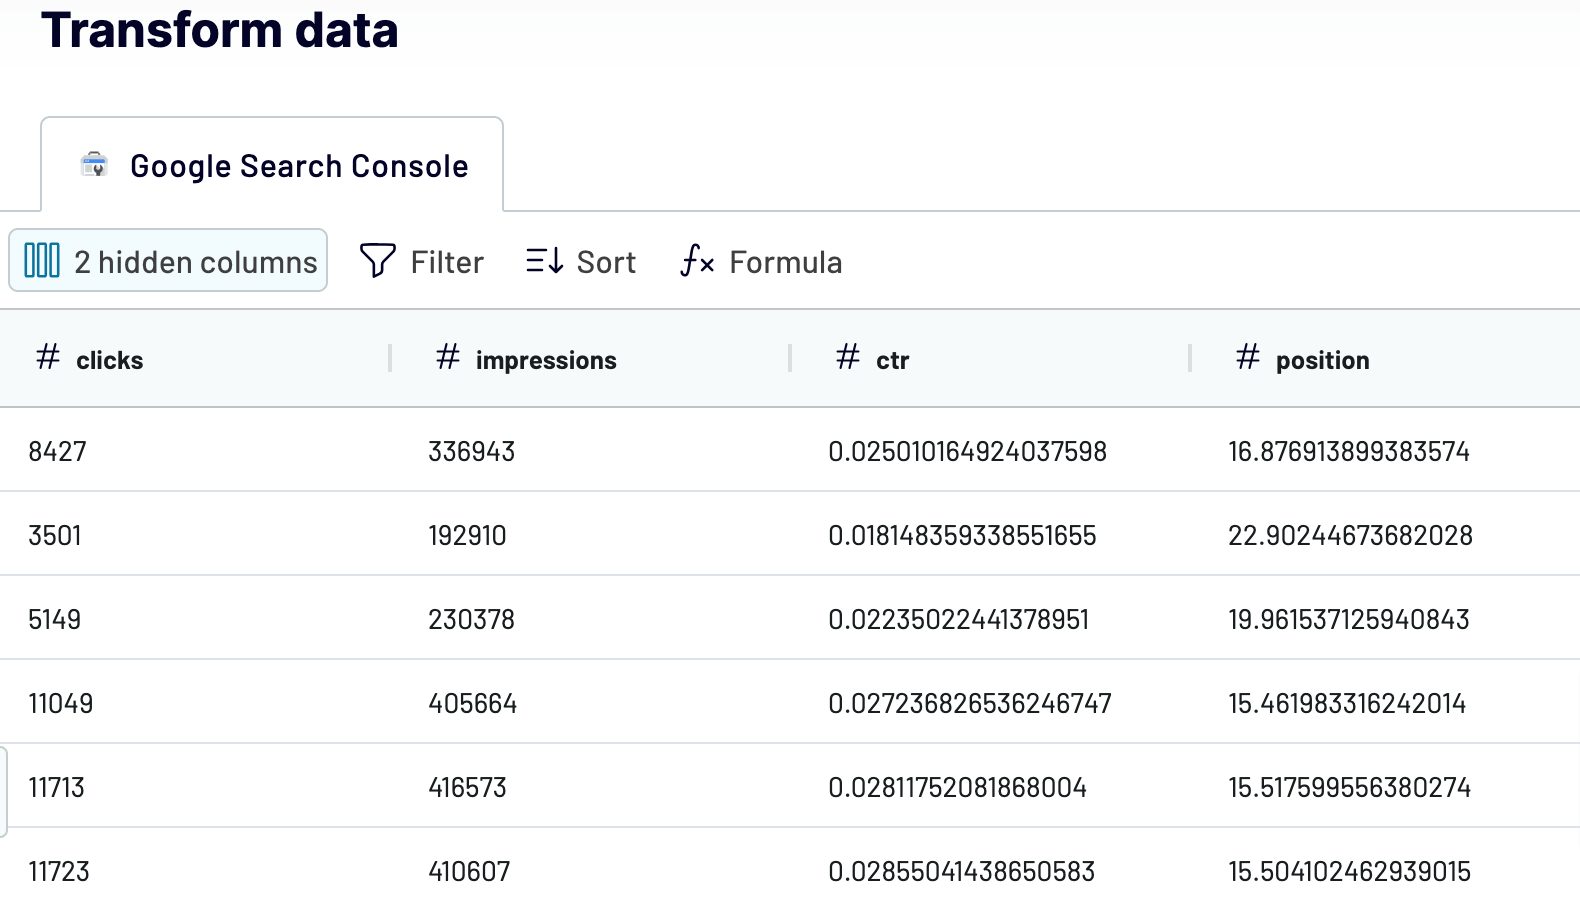
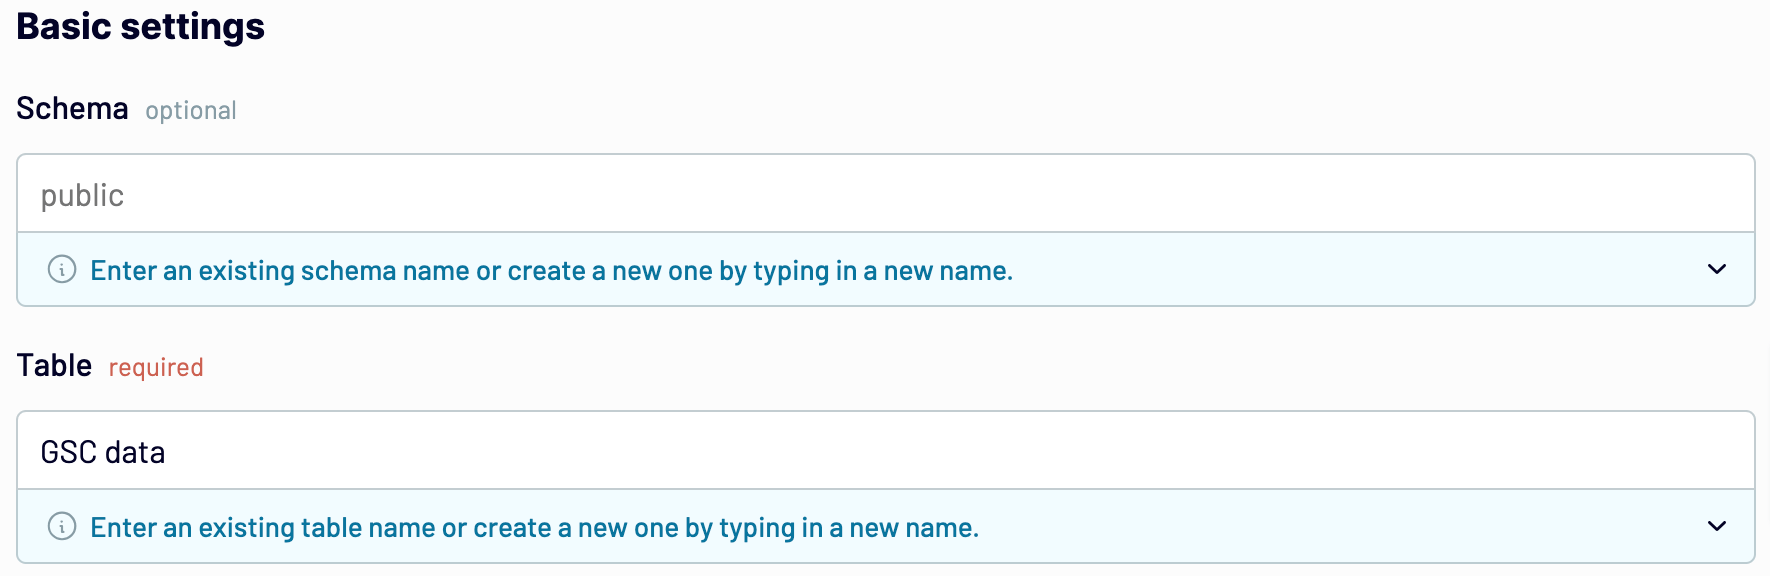
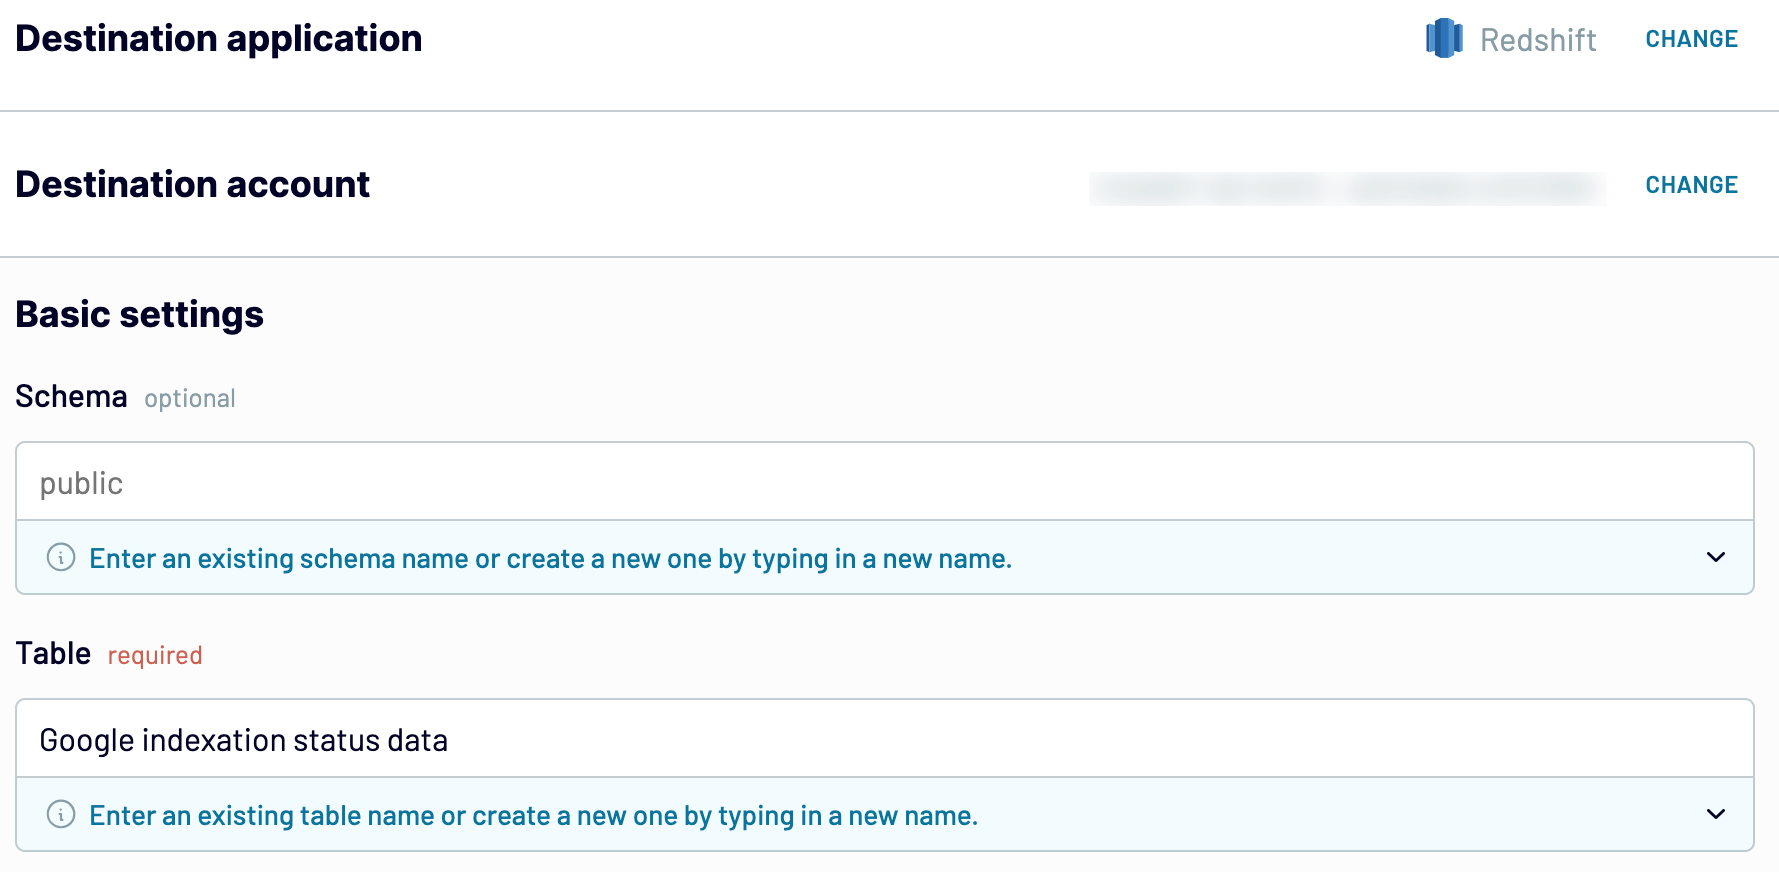
Once you make sure the data is accurate, click Proceed. Next, authorize your Redshift account by specifying the Host, Port, Database, User, and Password. Click Continue and enter the existing Table name or create a new one by typing in a name. Lastly, press Setup a schedule.

3. Schedule updates
Toggle on the Automatic data refresh to schedule your data exports. You can select an interval from monthly to daily or even every 15 minutes if you wish to make your report near real-time.

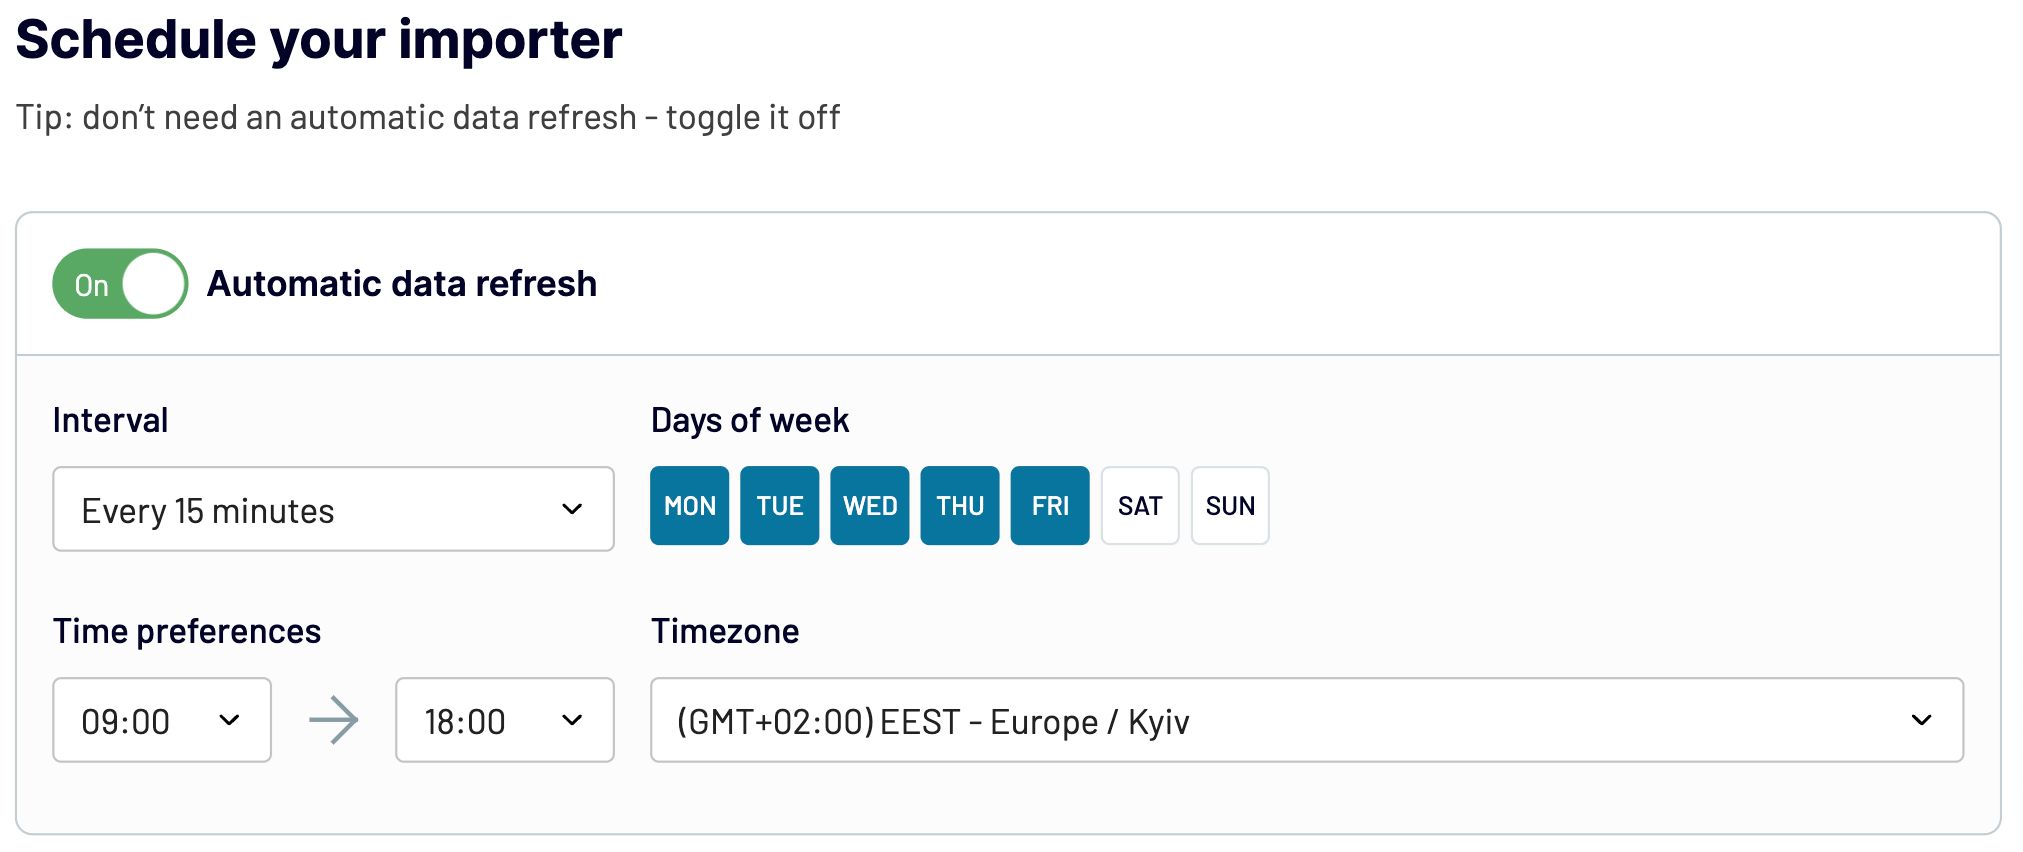
Click Run importer to get your data to the destination.
Great news – you’ve learned to automatically load GSC data into Redshift. Now it’s time to see a real-life example of querying data before importing.
Google Search Console data example
One thing you can do by exporting and querying data with Coupler.io is check the Google indexation status for your website.
Here’s a breakdown of this process:
- Create a GSC importer and authorize your Google Search Console account.
- Select the Sites and choose URLs index performance as the report type.
- Enter a list of the necessary URLs into the Inspection URLs field.

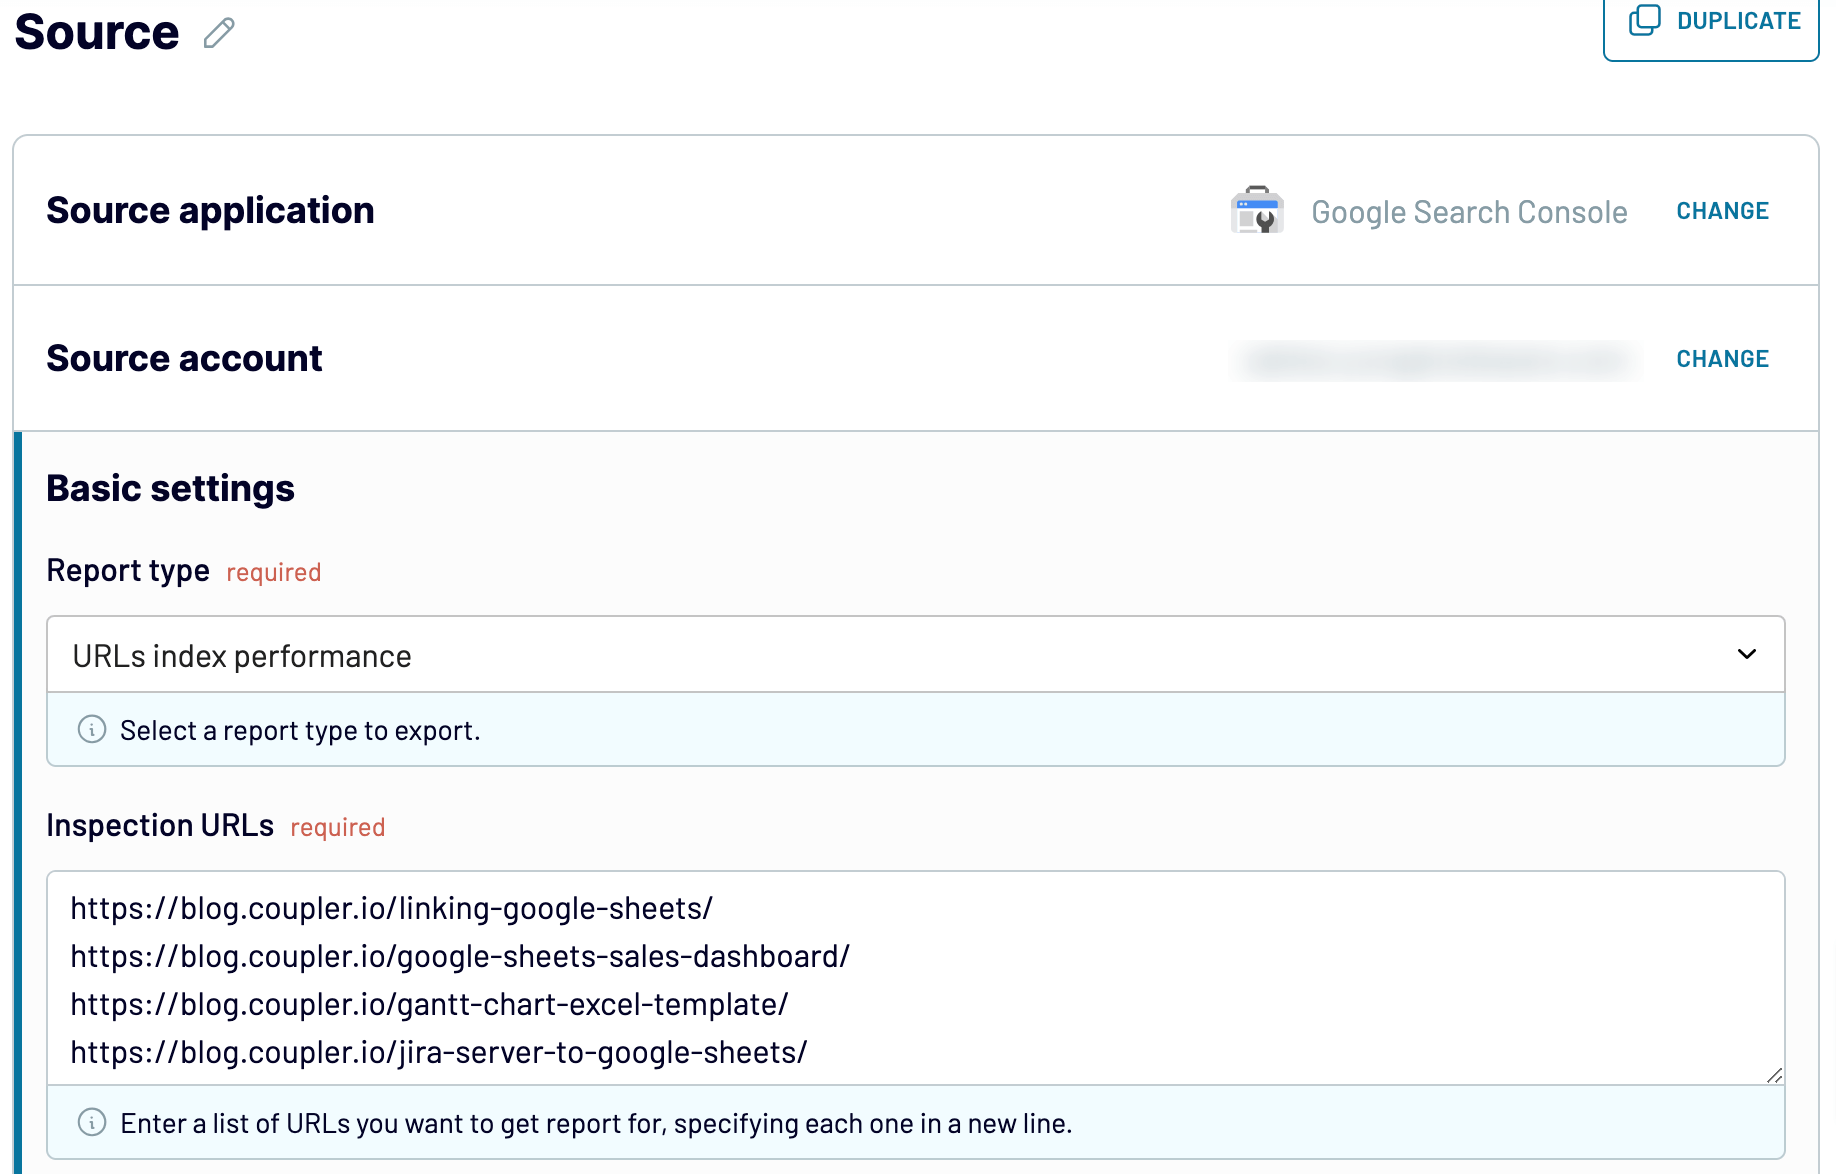
- Click Finish and proceed. Next, press Transform data to export it from GSC.
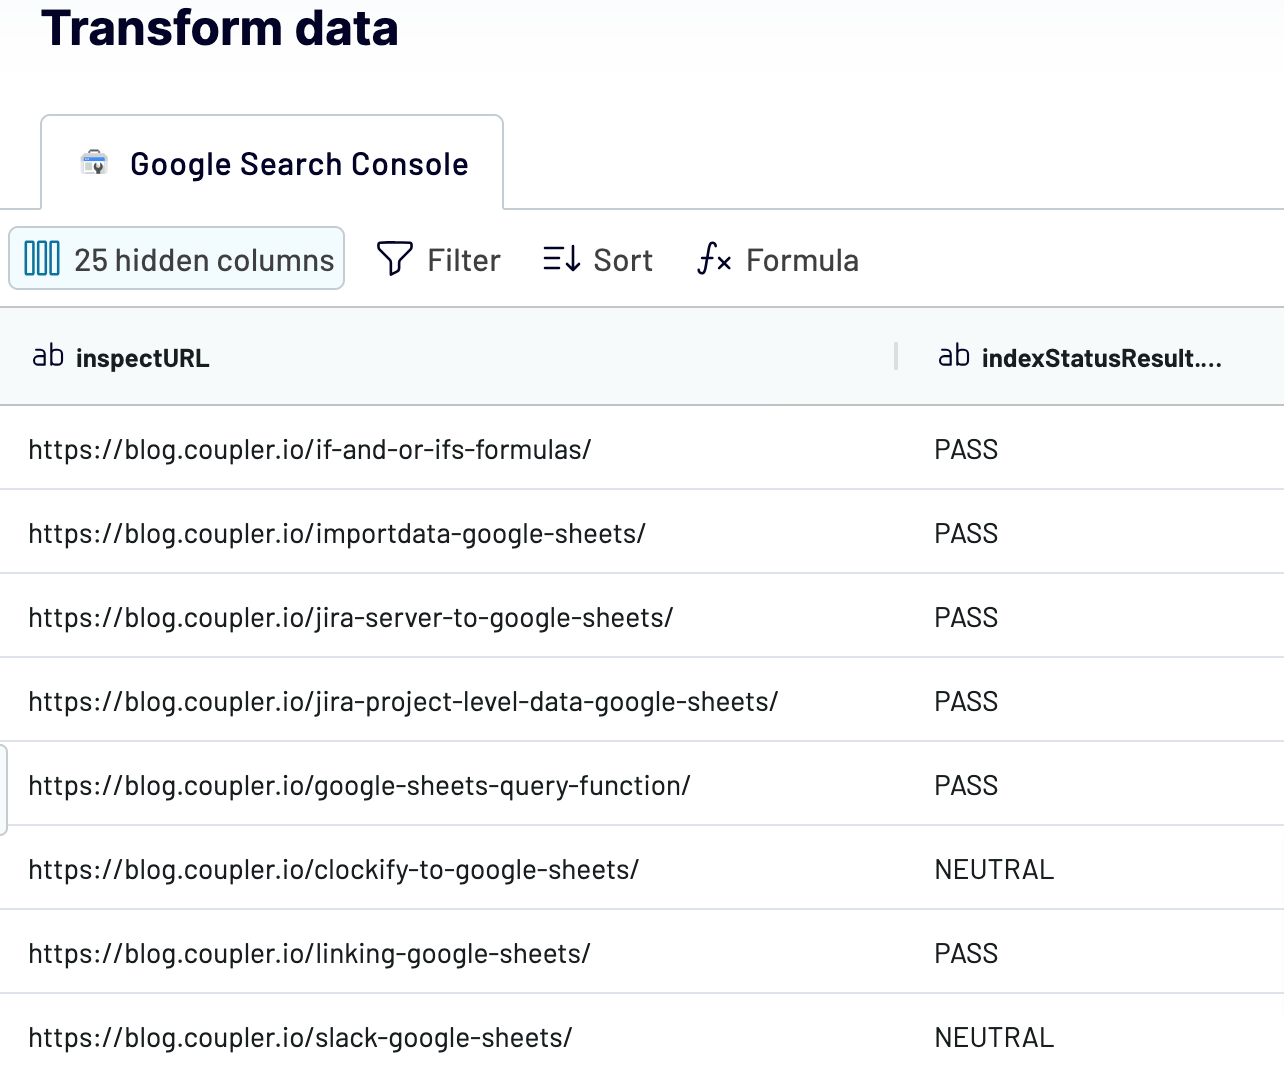
- Now you must pick the needed columns: first, click Column management and Hide all.
- Enter inspectURL and put a tick by it. Do this for indexStatusResult.verdict as well.

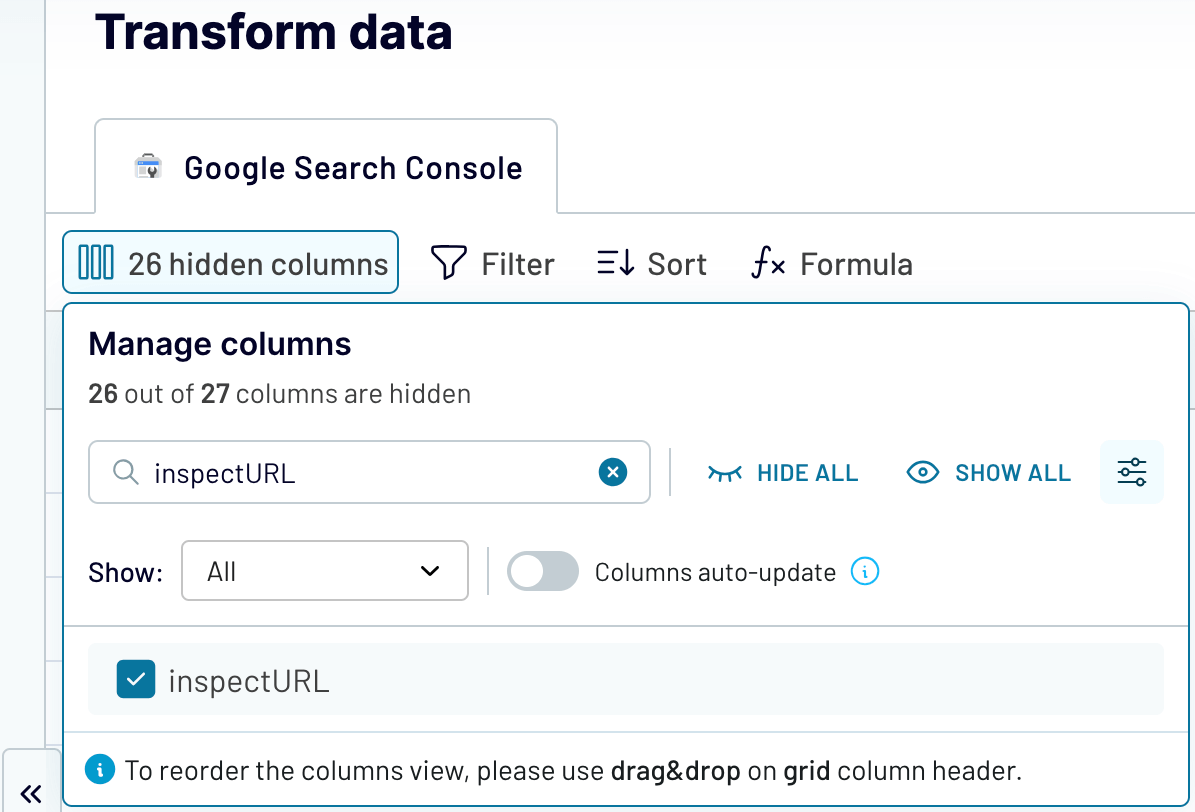
- Preview your data and click Proceed.

- Take the final steps to load your data into Redshift.

Automate data export with Coupler.io
Get started for freeManual method to send data from Google Search Console to Redshift
To manually load data from Google Search Console to Redshift, take the following steps:
- Export your data from GSC as a .csv file
- Upload it to the bucket you create in Amazon S3
- Create a cluster for your data in Redshift
- Import your data to the table created with Query Editor
Let’s discover this method in depth:
1. Export your data from Google Search Console
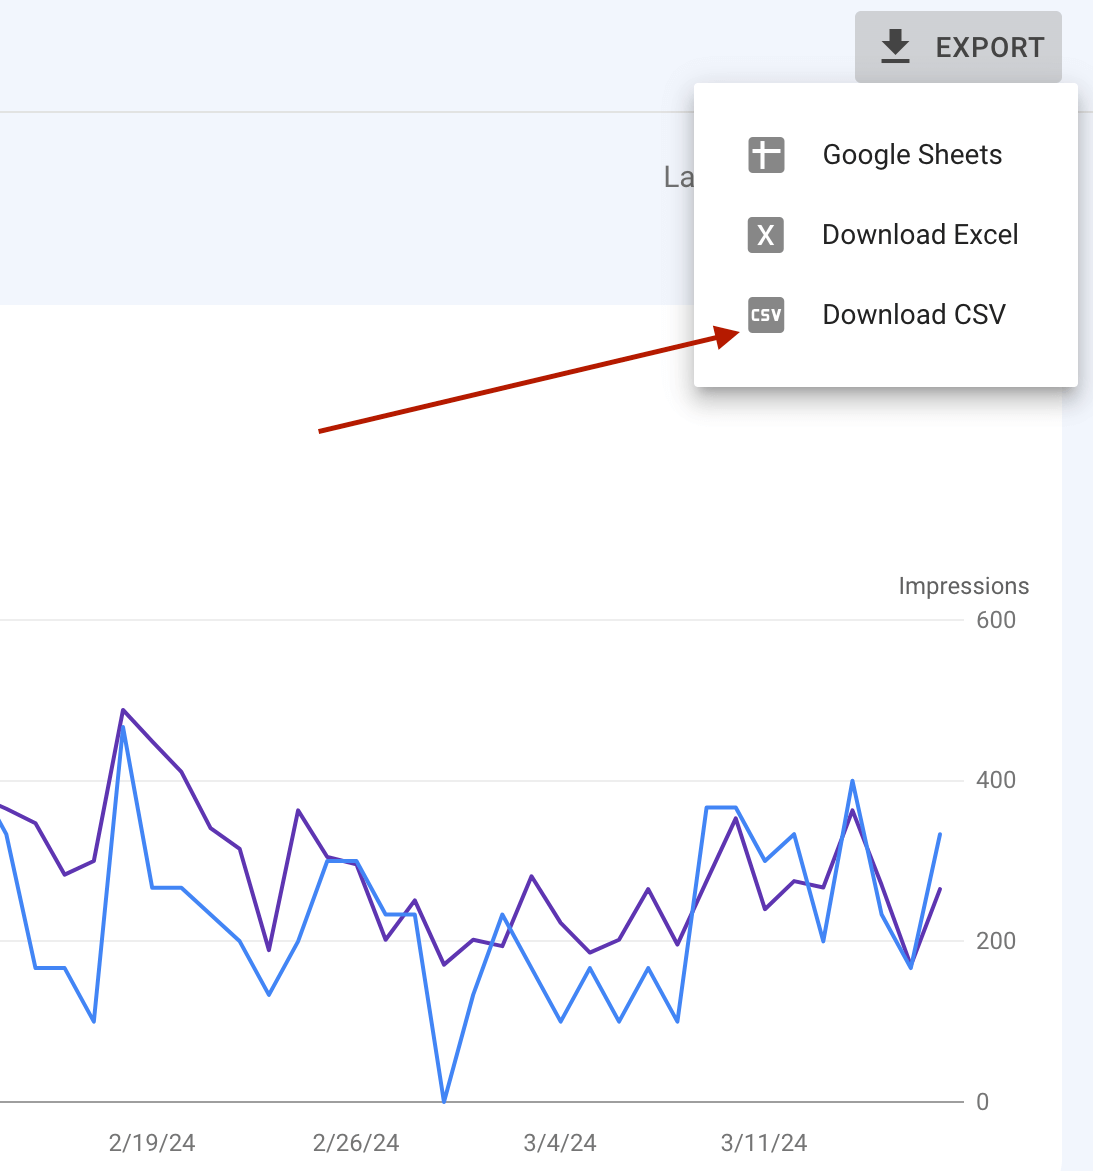
- Log in to your GSC account and open the report you’d like to export, for example, Search results. Click Export in the upper right corner and select Download CSV.

- The .csv file with your data will be downloaded to your device.
2. Upload the file to the bucket in Amazon S3
- Sign in to your AWS Management Console. Then, select S3 in the services list and click Create bucket.

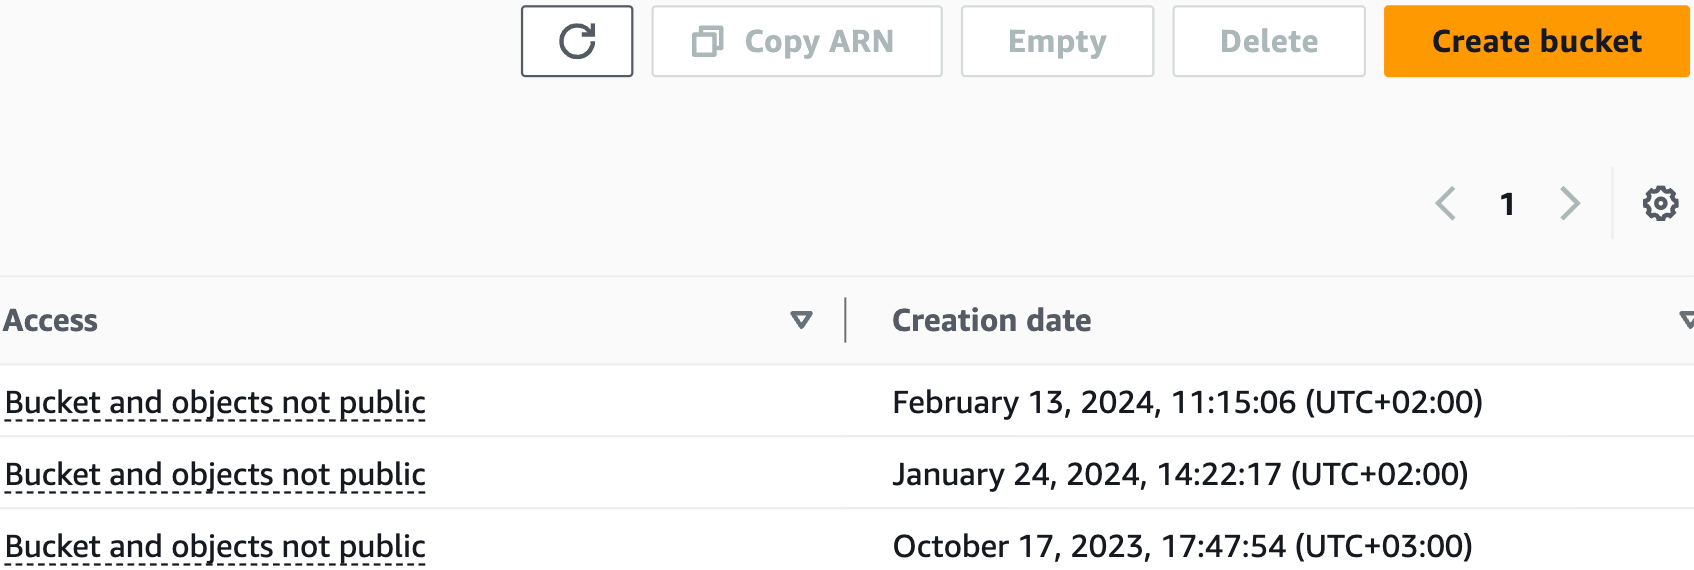
- On the next page, choose the AWS region, enter the Bucket name, and click Create bucket. Once the bucket is ready, take note of the AWS region next to the bucket name, as you’ll need this information later on.
- Click Services in the top left corner and pick IAM from the list.
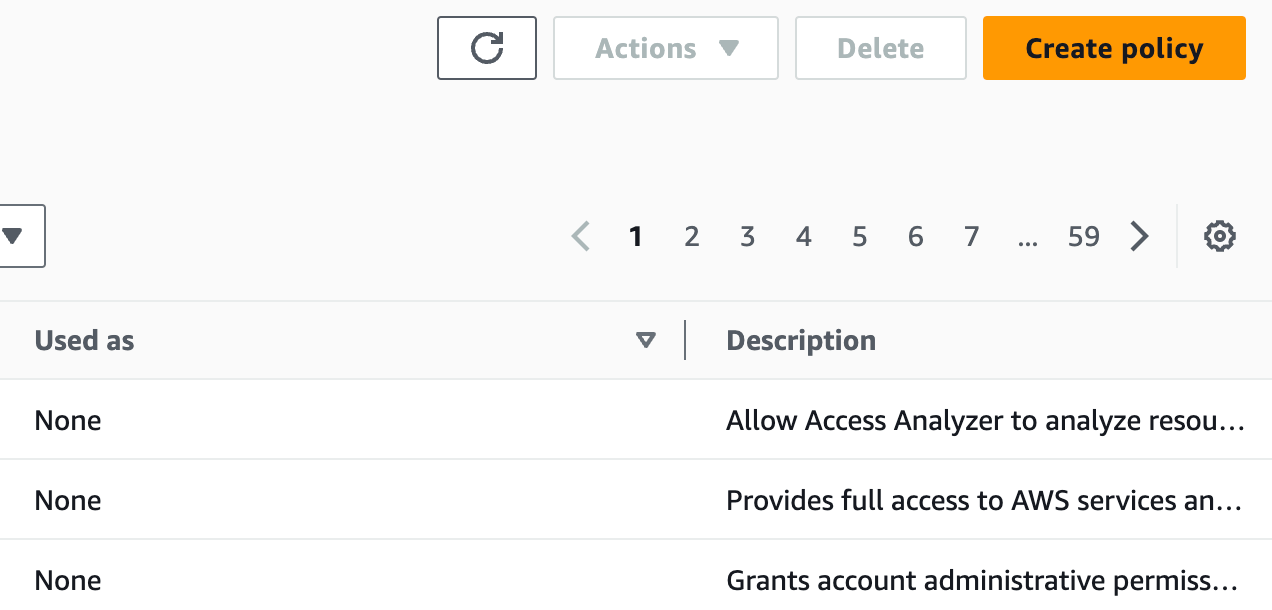
- Select Policies from the Access management list on the left and click Create policy.

- Choose S3 from the Service list, click Read in the Access level list, and put a tick by All read actions. After that, click Add ARNs next to the bucket in the Resources list.
- In a new window, enter the Resource bucket name and click Add ARNs. Press Next.
- Enter the Policy name and click Create policy.
- Click Services in the top left corner again and pick S3 from the list. Navigate to your bucket and click Upload.

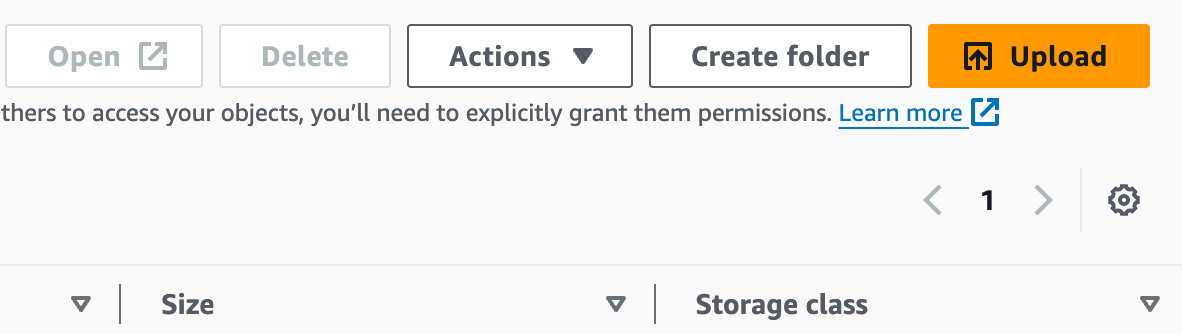
- Click Add files on the next page, choose the .csv file with your Google Search Console data, and press Upload.
3. Create a cluster for your data in Redshift
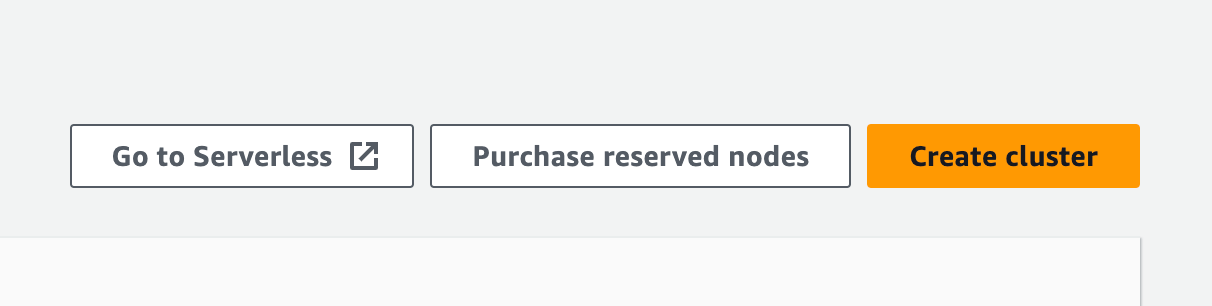
- Select Services in the top left corner and choose Amazon Redshift from the list. Press Create cluster on the next page.

- Type in the Cluster identifier. Next, scroll down to the Associated IAM roles, put a tick by the default IAM role, press Manage IAM roles, and select Remove IAM roles from the list.
- Click Manage IAM roles again and press Create IAM role.

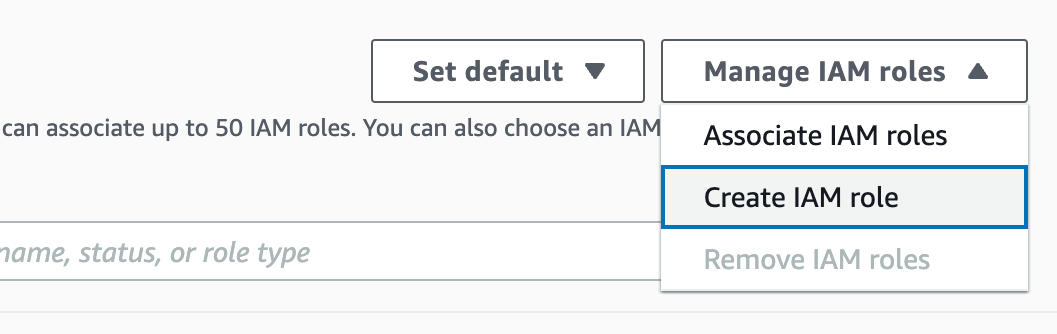
- Select Specific S3 buckets, pick your bucket from the list, and press Create IAM role as default. After that, click Create cluster.
- Once you’ve created the cluster, click on it and go to the Properties tab to see the Admin user name you’ll need in the next step.
4. Load your data to the table
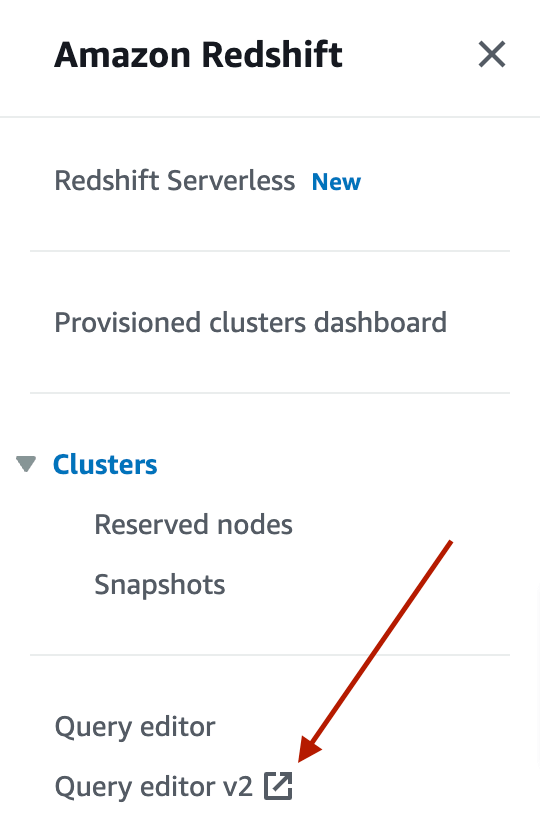
- ?lick on three lines in the top left corner and navigate to Query Editor v2.

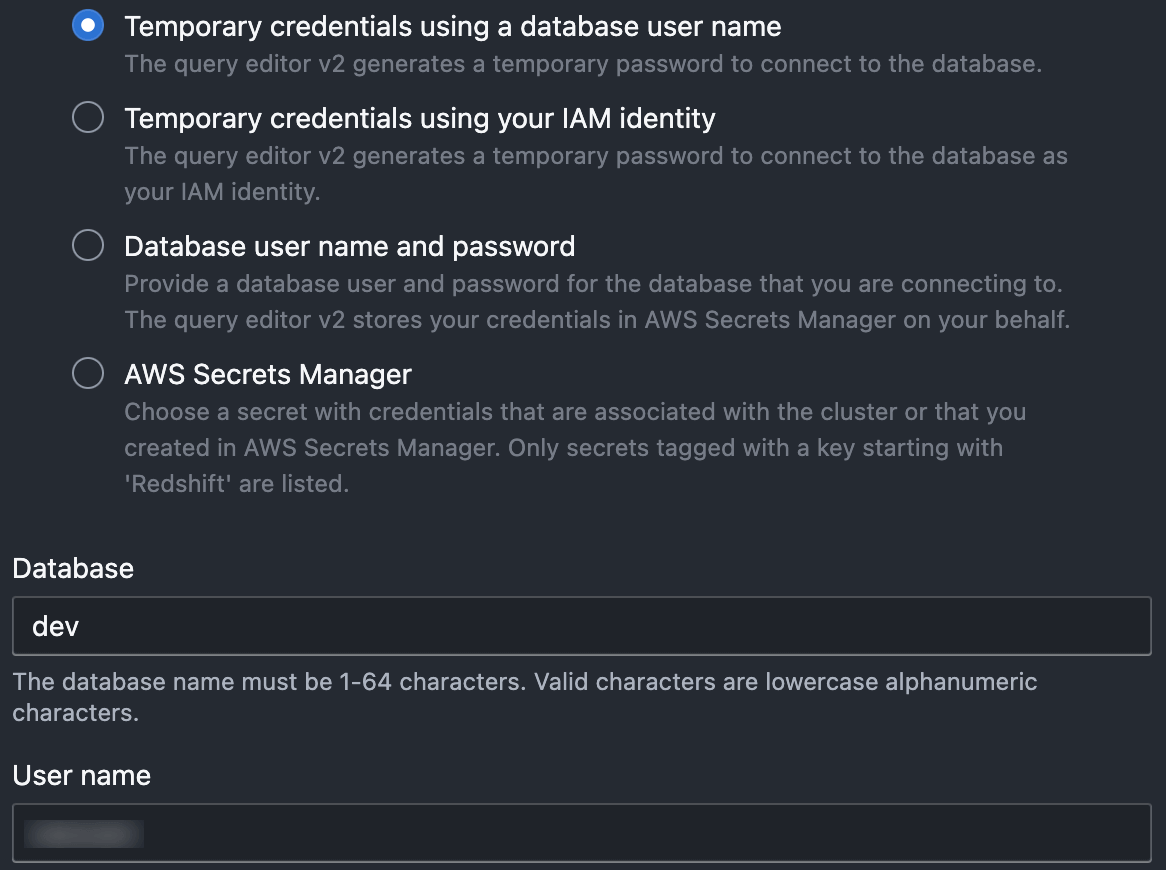
- Go to your cluster on the left. In a new window, select Temporary credentials using a database user name and enter the User name you’ve discovered before.

- Click Load data. In a new window, press Browse S3, put a tick by your bucket, and click Choose. Next, pick the S3 file location (AWS region mentioned in previous steps) and press Next.
- Choose Load new table, specify your cluster under Cluster or workgroup, select public for the Schema, and enter the table name under Table. Press Choose an IAM role and opt for the one from the drop-down menu. Click Create table.
- Finally, press Load data.
Pitfalls of the manual method to load data from Google Search Console to Redshift
Manual data import from Google Search Console to Redshift isn’t optimal for every scenario. The pitfalls of this method include:
- Data amount limit: Google Search Console restricts you to exporting a maximum of 1,000 rows of data.
- Time-intensive process: To manually load your data from Google Search Console to Redshift, you need to do a huge number of tasks. For this reason, you’ll most likely spend up to 1 hour or more, depending on the data size. This is particularly unsuitable for frequent reporting.
- Risks to data accuracy: If you fail to prepare your .csv file correctly, you might end up loading imprecise data to Redshift. This may result in data querying errors and low-quality analytics.
Pay attention to these factors when choosing how you’ll get your GSC data to Redshift.
What Google Search Console metrics can you export to Redshift?
Before importing data from Google Search Console to Redshift, let’s look at the metrics available. GSC provides you with the following measurements:
- Total impressions: This shows how often any URL from your website appeared in search results viewed by a user. Importantly, paid Google Ads search impressions aren’t included here.
- Total clicks: This metric represents the number of clicks on your website URLs from the Google search results page. Like with total impressions, clicks on paid search results don’t count.
- Average position: This is the average ranking of your website URLs for the query/queries. For instance, if your website’s URL appears at the 2nd position for one query and the 8th position for another, the average position will be (2+8)/2=5.
- CTR: Abbreviated from “click-through rate,” this informs you how frequently users who see your website click on it. CTR is calculated by dividing the total number of clicks by the total number of impressions and then multiplying the result by 100.
The other data you can export relates to page indexing. For example, Coupler.io’s SEO dashboard (available for Power BI and Looker Studio) offers insights into Indexed pages and Pages with clicks, in addition to the metrics above.
Do you want to load data from GSC to Redshift quickly and accurately? If so, then automated integration may be the best option.
Connect Google Search Console to Redshift by using Coupler.io and import your data without any pitfalls or limitations. To ensure your reports are up-to-date with the latest changes, configure automated data refreshes. Have a test of Coupler.io for free and explore its capabilities first-hand!
Automate data export with Coupler.io
Get started for free