Klaviyo’s native reporting and analytics features are impressive. But, they come with limited customization support. You may need to export the data into a more powerful data reporting and visualization tool to get deeper insights. Looker Studio is one such option. Connecting Klaviyo to Looker Studio can take campaign reporting to the next level. It can help you build an easily shareable dashboard and visualize campaign performance.
In this article, we’ll cover the different ways to connect Klaviyo to Looker Studio and automate reporting. You can also check out our video guide on YouTube.
Options to connect Klaviyo to Looker Studio
Looker Studio does not support a native Klaviyo connector. However, you can set up a Klaviyo to Looker Studio connection using the partner connector by Coupler.io. It is a reporting automation solution that turns raw data into simple reports. Coupler.io provides a Looker Studio connector to import data from 60+ different sources, including Klaviyo. There are two possible methods to connect Klaviyo to Looker Studio using Coupler.io:
- Looker Studio connector – The easiest method to pull data from Klaviyo to Looker Studio using the partner connector. Supports data auto-update at regular intervals.
- Google Sheets integration – Connect Klaviyo to Google Sheets and use it as a data source in Looker Studio. Supports auto-refreshing data at regular intervals.
The Klaviyo API can also be used to get the required data into Looker Studio. API or Application Programming Interface is the common protocol that applications use to exchange information. You can use a programmatic method to get data from Klaviyo to Google Sheets using Apps Script. This method demands coding proficiency.
To set up a Klaviyo to Looker Studio connection with any of these methods, you’ll need to provide the private API key. It acts as a token of authorization, just like a password. So, first, let’s learn to get the Klaviyo API key.
How to get Klaviyo API key?
Follow these steps to get the Klaviyo private API key from the dashboard:
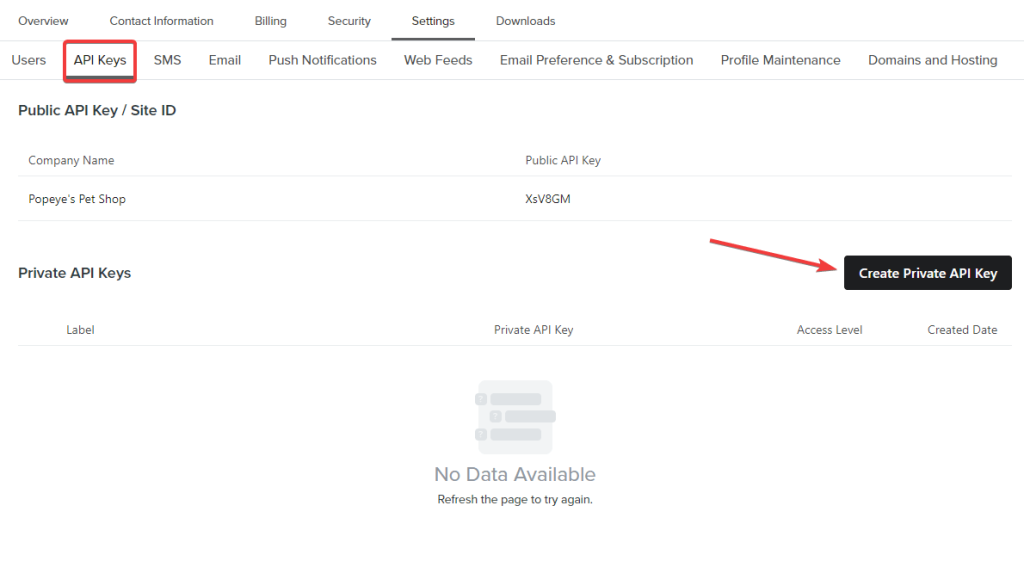
- Go to Settings > API Keys, and click Create Private API Key.
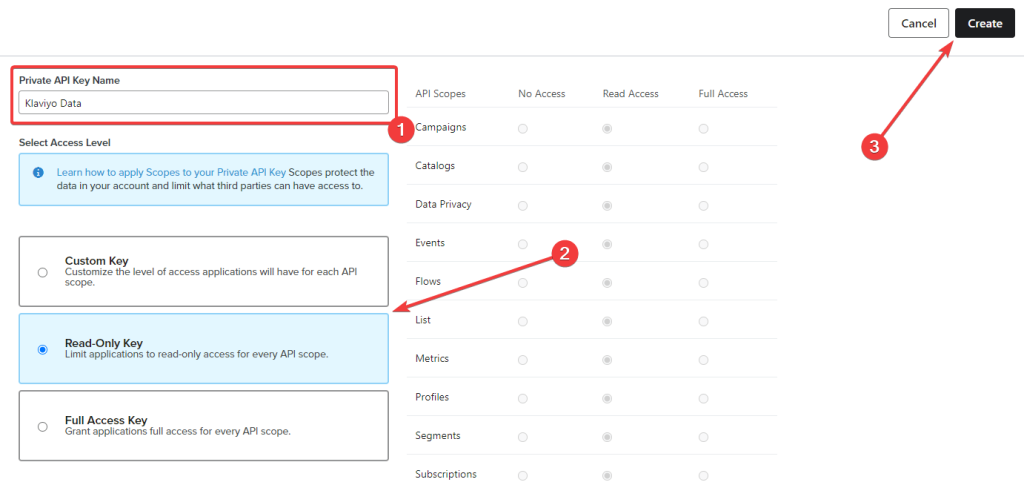
- Now, enter a name for the API key, for example, Klaviyo Data. Then select the appropriate access level and click Create.
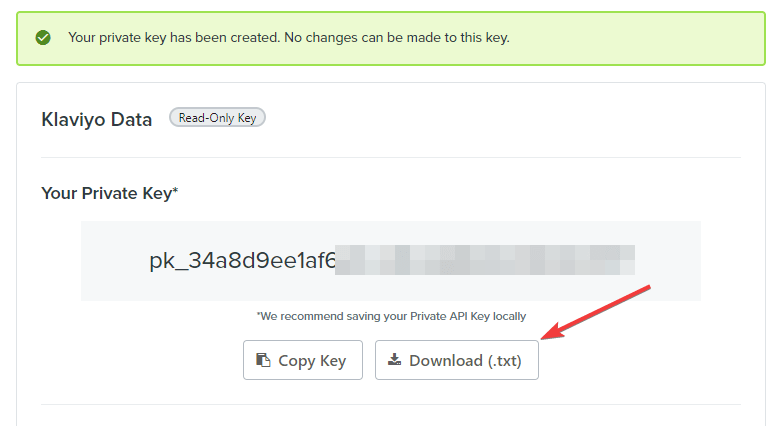
- The Klaviyo API key will appear on your screen. Copy it or download it as a .txt file on your computer.
You can also find it in the Settings > API Keys section of your Klaviyo account.
Once you have the private API key, you can use it to make various requests and get desired data.
Connect Klaviyo to Looker Studio using Coupler.io
To get started click Proceed in the form below where we’ve already preselected Klaviyo as a data source and Looker Studio as a destination. You’ll be asked to create a Coupler.io account for free with no credit card required.
Alternatively, you can connect Klaviyo to Power BI and many other destinations.
Then complete three steps:
Step 1. Extract data
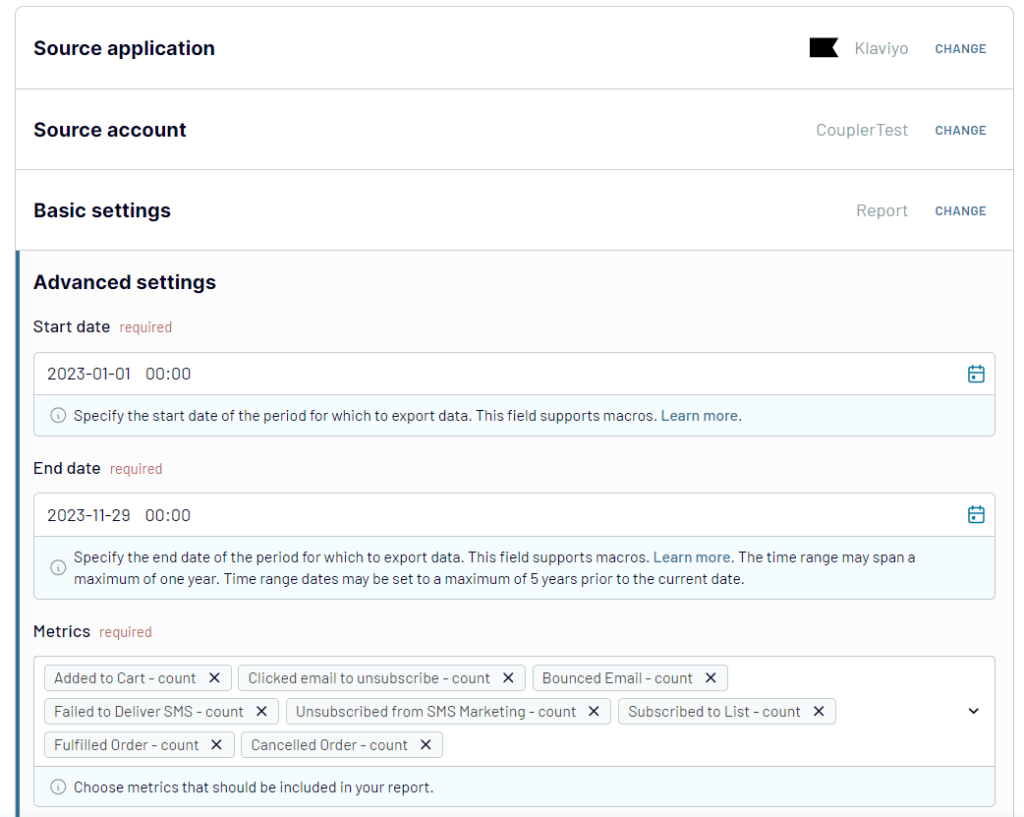
- Connect your Klaviyo account. You’ll need to enter your private API key and its name.
- Select a data entity: Campaigns list, Profiles list, or Report. For the Report, you’ll also need to specify start and end dates, as well as metrics to include in the report.
Coupler.io allows you to merge data from multiple sources. So, you can add more Klaviyo accounts or combine Klaviyo data with the records from other apps and sources. We won’t be doing this here, but feel free to check out how to connect multiple data sources to Looker Studio.
Step 2. Transform data
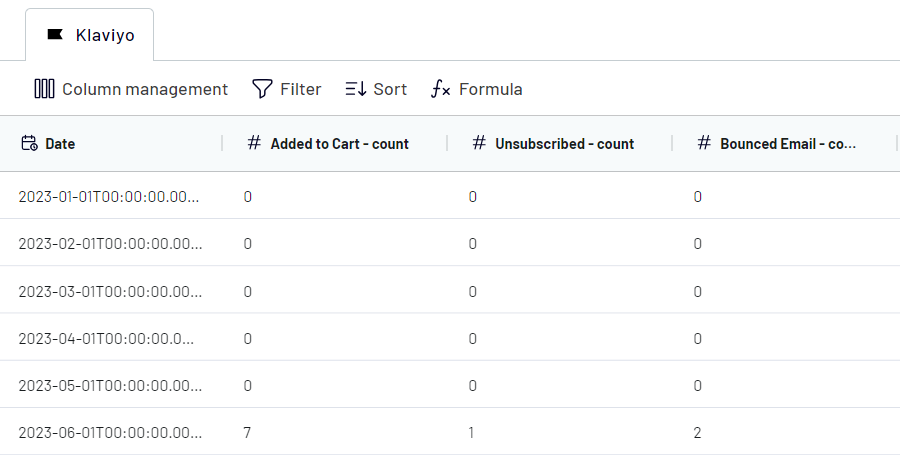
Now, you have the possibility to preview the Klaviyo data before loading it to Looker Studio. In addition to the preview, Coupler.io allows you to perform some transformations to make the data analysis ready:
- Manage columns: Hide/unhide columns, edit their names and types, etc.
- Filter: Filter your selection based on conditions. Using the AND/OR conditions, you can have one or more condition-based filtered data.
- Sort: Sort columns in ascending or descending order.
- Formula: Add new columns using the computable formulas. Learn more about adding formula-based custom columns.
Step 3. Load data and schedule refresh
In the last step, follow the instructions provided in the setup wizard of the destination section to load data from Klaviyo to Looker Studio.
You’ll get a newly created data source in Looker Studio, based on which you can create a report. Click the respective button, and there you go!
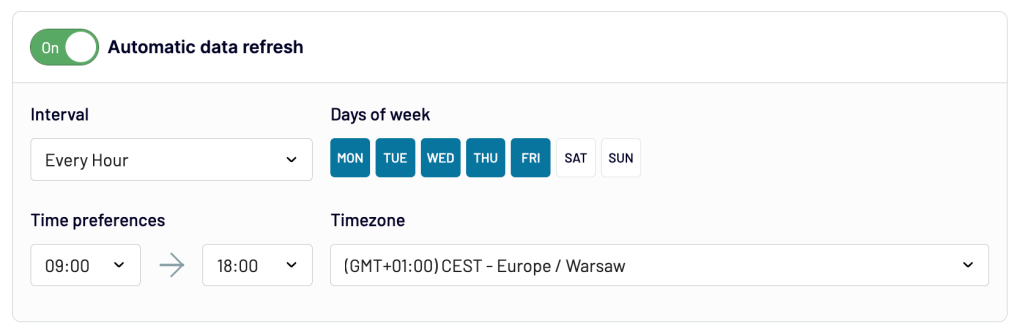
One more thing – you can automate data flow from Klaviyo to Looker Studio. For this, get back to Coupler.io, toggle on the Automatic data refresh, and set up the desired schedule. You can have your data refreshed as frequently as every 15 minutes!
Free ready-to-use dashboard templates for Klaviyo
You can use the Klaviyo data available in Looker Studio to build visual dashboards and custom reports. However, Coupler.io has got you covered, offering ready-to-use dashboard templates for Klaviyo. Let’s explore how to use them to turn raw data into insights.
Klaviyo dashboard template
This ready-to-use dashboard template helps you monitor and analyze your Klaviyo email marketing performance with intuitive visualizations. Perfect for marketers who want to quickly understand campaign effectiveness without building reports from scratch.
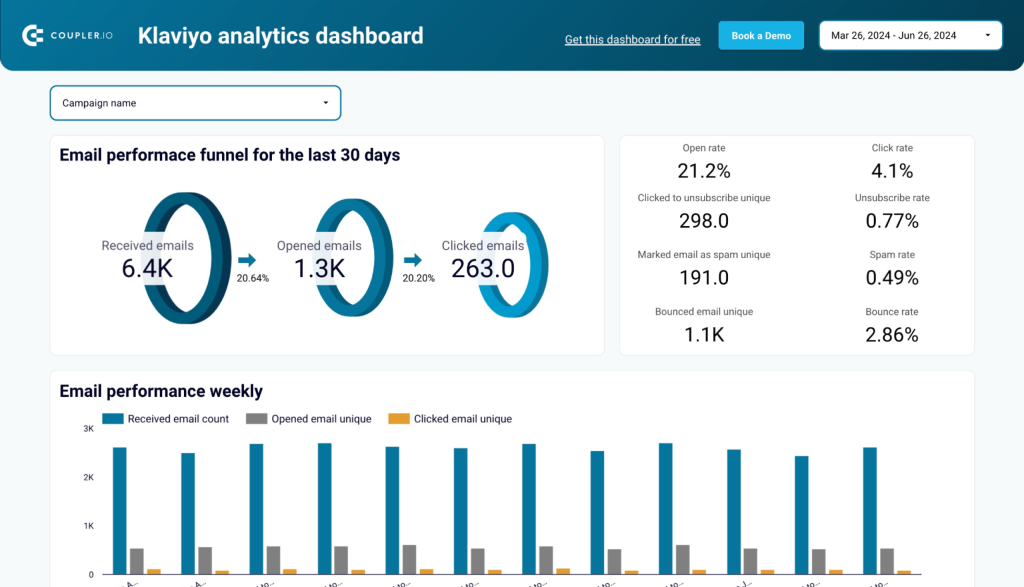
What insights you can get
- Email marketing funnel visualization: See how your audience moves from receiving emails to taking action
- Campaign effectiveness metrics: Compare open rates, click-through rates and conversion metrics across campaigns
- Audience engagement tracking: Monitor how subscribers interact with your content over time
- Performance trend analysis: Identify seasonal patterns and long-term trends in email engagement
- Campaign ROI measurement: Understand which email initiatives deliver the best return on investment
How to use this dashboard
After connecting Klaviyo to Looker Studio using Coupler.io as described above, you can access this pre-built dashboard template. The connector automatically pulls and refreshes your Klaviyo data according to your schedule, populating the dashboard with your actual metrics. No manual data importing or dashboard configuration required.
Email marketing analytics dashboard template for Klaviyo
This dashboard bridges the gap between email engagement and website behavior by combining Klaviyo data with Google Analytics 4. It provides an overview of how your email campaigns influence user actions on your website.
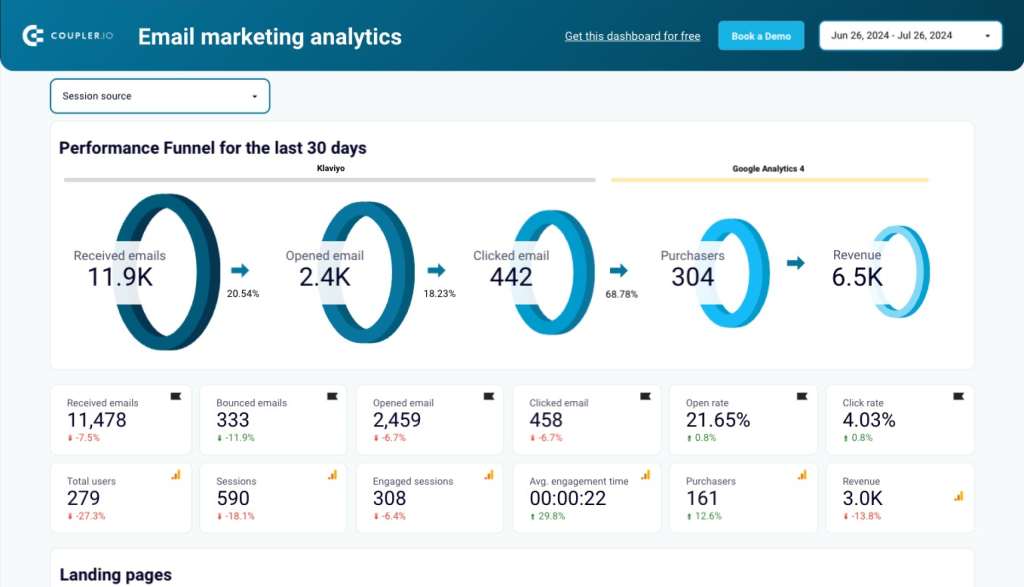
What insights you can get
- Cross-platform performance tracking: Monitor how email campaigns drive traffic and engagement on your website
- Attribution analysis: Understand which emails and content types generate the most valuable website sessions
- Conversion path visualization: See the journey from email click to conversion with path analysis
- Content effectiveness comparison: Identify which email content generates the most website engagement
- Channel synergy metrics: Measure how email marketing complements and enhances other marketing channels
How to use this dashboard
Once you’ve set up the Klaviyo to Looker Studio connection using the Coupler.io method outlined in this guide, this template can be implemented with a few clicks. The dashboard automatically pulls data from both Klaviyo and GA4 to create a unified view of your marketing performance, with scheduled data refreshes to keep insights current.
Klaviyo email campaign performance dashboard for Shopify store
For eCommerce businesses using both Klaviyo and Shopify, this specialized dashboard connects email marketing activities directly to sales outcomes. It helps you understand exactly how your email campaigns translate into revenue and product sales.
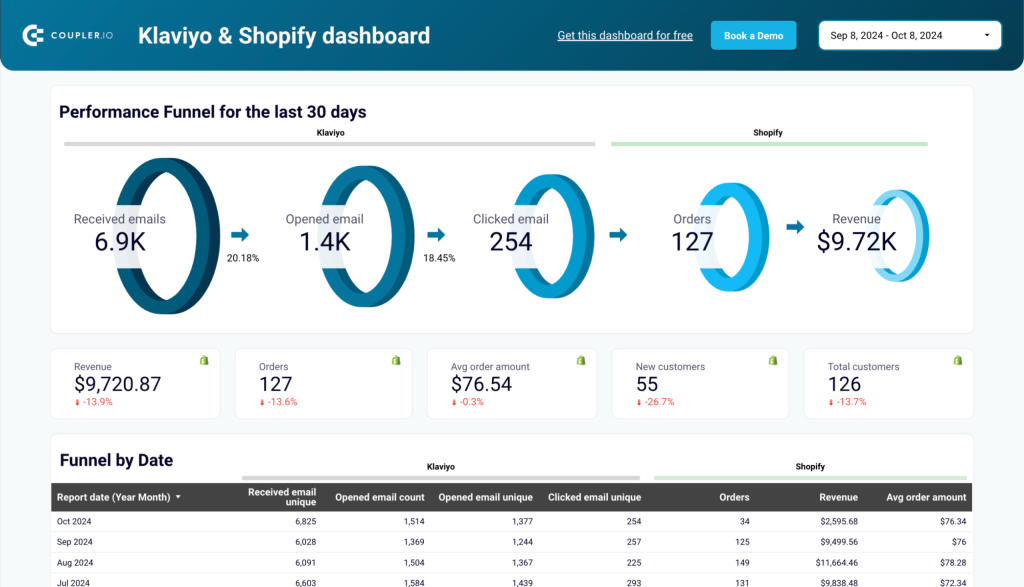
What insights you can get
- Revenue attribution by campaign: See exactly how much revenue each email campaign generates
- Product performance analysis: Identify which products sell best through email marketing channels
- Customer purchase behavior: Understand how email engagement influences buying patterns
- Email-driven sales trends: Track how seasonal factors affect email marketing effectiveness
- Campaign-to-purchase timeline: Measure the time between email engagement and purchase completion
How to use this dashboard
The setup process follows the same Coupler.io integration method described in this article. After connecting both your Klaviyo and Shopify accounts, this specialized dashboard template automatically combines data from both platforms, creating a powerful sales analysis tool that updates according to your preferred schedule.
Import Klaviyo data into Looker Studio using the Google Sheets integration
Looker Studio offers native integration with Google Sheets, which can be used as a mediator between Klaviyo and Looker Studio. Using this method, you can also access the raw data manually in Google Sheets. This can serve as a data backup and can also be used for other calculations.
Coupler.io will help you connect Klaviyo to Google Sheets. To load data from Google Sheets to Looker Studio, you can use either Coupler.io as well or the native Looker Studio connector. We’ll use the latter just to demonstrate how it works.
We’ve already described the flow to connect Klaviyo to Google Sheets in our blog post. It looks pretty much the same as when connecting Klaviyo to Looker Studio. Click Proceed in the form below to try it out.
You’ll need to select a spreadsheet and a sheet where to load data from Klaviyo. Coupler.io will also auto-update the Google Sheet every day as per the schedule so that you can always stay on top of the latest data. Now, you can easily use this Google Sheet to visualize Klaviyo data in Looker Studio.
Let’s see how to do it.
Connect Google Sheets to Looker Studio
Open the Looker Studio Report where you want to visualize the Klaviyo data and follow these steps:
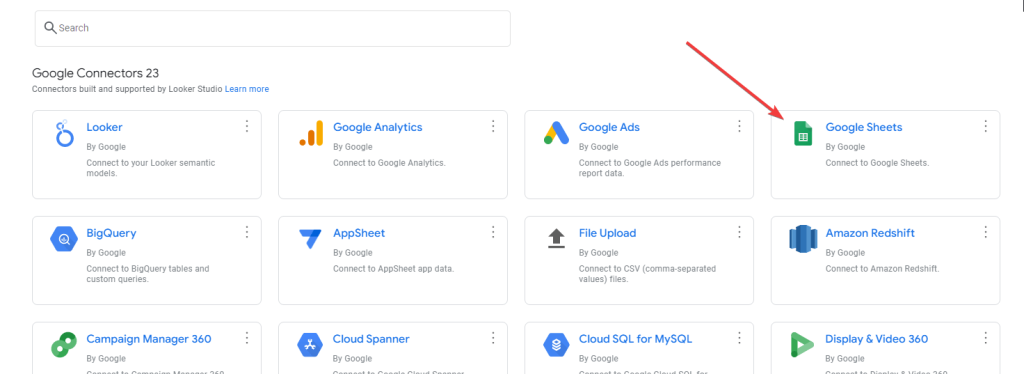
- Add a new Google Sheets data source.
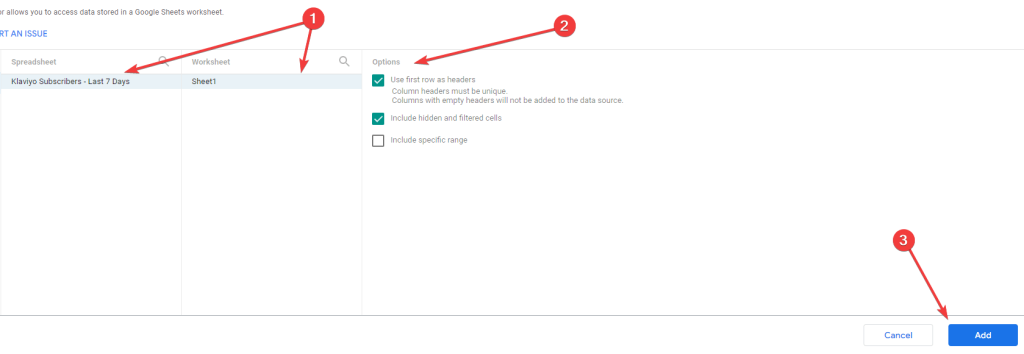
- Select the Google Sheet & Worksheet that you used to import Klaviyo data, tick the appropriate options, and click Add.
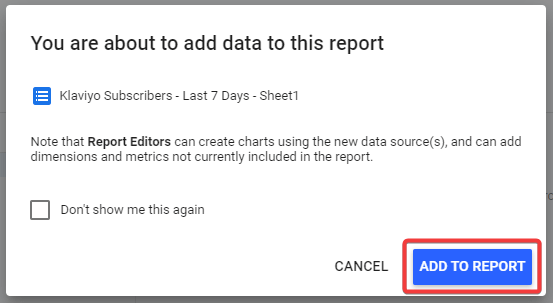
- Finally, click Add to Report to get the Klaviyo data into Looker Studio.
This will import Google Sheets data into Looker Studio, which you can visualize as you want!
Tada!! ? You’ve successfully connected Klaviyo to Looker Studio via Google Sheets.
Set up Klaviyo Looker Studio data sync using Coupler.io
The Looker Studio auto-refreshes the data from Google Sheets every 15 minutes by default. You can change this by using the following steps:
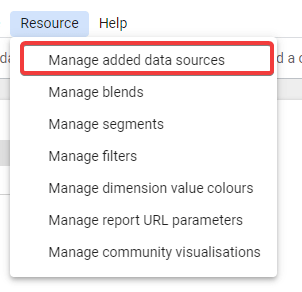
- In the Looker Studio report, go to Resource > Manage added data sources.
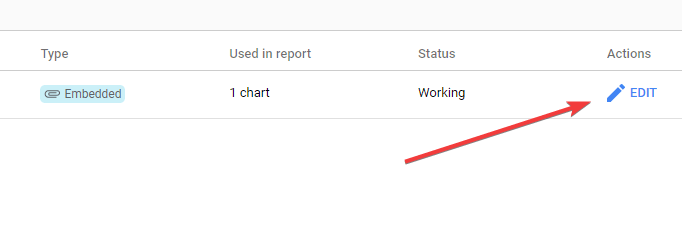
- In the list of connected sources, click Edit against the Google Sheets that we used to connect Klaviyo to Looker Studio.
- Now, in the top-right corner of the section, the data refresh interval of the connection will appear. Click on it.
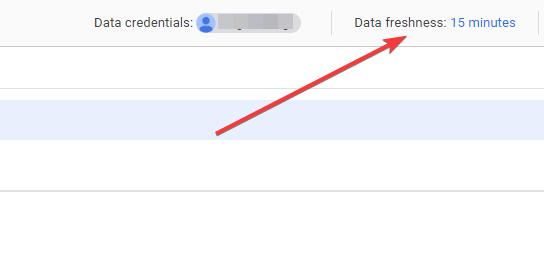
- Choose the preferred data refresh interval, and click Set Data Freshness.

Now, Looker Studio will update the data from Google Sheets every hour.
Tada!! ? You’ve successfully automated the Klaviyo to Looker Studio connection using Coupler.io. Now, just sit back, relax, and let the importer pull the data regularly for you!
Connect Klaviyo to Looker Studio programmatically using Apps Script
Google Apps Script can be used to call the Klaviyo API and pull the required data into Google Sheets. Later on, the Google Sheets can be used as a data source in Looker Studio.
This method demands really high coding skills and knowledge of REST API. Therefore, it is the least preferred method to import Klaviyo data into Looker Studio.
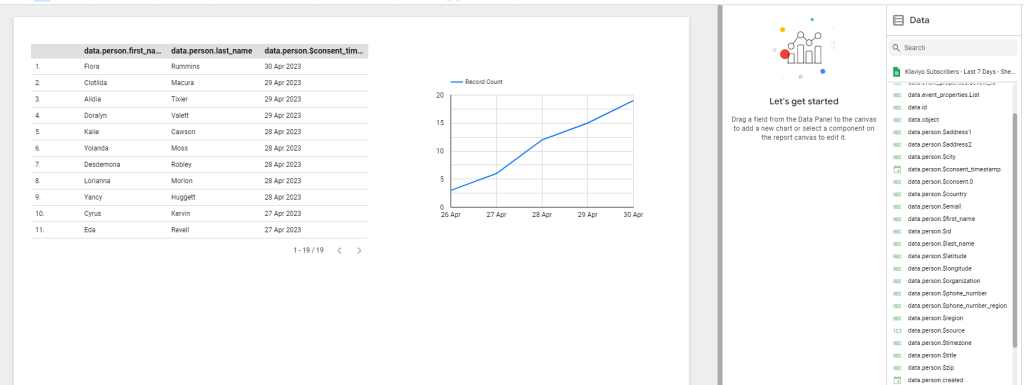
Let’s say you want to get Klaviyo subscribers’ list data for the last seven days. Here’s how you can do this:
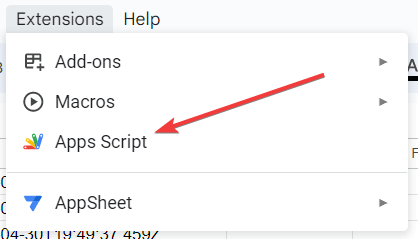
- Open the Google Sheets where you want to import the Klaviyo data and go to Extensions > Apps Script.
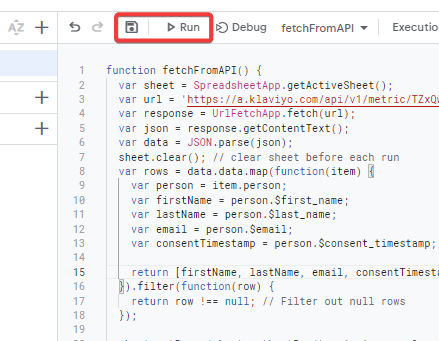
- Now, in the script editor, paste the following code:
function fetchFromAPI() {
var sheet = SpreadsheetApp.getActiveSheet();
var url = 'https://a.klaviyo.com/api/v1/metric/{Metric_ID}/timeline?data_type=c×pan=LAST_7_DAYS&api_key={Your_Klaviyo_API_KEY}';
var response = UrlFetchApp.fetch(url);
var json = response.getContentText();
var data = JSON.parse(json);
sheet.clear(); // clear sheet before each run
var rows = data.data.map(function(item) {
var person = item.person;
var firstName = person.$first_name;
var lastName = person.$last_name;
var email = person.$email;
var consentTimestamp = person.$consent_timestamp;
return [firstName, lastName, email, consentTimestamp];
}).filter(function(row) {
return row !== null; // Filter out null rows
});
sheet.getRange(sheet.getLastRow() + 1, 1, rows.length, rows[0].length).setValues(rows);
}
- Save the script and click Run to execute it.
- Upon successful execution of the script, the required columns will be imported to the sheet.
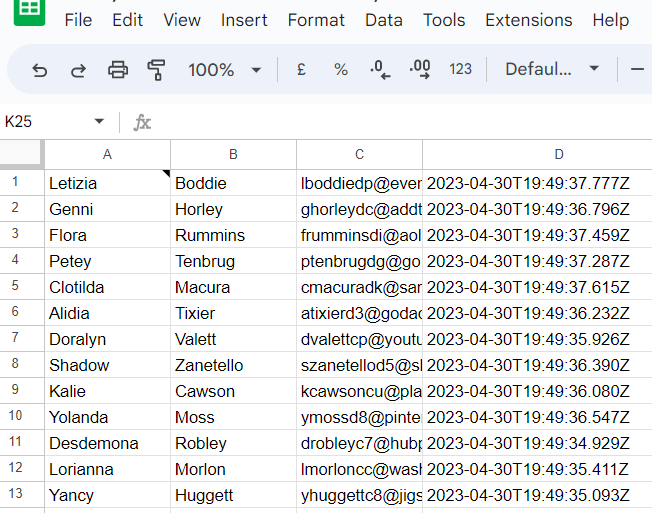
Now, you can connect this Google Sheets as a data source to visualize Klaviyo data in Looker Studio.
Auto-import Klaviyo data into Looker Studio at regular intervals
Google Apps Script supports time-based triggers that we can use to import data from Klaviyo to Google Sheets at regular intervals. Just follow these steps to do that:
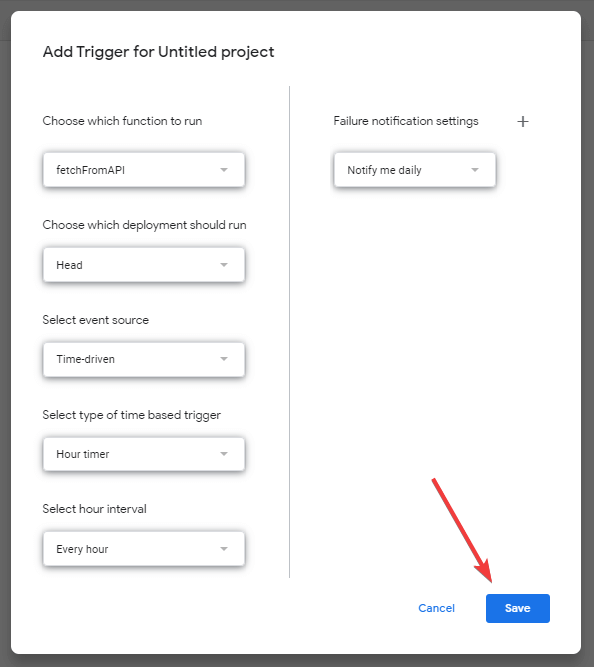
- In the Apps Script window, go to Triggers from the left menu and Create a new trigger.
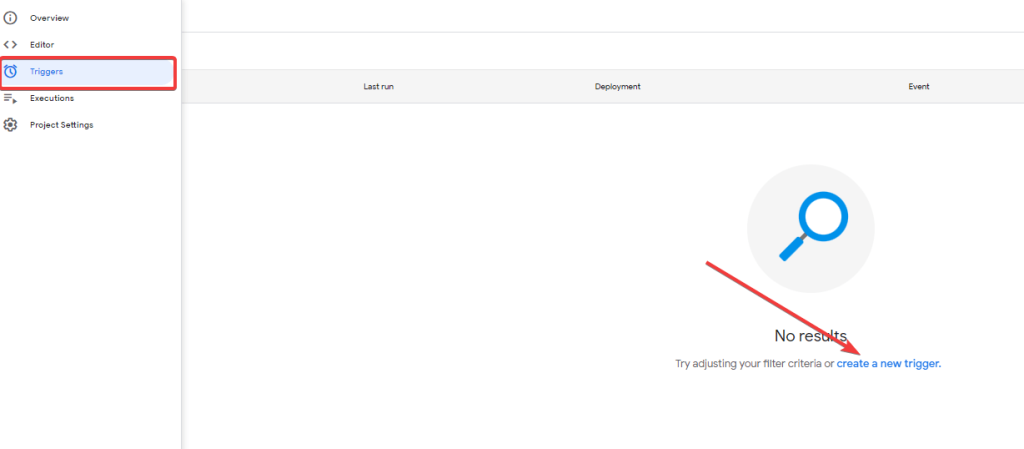
- Now, select Time-driven as the event source, select the preferred interval, and click Save.
At this point, the Apps Script will run the function at regular intervals and keep updating the data in the Google Sheet. Connect the Google Sheets with Looker Studio, and configure the data refresh interval in Looker Studio as well to sync the data.
Which is the best method to analyze your Klaviyo data with Looker Studio?
In this article, we’ve discussed three possible ways to connect Klaviyo to Looker Studio and automate the data flow.
The Google Apps Script method demands coding proficiency and can be too complex for non-technical users. In conclusion, the Coupler.io connector is the most convenient and user-friendly way to connect Klaviyo to Looker Studio without any technical hassle.
Furthermore, Coupler.io supports importing data from multiple sources, which means you load data from multiple Klaviyo accounts or even different sources for your report. Overall, it is the best way to create data-rich reports in Looker Studio.
Automate Klaviyo reporting with Coupler.io
Get started for free