Calendly’s analytics feature is excellent. It provides dashboards that show usage metrics across your organization with data from up to a year in the past. But what if you want to access more data? You may also want to create custom reports to gain deeper insights into your scheduling patterns. Exporting your Calendly data could be the key.
Let’s first explore the different methods of exporting data from Calendly.
Methods to export Calendly data
There are several ways to export data from Calendly, which include:
Automated connections to your preferred destinations: Coupler.io helps you extend your Calendly analytics by automating exports of Calendly data directly to the destination of your choice: spreadsheets, data warehouses, and BI tools. This method is super convenient, as you can combine your Calendly data with data from other sources and refresh your reports automatically.
Manual export to CSV: Calendly’s built-in feature lets you export data from Calendly manually. You can simply download your data into CSV files by clicking the Export button (found on several Calendly pages). This method doesn’t require any external tools. However, this could be time-consuming if you need to download data regularly.
Calendly integrations: If you want to use your Calendly data with other apps, then there are plenty of integrations available to streamline your workflow. Instead of spending time manually transferring data, these integrations can automatically send your Calendly data straight to apps like Slack, Salesforce, Paypal, and others. For example, you can get a notification in your Slack channel, automatically add a new lead in Salesforce, and allow the invitee to submit payment whenever they schedule a new event with you.
Calendly APIs: You can leverage Calendly APIs to export Calendly data and use it within your own product. This provides a customized usage of the data and allows you to create an integrated user experience within your product. However, this method requires coding skills and thorough research of the documentation of the Calendly API and the API of your destination app.
How to set up an automated export of Calendly data on a schedule?
Setting up an automated export of your Calendly data doesn’t have to be a complicated process. With Coupler.io, it can be done with just 3 simple steps.
Step 1: Collect Calendly data
There are two dropdowns in the following form: source and destination. We set the source as Calendly by default. Change the dropdown on the right to select a data destination. Then, click Proceed.

Create a Coupler.io account for free without any credit card required. After that, you will see the following interface to connect to your Calendly account and configure your data source.

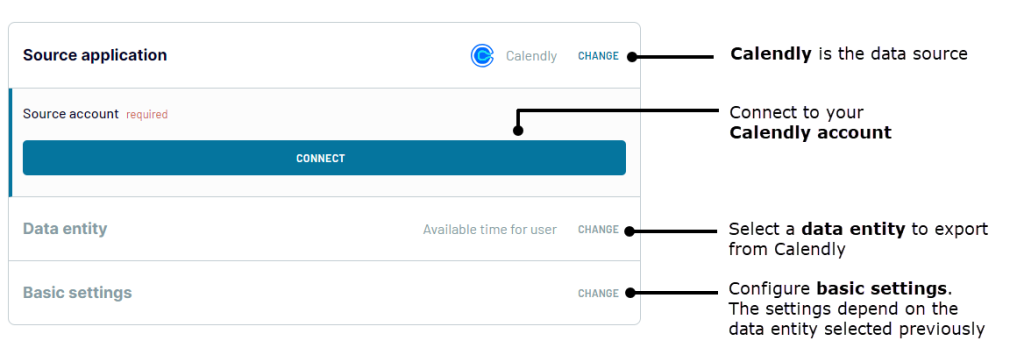
Click Connect to sign in to your Calendly account. You can do so via email, Google, or Microsoft account.
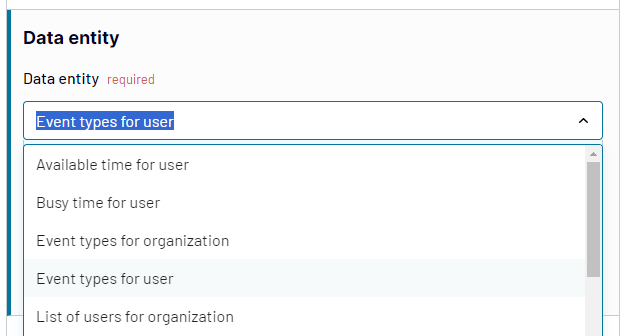
Once connected, select a data entity to export from Calendly. See the list of data entities supported by Coupler.io in the later section of this article.

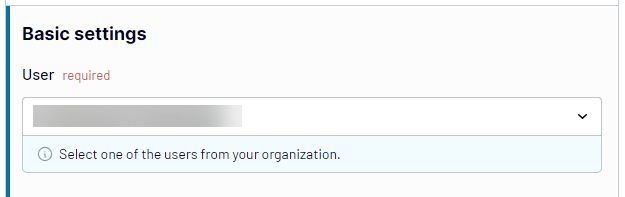
Depending on the data entity you selected in the previous step, you may need to configure basic settings. The settings may require selecting a specific Calendly user and/or date range.

Once you’re done setting up your data source, click Finish and Proceed.
Optionally, you can add more data sources or click Transform Data to apply data transformation.
Step 2: Organize and transform data
Coupler.io offers handy data transformation features, which you can access in the toolbar menu located above your data preview:


Click the corresponding button to start transforming your data.
- Column management: You can hide unnecessary columns, change their names, types, and so on.
- Filter: You can apply basic and advanced filters based on AND/OR criteria.
- Sort: You can arrange your data in ascending or descending order based on the specific columns.
- Formula: You can add new custom columns using formulas. For instance, combine two columns, apply values based on conditional checking, and more.
If everything looks good, click Proceed.
Next, you’ll see options for configuring your data destination. The settings will be different for each destination. If you change your mind, you can always select another destination for your data on the go.
Step 3: Schedule updates
Toggle on the Automatic data refresh button to enable scheduling. This will ensure your data is always updated.

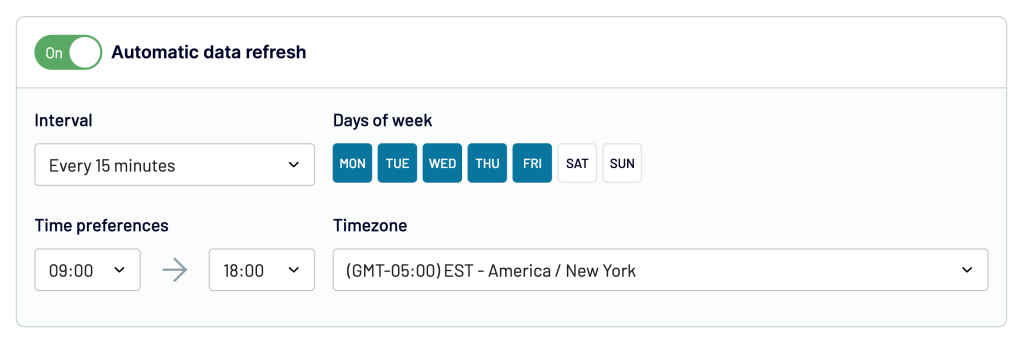
Now, you will always have access to updated information. Having a real-time view of data in your dashboards will help you make accurate, data-driven decisions.
What data can be exported by Coupler.io from Calendly?
See the list of supported data entities in the following tables.
Basic data entities
| Data entity | Description |
| Available time for user | Refers to info about specific times when a user is available for scheduling meetings or events. |
| Busy time for user | Shows when the user is preoccupied and thus unavailable for scheduling. |
| Event types for organization | Details the various types of events that an organization has set up in Calendly |
| Event types for user | Denotes the different types of events that a specific user can schedule. |
| List of users for organization | Provides a comprehensive list of all users within a particular organization. |
| Routing forms | Details any forms, including those from Calendly, Marketo, Pardot, and HubSpot, which are used to direct meeting requests or other inquiries. |
| Scheduled events for organization | Contains all events scheduled across an entire organization. |
| Scheduled events for user | Shows all events scheduled by a specific user. |
Reporting data entities
| Data entity | Description |
| Events | Gives comprehensive information about all events, including date, time, attendees, and more. |
| Events without teams | Focuses on information about events scheduled without a team, providing a clearer picture of one-on-one meetings or individual tasks. |
| Events with invitees | Gives data on events where invitees are involved. |
| Questions and answers | Contains any questions and their corresponding answers given during event scheduling. |
| User availability | Provides information on when users are available for scheduling events. |
How to visualize data from Calendly
If you are new to creating reports and dashboards, this ready-to-use Calendly dashboard template built on Looker Studio can be a starting point. This template helps you create a dashboard with your own Calendly data in a few minutes.

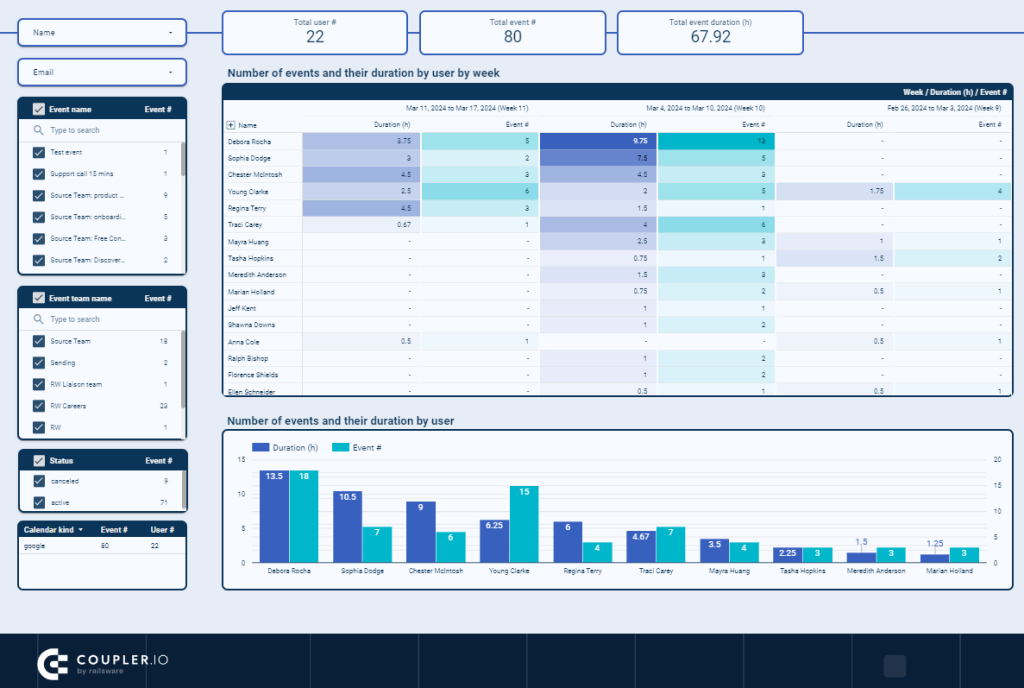
This Coupler.io’s Calendly dashboard provides insights such as:
- Total events created
- Total canceled events
- Number of events and their duration by user
- Number of events and their duration by team
- Peak meeting times
- Most popular day of the month
- And more
Setting up the dashboard with your own data is straightforward. Follow the steps in the Readme tab to connect the dashboard to your Calendly account. Once connected, it will automatically populate with your data.
All that is left is to click the Generate Data Souce button to create a data source in Looker Studio (see the following screenshot). This will redirect you to Looker Studio. Then, follow the instructions on the Looker Studio side to finish setting up the dashboard.

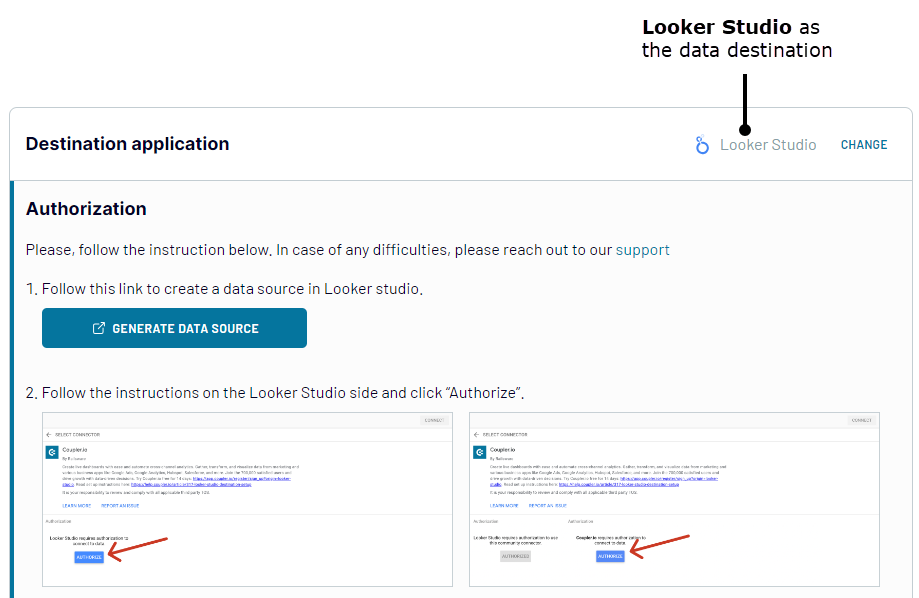
Once finished, you’ll see the newly created dashboard copy. Enjoy!
Where you can import Calendly data
Depending on your needs and preferences, you can export data from Calendly automatically on a schedule to a destination of your choice.
Spreadsheets
Coupler.io offers two popular options for spreadsheets, which are ideal for smaller datasets. While Google Sheets is perfect if your organization uses Google’s ecosystem, Excel is a great choice for those working with Microsoft’s environment.
Data warehouses
If you have larger datasets and need to perform complex queries, you can select one of the following destinations: BigQuery, PostgreSQL, and Redshift.
BI tools
If require comprehensive insights from your data, you can choose one of the top BI tools:
- Looker Studio
- Power BI
- Tableau
- Qlik
You can access Calendly’s built-in analytics feature if you have a Standard, Teams, or Enterprise plan. However, exporting Calendly data for custom reporting offers another level of flexibility.
Furthermore, Coupler.io offers an added benefit — a dashboard template specifically designed for Calendly. This template helps streamline your dashboard creation process, saving you both time and effort.
Automate data export with Coupler.io
Get started for free