Often compared to Microsoft Excel or Airtable, TimeTonic makes it easy to organize data using Smart Tables. This more visual type of database gives you the flexibility of a spreadsheet and becomes a versatile tool for project management, time tracking, or team collaboration. Whichever data you store in TimeTonic, you can export this information to create a custom report or dashboard, a backup copy, or simply share it with stakeholders. In this guide, we’ll show how you can automate data export from TimeTonic without coding or any complex configurations.
Methods to export data from TimeTonic
There are several export options to get your data from TimeTonic for further analysis or reporting.
Automated connector: You can export data from TimeTonic to spreadsheets, data warehouses, visualization tools, and more with Coupler.io. It’s a reporting automation platform to turn raw data into simple reports. You can easily set up the export of data from TimeTonic to run on autopilot without needing to code or set up complex API connections. Using Coupler.io is the best method when you want accurate and close to real-time data outside of TimeTonic.
Export data using TimeTonic API: TimeTonic API allows you to access and read data from your tables and integrate them into other tools. This method can be quite complex to implement if you don’t have a technical background or expertise. We recommend this for developers when looking to integrate the data with other tools for different use cases apart from reporting.
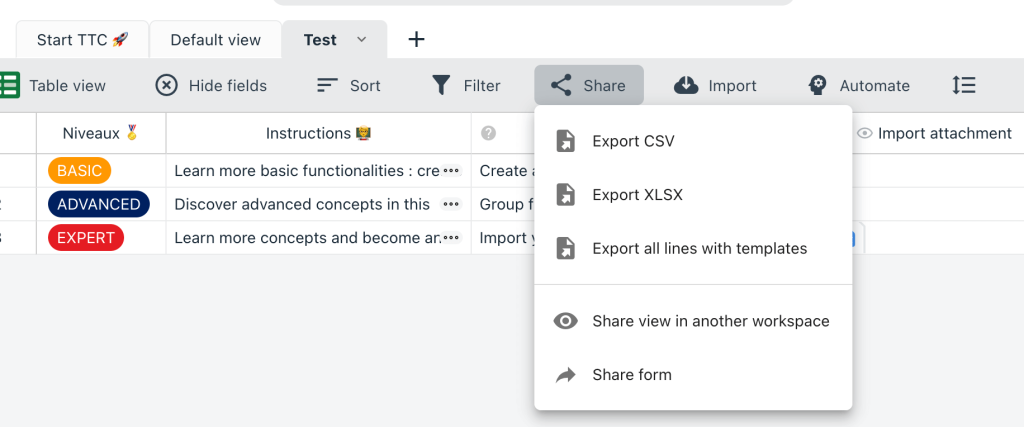
Export CSV or XLSX files manually: If you only need to export data once, you can do so directly from TimeTonic’s interface. This allows you to export a CSV file or an XLSX one with just the click of a button. While useful for sharing data with others, this method is not recommended if you need up-to-date information in your exported files.
How to set up an automated export of data from TimeTonic on a schedule
You can use Coupler.io and connect your data in 3 steps. This will give you automated TimeTonic data exports with data refresh on a schedule so you know your data is always up to date.
Step 1: Collect TimeTonic data
Start by creating a new importer – we’ve already preselected TimeTonic as a data source, so you only need to select your preferred destination and click Proceed. You’ll be prompted to create a Coupler.io account for free with no credit card required.
Next, connect your TimeTonic account. You will need your TimeTonic user ID and API key for this. Here’s where you can get them:
- User ID: Click on the profile icon inside your TimeTonic dashboard. The user ID is displayed below the profile picture. It’s the same one you use to log into your account.

- API key: To create the API key, go to Profile ? Settings ? Add new API key. Grant the requested permissions, copy the key, and insert it in the Coupler.io connection setup window.
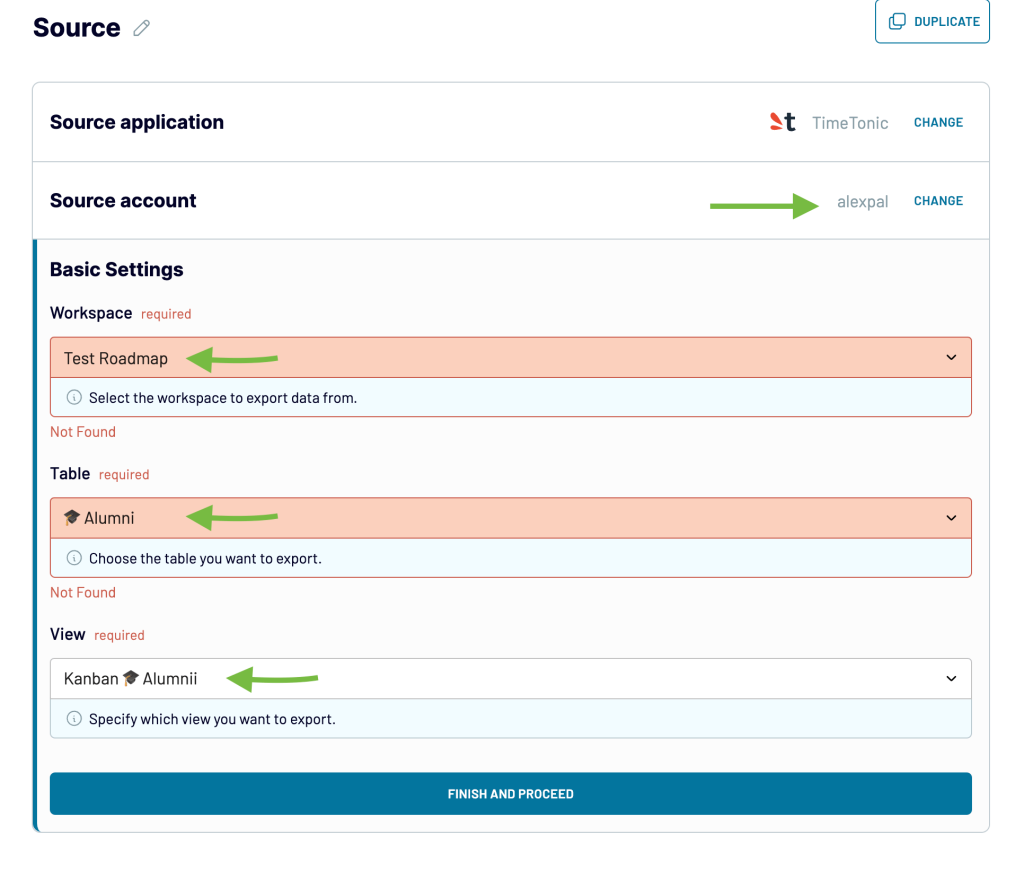
Once your TimeTonic account is connected to Coupler.io, you can select the Workspace from which you wish to export data using the drop-down of available options.
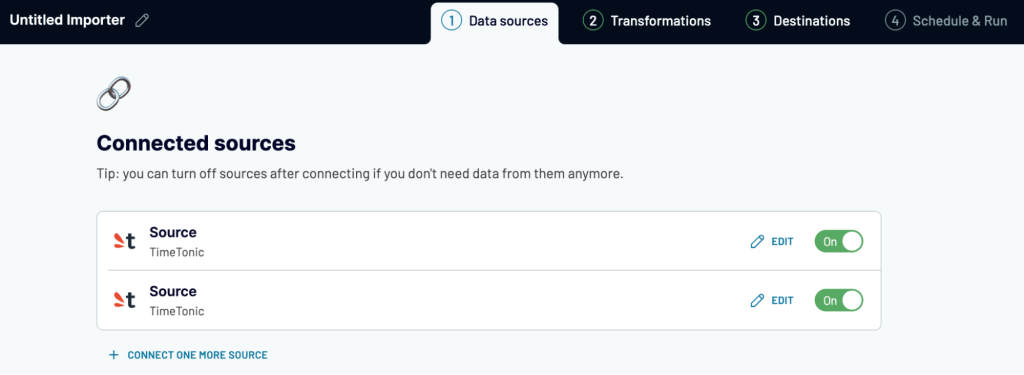
From here, you need to choose a specific table and view the drop-down lists. Once you are happy with your settings, click Finish and Proceed.
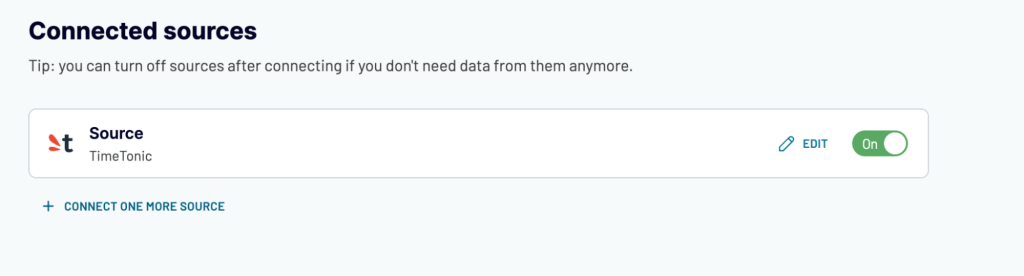
At this stage, you can either add more data sources or click Transformations and move to the next step. If you wish to export data from multiple workspaces and table views, click Connect one more source.
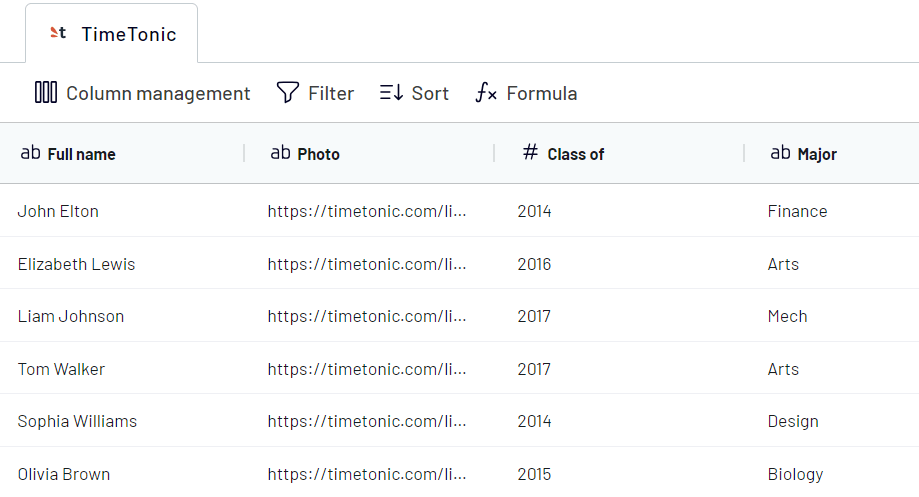
Step 2: Organize and transform data
This step is optional but allows you to manipulate and transform your data and prepare it for custom reports. There are several data transformation options available:
- Column management: Edit column names, types, etc, or hide unnecessary columns that you don’t need in your reports.
- Filter: Apply basic and advanced filters based on AND/OR criteria.
- Sort: Arrange your data in ascending or descending order based on the specific columns for better data visualization.
- Formula: Create new custom columns using formulas. For example, merge two columns, apply values based on conditional checking, and more.
When you are done transforming your data, proceed to the destination app connection setup. The process of connecting your data destination will vary depending on the selected app.
Step 3: Schedule data updates
The final step to export your TimeTonic is to set the frequency of automated data refreshes.
After your Destination is connected, click on the Setup a Schedule button. Toggle the Automatic data refresh button to enable scheduling. Then, set the desired data refresh frequency, days of the week, and preferred export time.
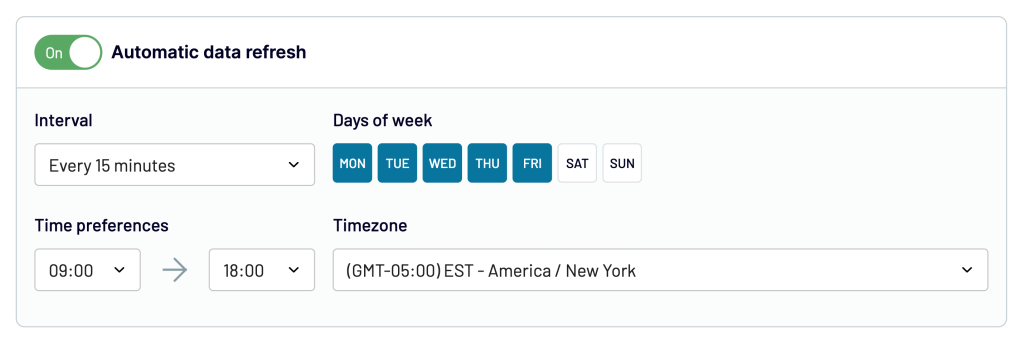
This step will ensure you always have close to real-time data in your reports without having to generate exports and update your data manually.
What data can be exported by Coupler.io from TimeTonic?
TimeTonic data is organized in tables with multiple views across different workspaces. Each table can have multiple views, and you can choose a specific one to export.
You can use additional data sources and select one table and view at a time to export multiple tables or views.
The type of data you can export will depend on what you are using TimeTonic for and the data available inside your tables. Here are some examples:
- Project Management data: Track specific projects and epics and the tasks inside them to get a better view of how different initiatives are advancing. With data on progress and deadlines, task and project assignees and collaborators, status, and completion, you can easily spot potential delays and blockers in delivering complex projects.
- CRM data: Export customer data, as well as leads and opportunities, to better understand at-risk customers and your entire sales pipeline. By looking at lead stages and scores, notes and communication history, engagement metrics, and financial data such as lifetime value or expansion revenue, you can easily spot opportunities to improve retention and the LTV to CAC ratio.
- Human resource data: Track your employee contract data, attendance, time tracking, performance reviews, recruitment, and onboarding status and details. This data not only supports payroll processing needs but also allows you to track employee performance over longer periods of time and better plan development and people growth initiatives.
- Financial data: Export expenses, budget data, invoices, and billing information to get a complete view of your business. This data allows you to build advanced financial reports to monitor your business health and identify cost-saving and growth opportunities.
- Marketing data: Extract campaign data like costs, conversions, clicks, and more to analyze ROI and better optimize your campaign budget allocation. When exporting data from multiple campaigns across different channels, you can understand and report on what’s working or not. This helps keep your stakeholders informed while also driving better decisions.
What are the destinations supported for importing TimeTonic data?
TimeTonic offers direct data exports to CSV and XLSX files with the click of a button. However, when using Coupler.io, you can export your data to multiple destinations. Here’s a complete list of available data destinations:
BI and data visualization tools
- Looker Studio: You can create comprehensive reports and dashboards with multiple data visualization charts with Looker Studio. It’s also a beginner-friendly tool that’s easy to get started with.
- Tableau: A more advanced data visualization tool preferred by data analysts for creating reporting dashboards.
- PowerBI: The tool of choice for teams using Microsoft tool stacks, Power BI is a robust analysis and reporting tool.
- Qlik Sense: This business intelligence tool is preferred for its predictive and generative AI functionality, which is useful for reporting and understanding large data sets.
Spreadsheets
- Google Sheets: This tool is widely used for simple data manipulation, and it allows you to create and share reports from your data. Export your TimeTonic data and use charts and pivot tables to make sense of it.
- Microsoft Excel: If Google is not your tool of choice, Excel offers the same functionality as desktop spreadsheet tools.
Data warehouses
- Google BigQuery: Load your TimeTonic data into BigQuery, manipulate and blend multiple data sources for further analysis and reporting.
- Amazon Redshift: If Google is not part of your tool stack, export your data to Redshift.
- PostgreSQL: Export your data into PostgreSQL for advanced analytics operations and storage.
Other tools
- JSON: If you need your data in JSON file format, you can extract it with Coupler.io.
How to visualize data from TimeTonic
Depending on where and why you decide to export your data, there are several data visualization options:
Data visualization in spreadsheets: You can use the tool’s native reporting functionalities and visualize your data using charts and pivot tables. When you combine Google Sheets or Excel reporting with Coupler.io automated data exports, it’s easy to have fresh reports to share with your company stakeholders.
Data visualization in BI tools: You can export your TimeTonic data to Looker Sudio, Power BI or other solutions directly and build self-updating dashboards for tracking business KPIs and making advanced data forecasts with multiple data visualization charts. Follow the steps described in the tutorial above and choose your desired destination.
Once you have your data, start building custom reports and dashboards. The simplest way to get started is to use dashboard templates and customize them to your needs. These will save you time and also give you ideas on how best to present your data for a good and comprehensive visual representation. Choose from Coupler.io templates for SEO, marketing, sales and financial predesigns dashboard templates.
Automate TimeTonic data export
Manually downloading XLSX of CSV files from TimeTonic is not a scalable solution, especially when creating visualization dashboards. As we’ve seen in this article, using Coupler.io to automate TimeTonic data export on a schedule makes it easy to get your data inside spreadsheets, data visualization tools, or data warehouses. Try it for free and see for yourself.

Automate TimeTonic data export with Coupler.io
Get started for free