

When managing your projects in Jira, the need to export data is inevitable, e.g., for data sharing, analysis, migration, or backup. Whether you are a brand new user ready to get started or you are simply looking to brush up on your skills, you may find this guide on how to export issues from Jira helpful. Let’s get started!
How you can export issues from Jira – all options explained
You can export Jira issues using the following methods:
- Coupler.io: It’s a reporting automation and analytics platform to turn data into simple reports. Coupler.io enables you to automatically pull your Jira issues without coding. Export your data, prepare a custom report on the go, and import it into the desired destination in a matter of minutes.
- Jira’s built-in functionality: First, apply the desired filters or enter the JQL query in the issue search to select the issues for export. Then, export them in the required format.
- Jira plugins: If the data you need can’t be exported natively through the UI, you can use Jira plugins available in the Atlassian Marketplace.
- Jira’s APIs: Call the Jira REST API to fetch the data needed. This demands high technical proficiency and knowledge of APIs.
Automate exports of Jira issues with Coupler.io
Coupler.io allows you to export data from Jira to BigQuery, Looker Studio, Google Sheets, Excel, and other destinations. Not only does it save time, but it also reduces the risk of human error. Additionally, you can set an automatic data refresh on the desired schedule so that your report remains up to date. Below, we show you how this is done.
Note: The particular flow described isn’t applied in certain cases, for example, when you want to export issues with comments and attachments. We discuss this and other scenarios later in the FAQ section.
To export all issues from Jira, you need to take three simple steps.
1. Collect your Jira issues
To start collecting your data, select the destination app for your Jira data, and click Proceed in the form below to create an automated Jira importer. For example, you can automate Jira export to Excel.

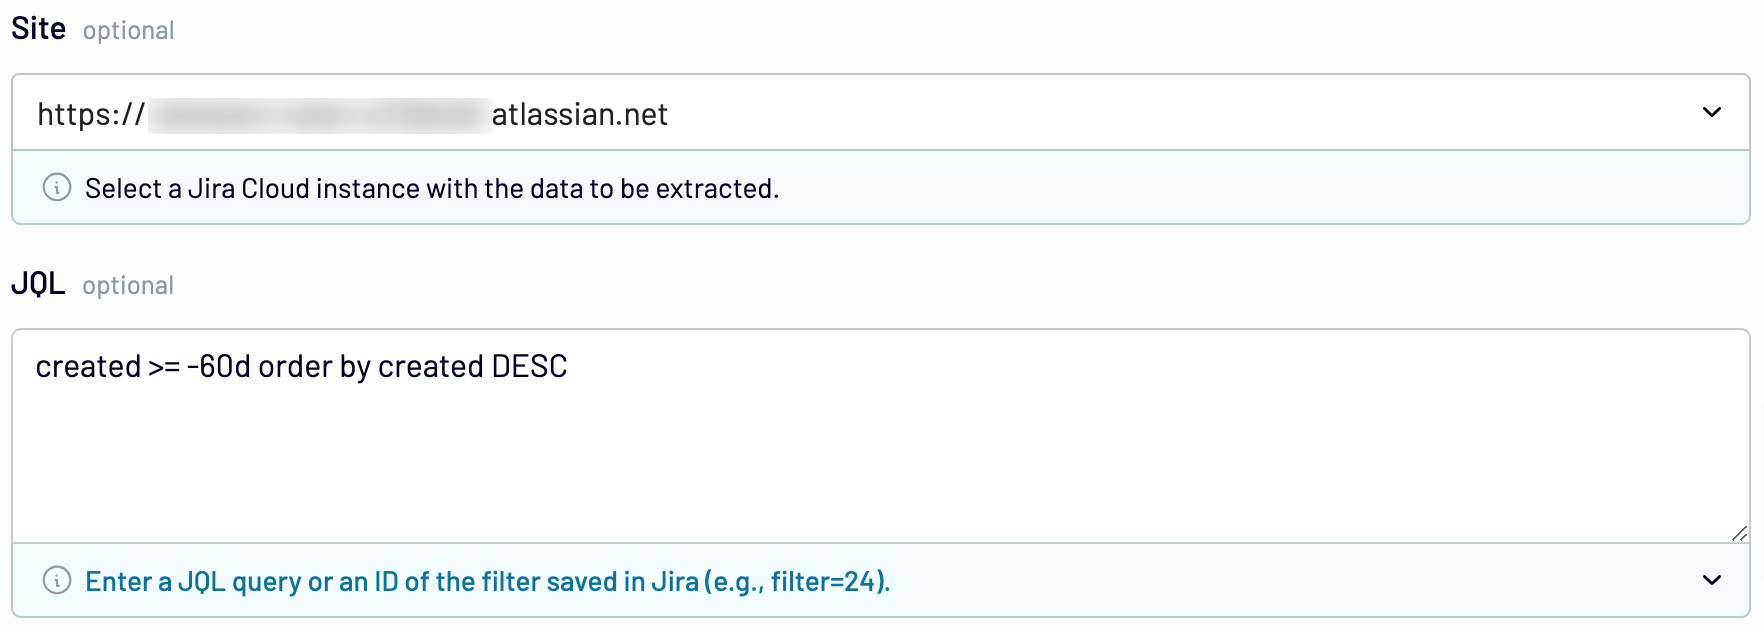
After signing up to Coupler.io for free, authorize your Jira account. Next, specify your Jira Cloud instance in the Site field. You can also enter the JQL query of your filter. For example, you may want to filter the issues created over the last 30 days using the following query:
created >= -30d order by created DESC

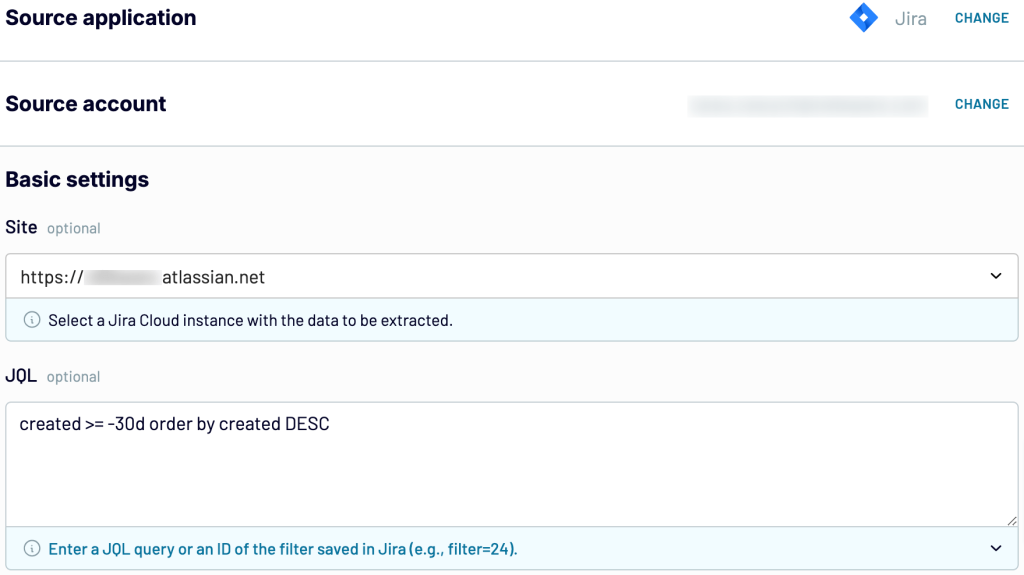
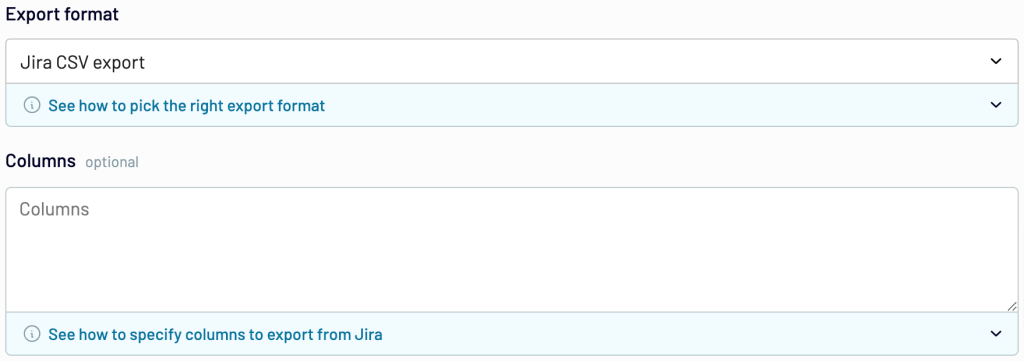
Select the Export format and optionally specify the columns you want to load.

Once you’re ready with the source settings, proceed to the next step.
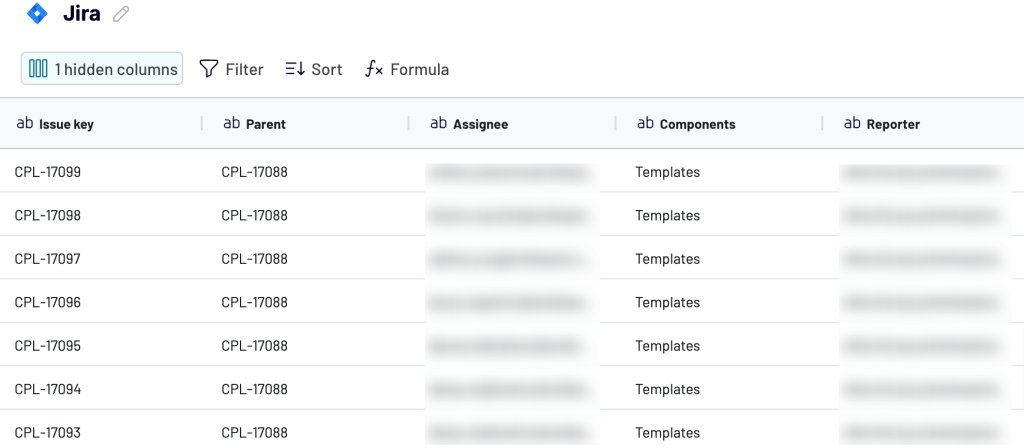
2. Organize and transform data
Now, check the data you are going to export. In this step, you can:
- Rename, rearrange, hide, or add columns.
- Apply filters and sort your data.
- Create new columns with custom formulas.
You can also combine data from multiple SQL queries, Jira accounts, or apps.

3. Load data and schedule updates
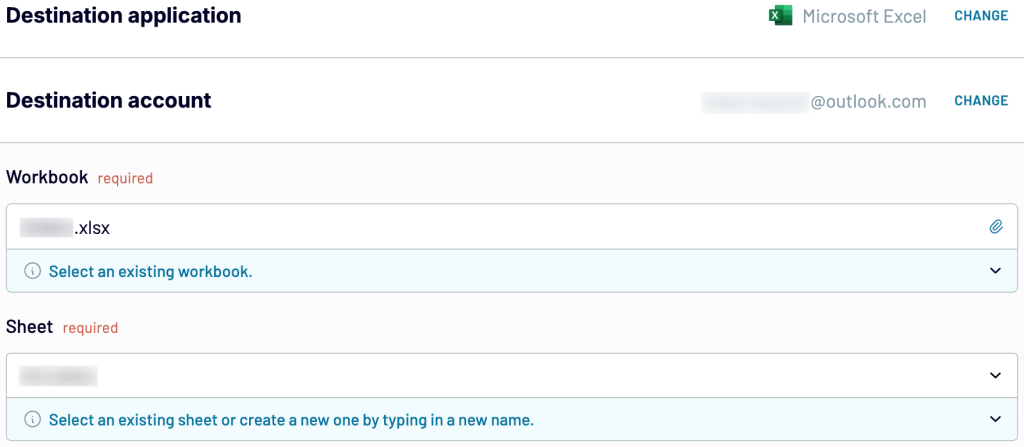
If your data looks accurate, move next to connect your destination app. For example, in Excel, you’ll need to select an existing workbook and either choose an existing sheet or create a new one by typing in the name.

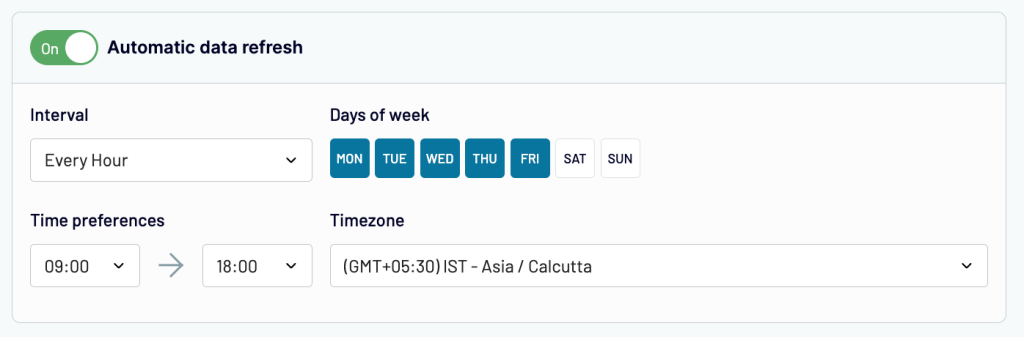
Toggle the Automatic data refresh button and schedule your exports. You can specify an update interval from monthly to daily and even every 15 minutes (that will make your report near real-time).

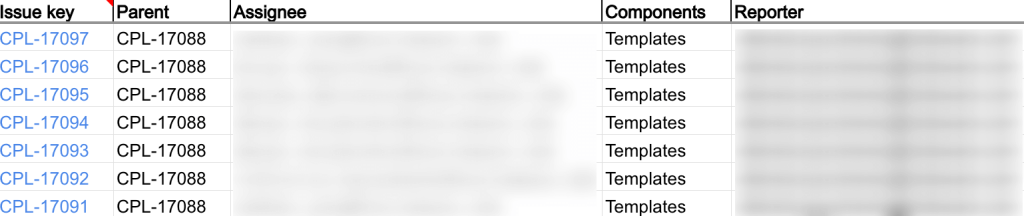
Save and run the importer to load your data to the destination. Here is what the exported Jira issues will look like in Excel:

Automate exports of Jira issues with Coupler.io
Get started for freeHow to export issues from Jira manually
Exporting issues from Jira using its native features involves pretty simple steps.
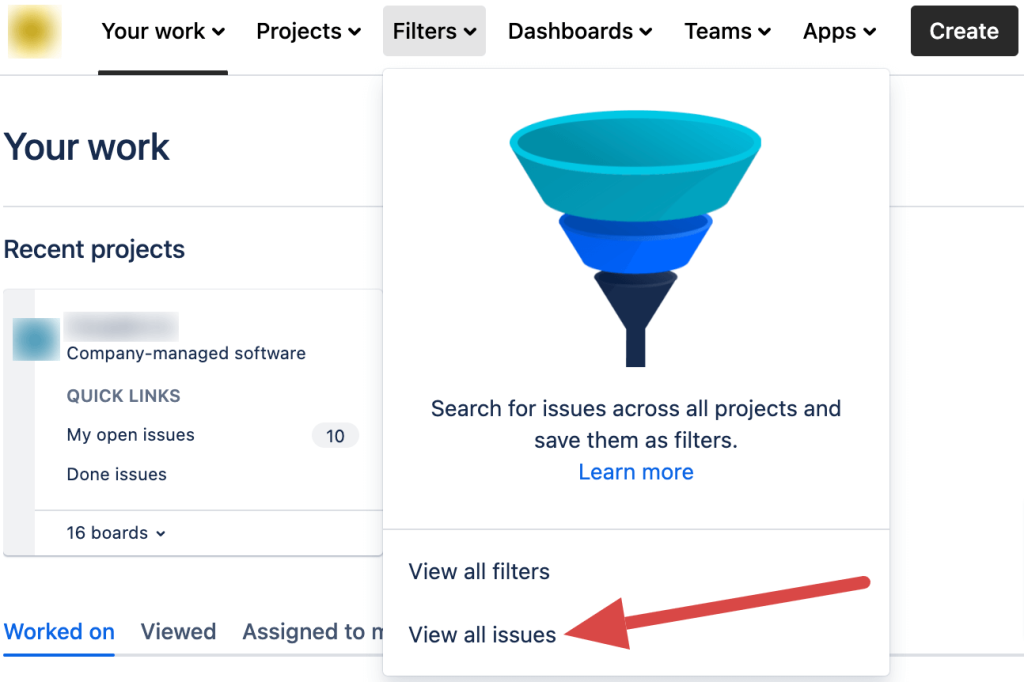
Once you have logged in to your Jira account, select the Filters option from the panel on the top of your screen. Then, click View all issues.

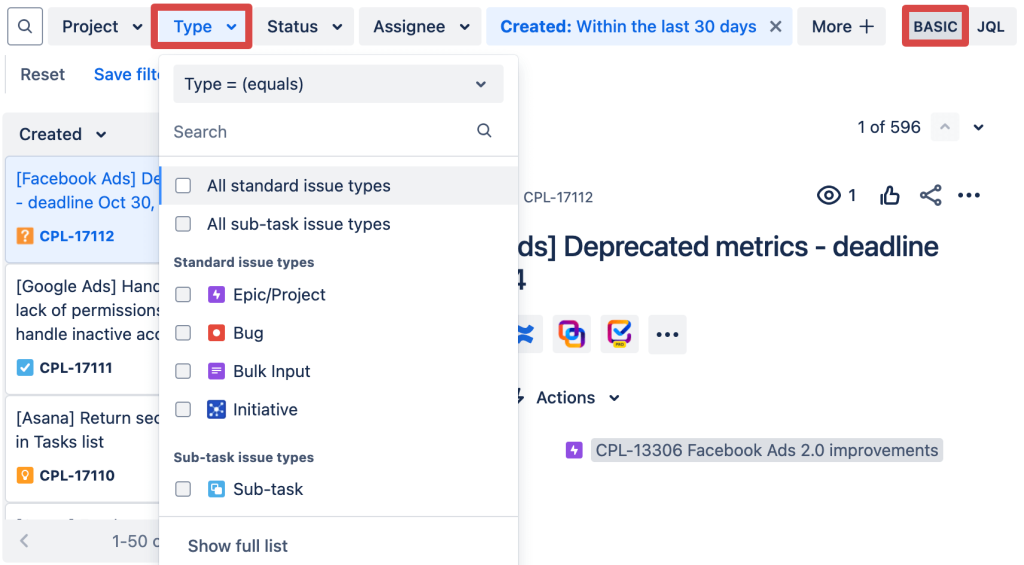
Next, a new search window opens up. You have two modes for issue search: Basic and JQL. If you choose the Basic option, you can use various filters. For example, the Type filter allows you to select bugs, epics, stories, or tasks manually.

Using JQL mode, you can enter Jira’s built-in JQL queries in the search bar to get the issues you want to export. If you are searching for a query that doesn’t exist, you can create your own.
In the example below, we’ve entered a query to retrieve issues created in the last 30 days.

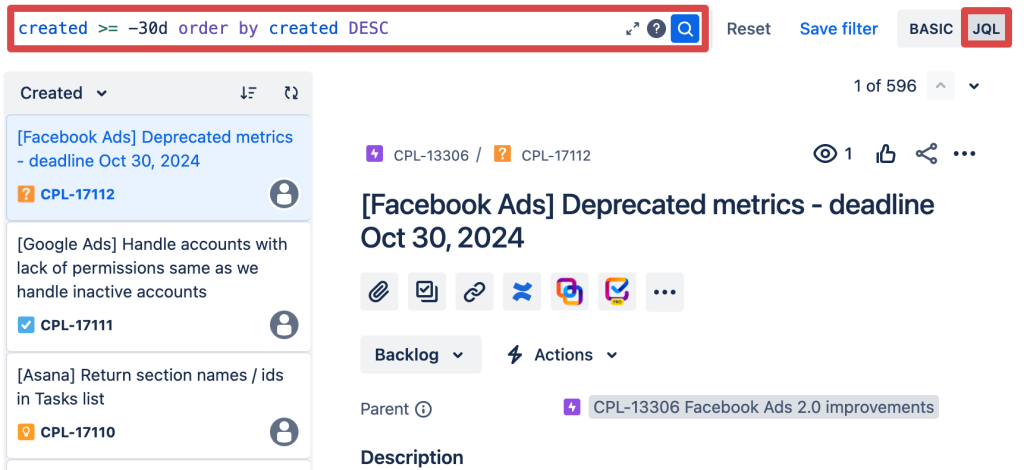
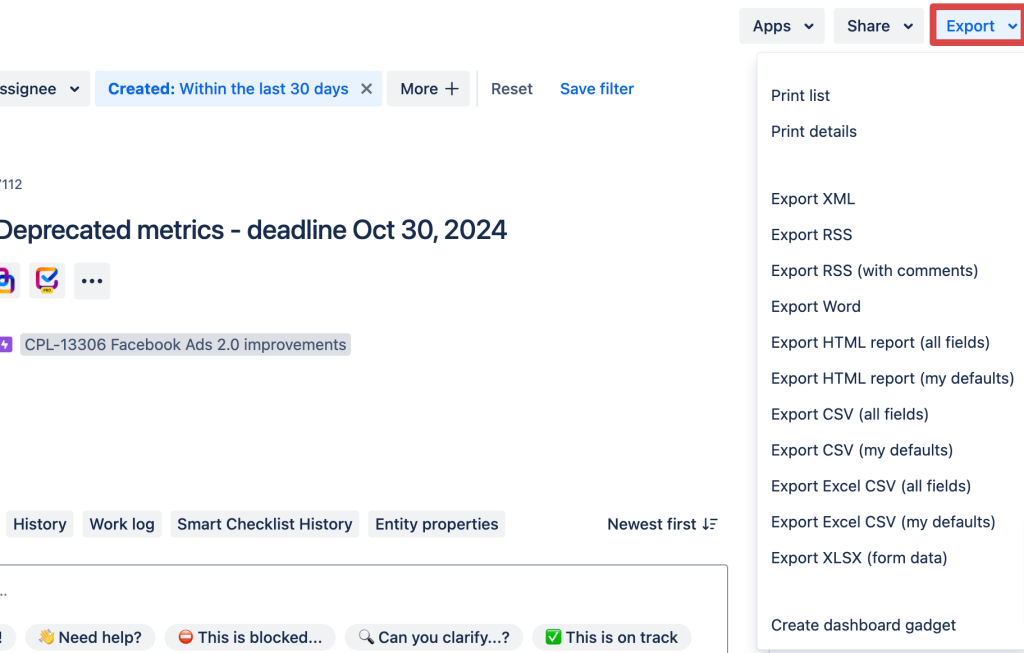
Jira’s Export drop-down in the top right menu allows you to pull data in various formats, including XML, Word, HTML, and Excel.

To finish, choose the required format, download the file with your issues, and you’re all set.
Limitations when exporting Jira issues through the UI
The native option to export Jira issues poses a few limitations. The main problems are the following:
- Jira does not export all the content from Jira issues. The issues that have been exported natively lack data that might be critical for your business, such as comments and attachments.
- Using Jira’s built-in functionalities, the maximum number of exported issues is 1000.
- Jira does not support issue exports to PDF. The supported formats are XML, Word, CSV, and HTML.
Why export issues from Jira
Here are a few reasons why teams may need to export Jira issues:
- Sharing information with external people: It is pretty common to collaborate on your projects together with external users in your Jira instance. Clients, partners, or stakeholders can create new issues, prioritize them, share ideas, and provide feedback. Keeping them aware of the objectives, requirements, needs, and constraints of a project allows them to bring up issues or concerns about addressing all of them.
- Analyzing data in spreadsheets and external tools: Exporting Jira issues comes in handy when you need to manipulate this raw Jira data in Excel, or other data analysis tools. For example, you can use the Jira Google Sheets integration or connect Jira to Looker Studio to visualize data and generate custom reports. Although Jira helps stay on top of different projects and team needs, it lacks some features that make spreadsheets or data visualization tools great. Getting actionable insight from raw Jira data holds the key to some key questions: Is your team tracking toward their key performance indicators? Is the project likely to be completed in due time?
- Migrating issues between Jira instances: It’s necessary to export issues from Jira when you want to move data from one Jira instance to another. For example, your business might need to merge the separate instances (Jira Cloud sites) it has for different purposes and departments. Another example is when you need to migrate your Jira instance from the cloud to a self-hosted server or vice versa.
- Analyzing compliance with SLAs: Customers often ask for statistics about their service-level agreements (SLA), which define contractually agreed-upon terms for services, including uptime and support responsiveness. Exporting issues to spreadsheet forms (e.g. Excel) or searching for better reporting alternatives in the Atlassian Marketplace than Jira is common when you want to assess how you are performing against SLAs.
Frequently asked questions about exporting issues from Jira
How to export Jira issues to Excel
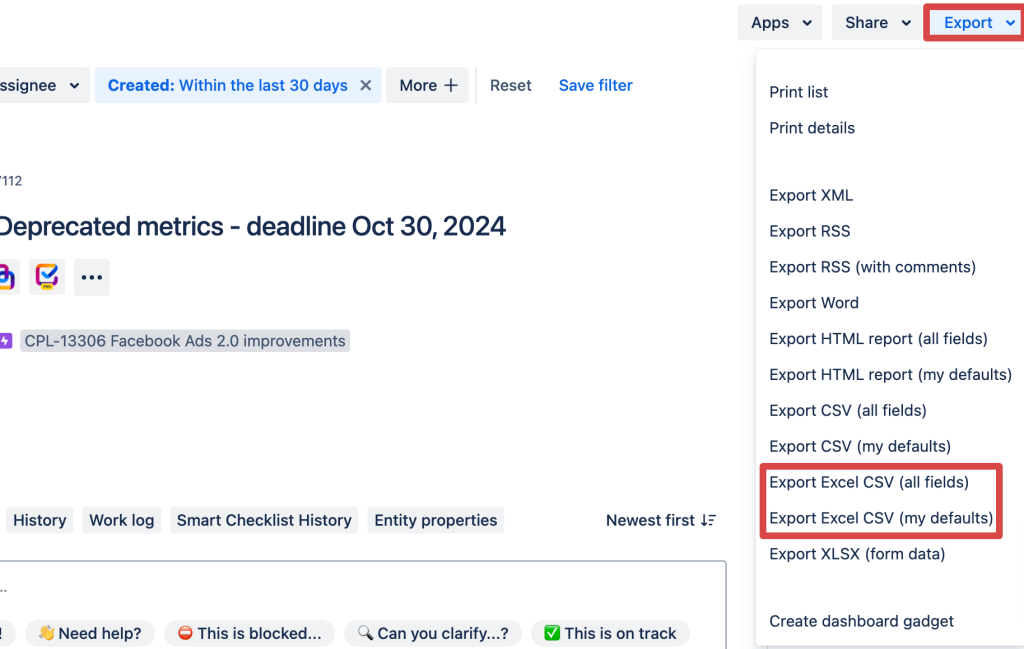
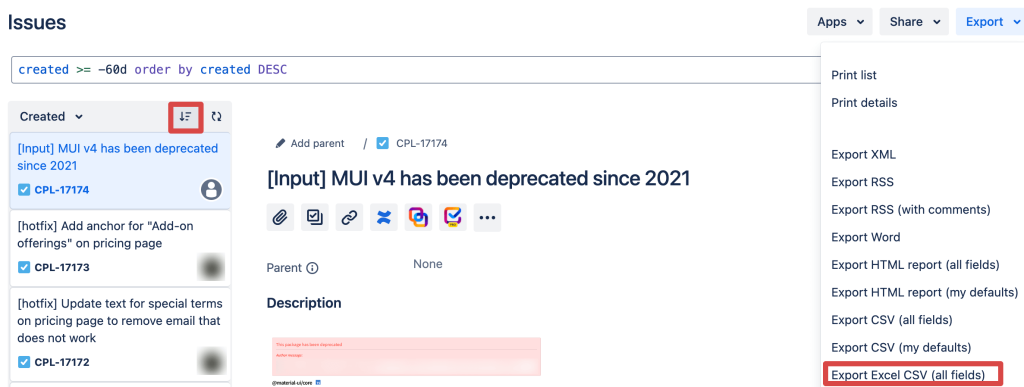
The basic method of Jira export to Excel is via the Export Excel CSV button. Once you have found the issues you want to export, either through the JQL or Basic option, click Export and Export Excel CSV (all fields) or Export Excel CSV (my defaults).

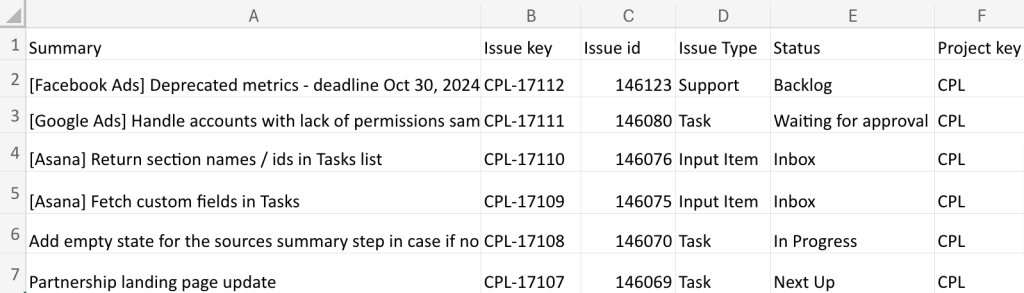
The CSV file is loaded as an Excel spreadsheet. Once you open the downloaded file, here is what the exported data will look like:

However, you can also automate exports of issues from Jira to Excel with Coupler.io. Just click the Proceed button in the form below and set up the connection just like we explained above.
Export Jira issues with comments
Issues with all their comments can’t be exported through Jira’s built-in features. Instead, you can do this via the Jira API with the help of Coupler.io. No coding is required but we recommend you get yourself familiar with the Jira API documentation. Select the destination app where you want to export issues with comments then click Proceed in the form below:
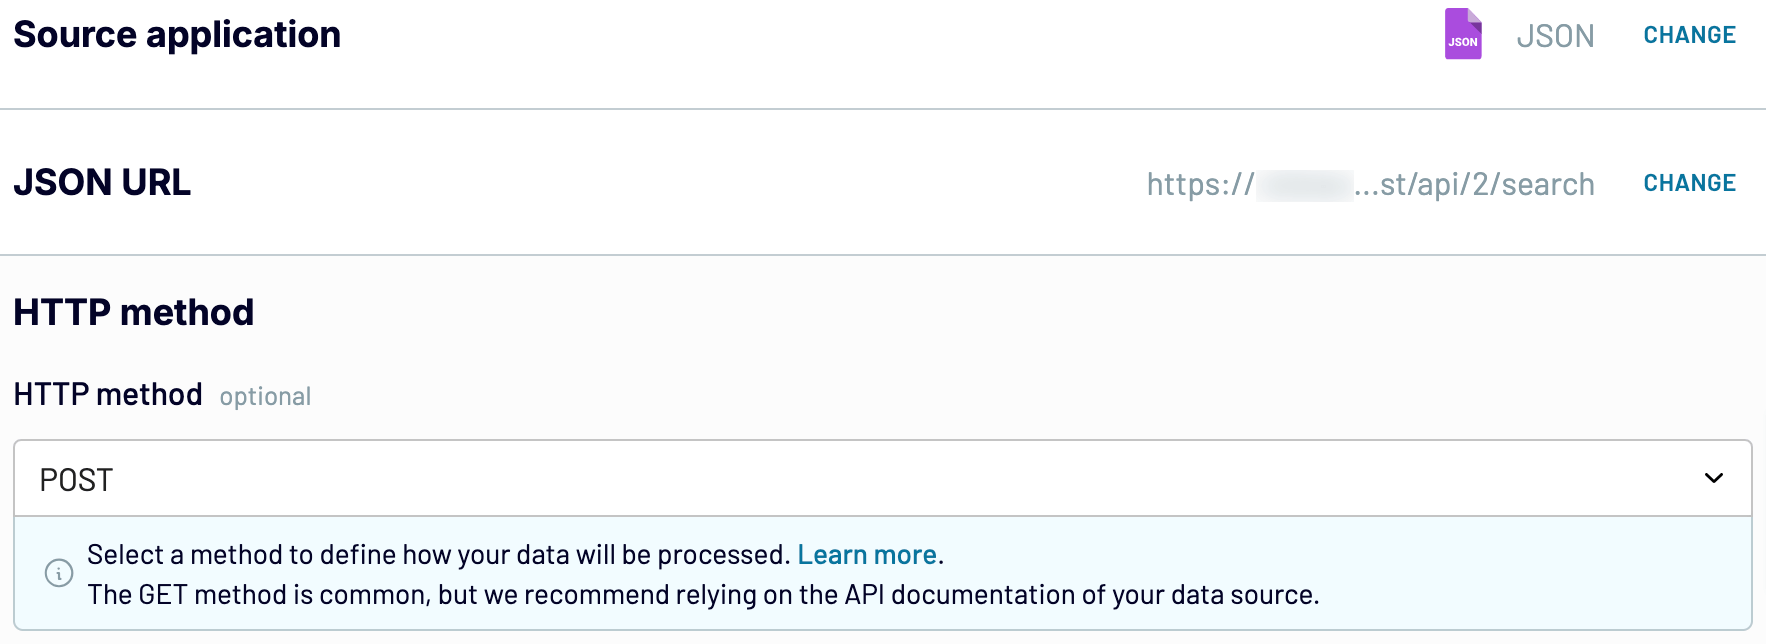
- Insert the URL of your Jira endpoint. Then, select POST as the HTTP method and proceed.
https://{site-url}/rest/api/2/search

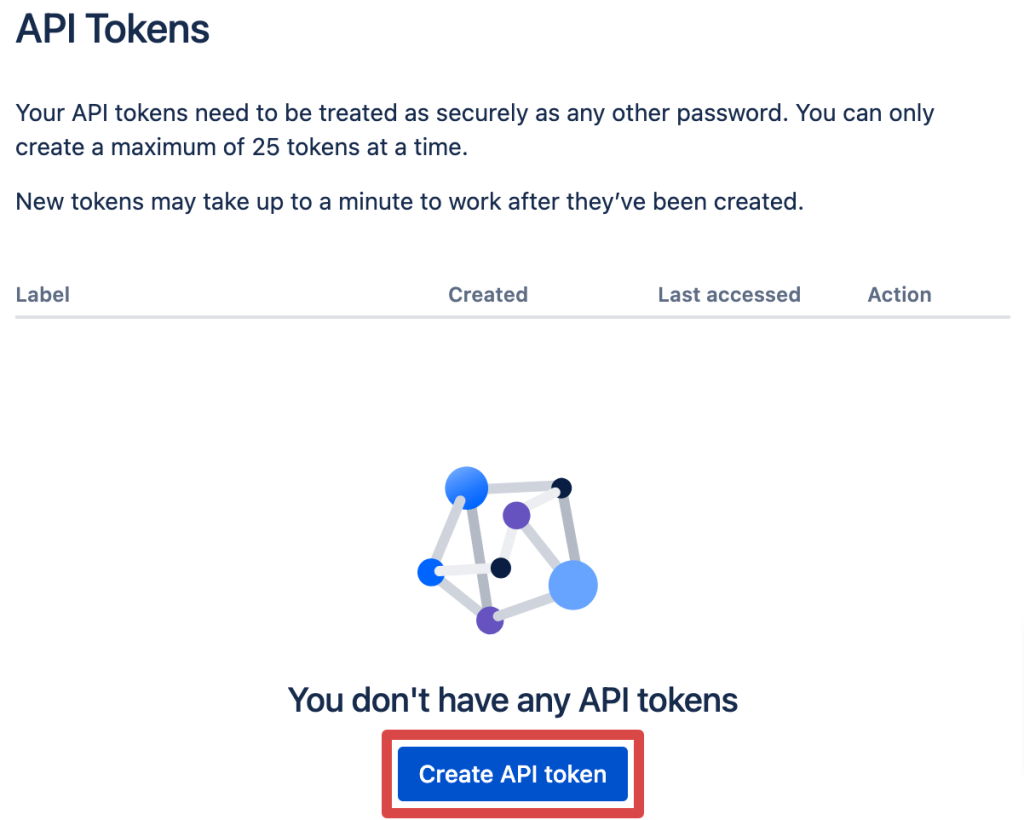
- Next, you’ll have to create an API token following this link.

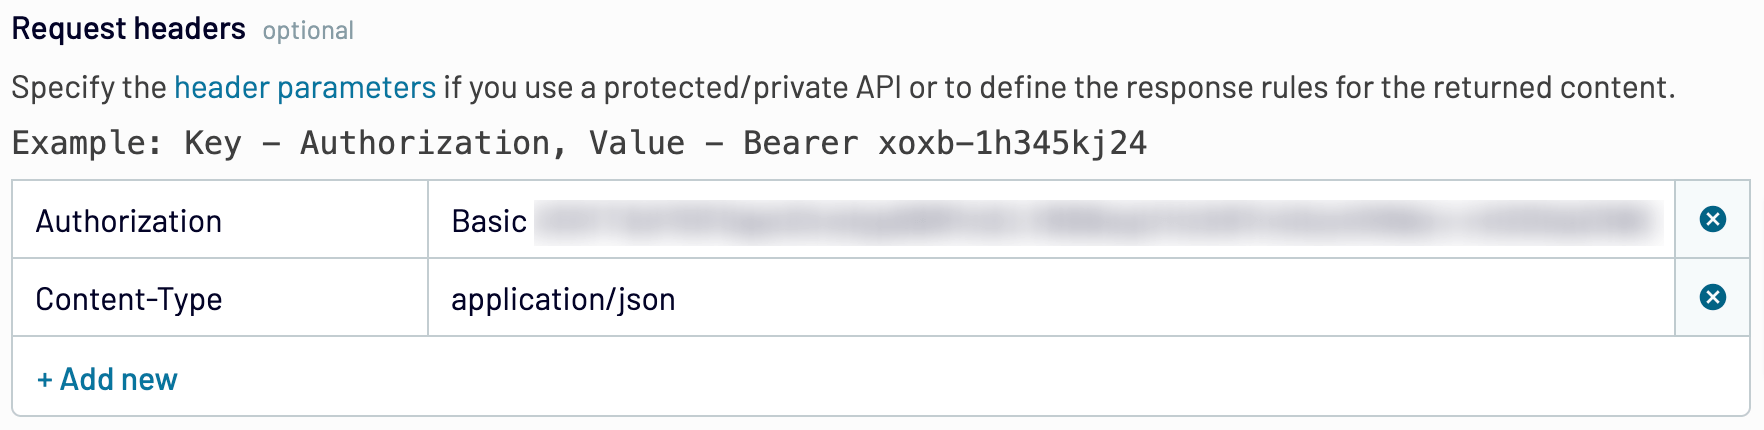
- Once created, copy and encode your token to Base64 format using a dedicated tool like base64encode.org or base64encode.net. Copy the encoded API token and come back to Coupler.io to specify the following HTTP headers for your JIRA request:
Authorization: Basic {encoded-api-token}
Content-Type: application/json

For example, we filter the issues with comments that have been created over the last 30 days using the following query:
created >= -30d and (comment ~ 'keyword*' OR comment !~ 'keyword*')
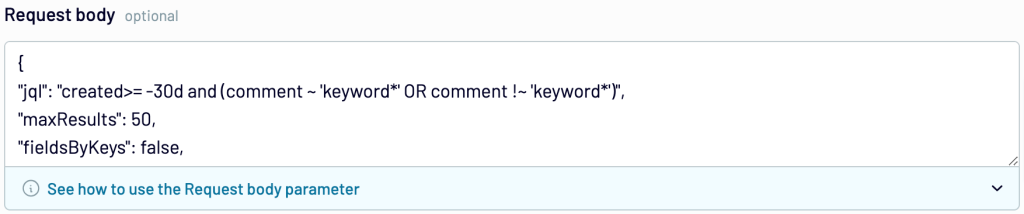
- To narrow down the number of exported fields in Excel, namely view information relevant to comments, add the following lines in the Request body:
{
"jql": "created>= -30d and (comment ~ 'keyword*' OR comment !~ 'keyword*')",
"maxResults": 50,
"fieldsByKeys": false,
"fields": [
"comment",
"attachment",
"issuelinks"
]
}
Note that the maximum number of returned results can’t exceed 1000. In addition to the comment value, we added the attachment as the process for exporting issues with attachments is similar to that of exporting comments.

- In Path, type
issuesto get the content under issues from the JSON response.


- Preview your data and transform it if needed. Not all of the columns might be useful for you. So, choose which comment-related columns you would like to keep and hide the rest of them:


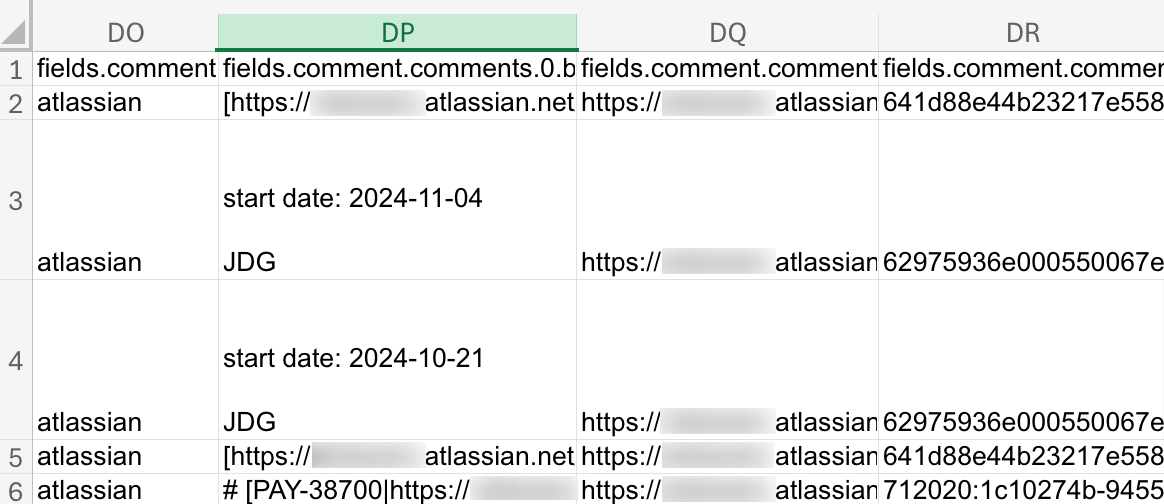
- Just like in the previously described Coupler.io flow, configure your destination app connection to load data. Ultimately, toggle the Automatic data refresh button, schedule your exports, and run the importer. Here is what the exported issues with comments will look like in Excel:

Export issues with attachments from Jira
Since Jira issues with attachments also can’t be exported natively, we’ll use Coupler.io as well. The process is similar to exporting issues with comments. However, you need to take into account the two following points:
- The JQL query in Jira that filters the issues with attachments is different:
created >= -30d and attachments is not empty order by created DESC
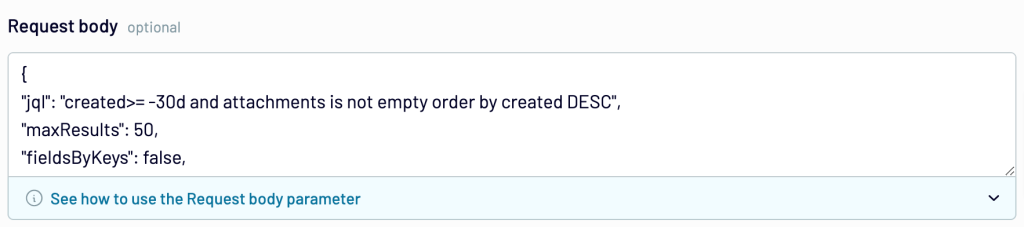
- The Request body with the above JQL query will now look like this:
{
"jql": "created>= -30d and attachments is not empty order by created DESC",
"maxResults": 50,
"fieldsByKeys": false,
"fields": [
"comment",
"attachment",
"issuelinks"
]
}

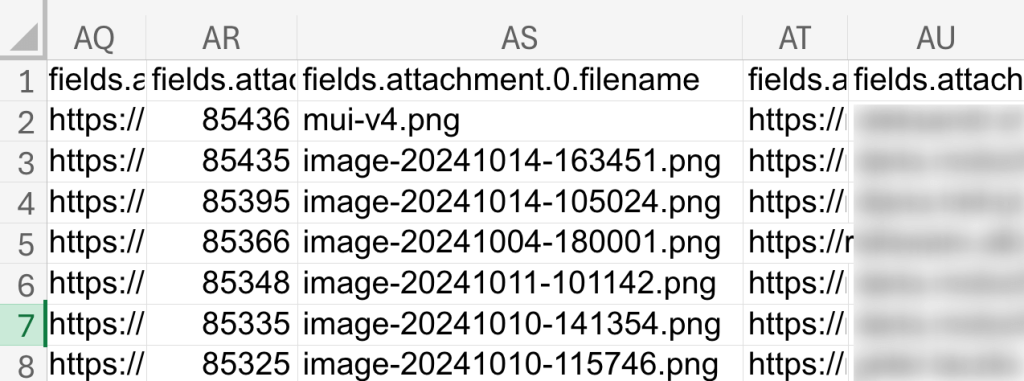
Here is what the exported issues with attachments will look like in Excel:

Export linked issues from Jira
Jira offers you the option to export linked issues through its interface. The following JQL query will let you view all types of issue links:
issueLinkType IS NOT EMPTY

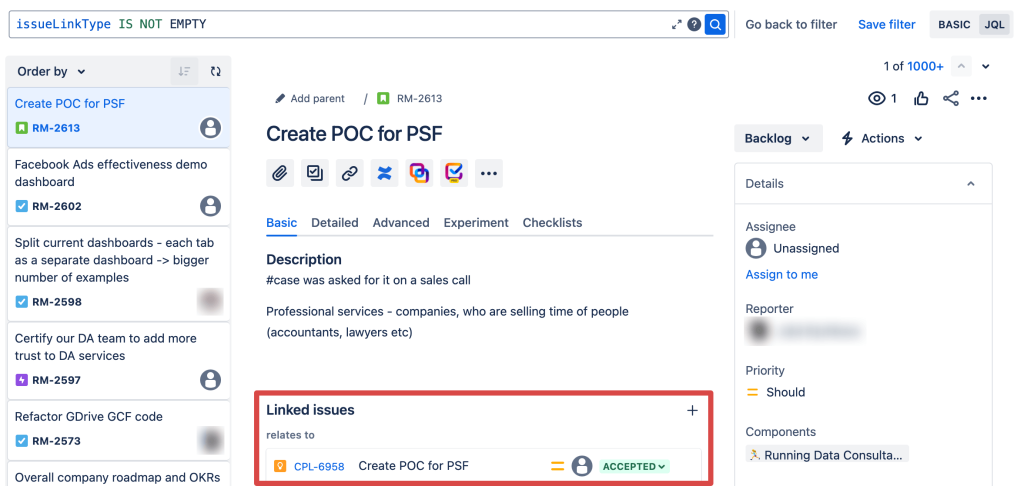
In the above picture, we view the “relates to” issue link: Issue RM-2613 relates to CPL-6958. You can also search for issues that use specific types of links. For example, the following query allows you to view blocks.
issueLinkType in ("blocks")

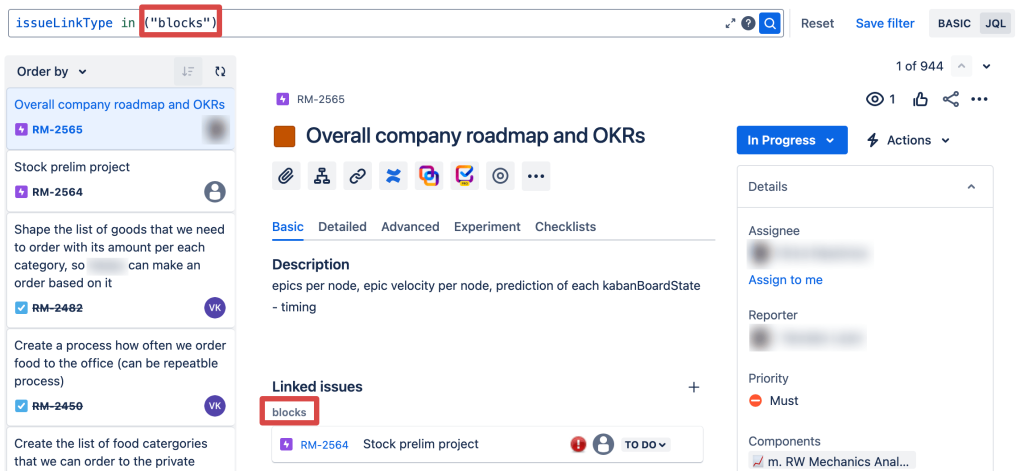
As shown in the picture, issue RM-2565 blocks issue RM-2564.Whether you want to load all types of issue links or specific ones, choose to Export your data and select the format required. This is what the exported issue links will appear in an Excel CSV file:

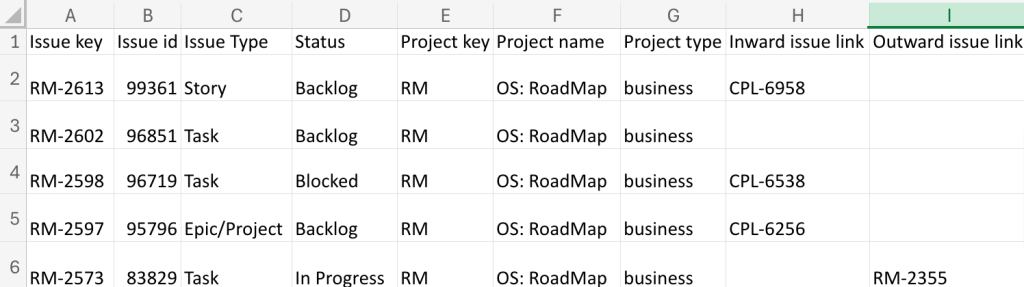
In the image above, the column Inward issue link demonstrates that an issue affects another issue (e.g., CPL-6958 affects RM-2613). The column Outward issue link shows that an issue is affected by another issue (e.g., RM-2355 is affected by RM-2573).
How to export all issues in an epic from Jira
Jira offers the option to export all issues in a specified epic through its interface. Below, we identify two cases, depending on whether you want to view all issues in one epic or find all epics with their issues.
Exporting all issues in one epic manually
To display in Jira all the issues in a specific epic, e.g. stories and tasks, navigate to the advanced search and type in the following JQL query:
issuekey=X or parent=X
Where X is the issue key (in our example, X = RM-2610).

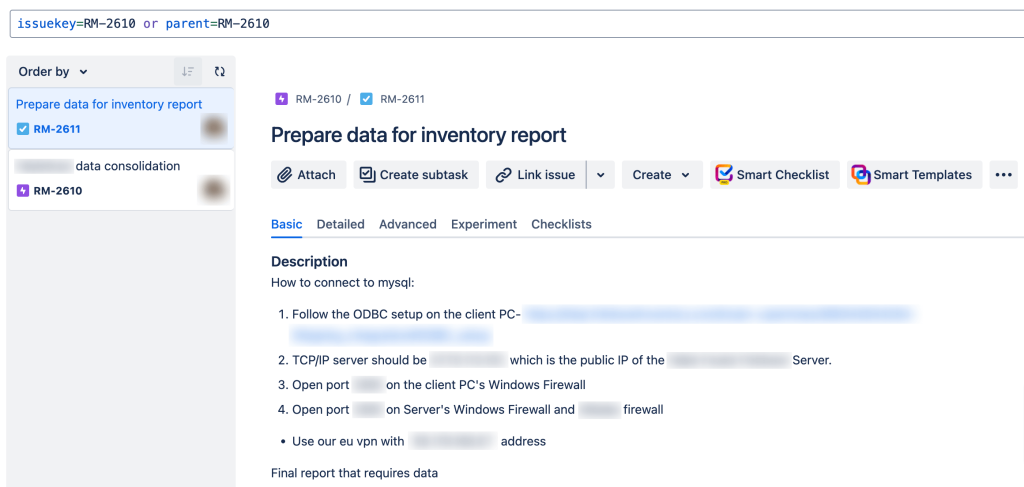
The image shows the issue key (RM-2610) with its child issue RM-2611.
Finally, download the epic with its issues using the standard Export feature described previously.
Exporting all issues from all epics manually
To display in Jira all epics with their issues, navigate to the advanced search and type in the following JQL query:
issuetype=epic or (issuetype=story and parent IS NOT EMPTY)

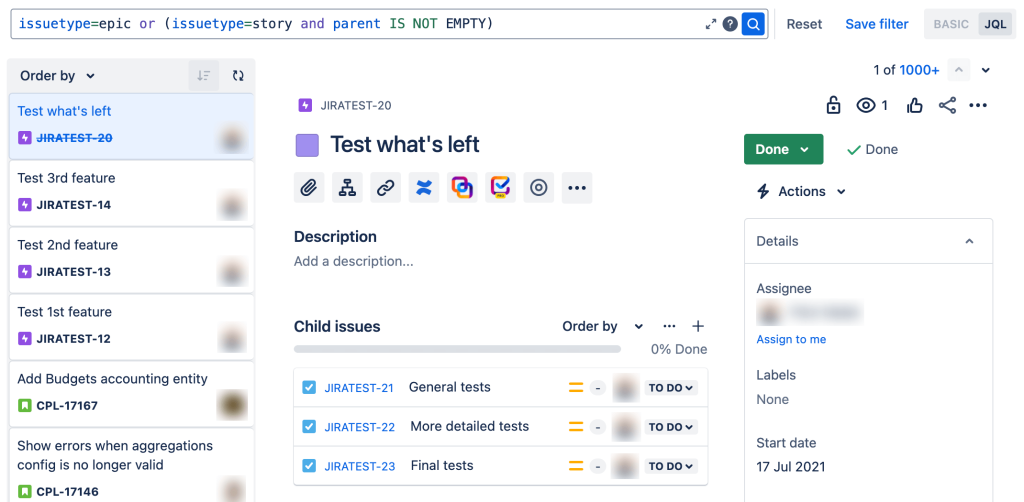
The image above shows the epic JIRATEST-20 with its child issues (JIRATEST-21, JIRATEST-22, and JIRATEST-23) as well as other epics.
As in the previous case, download the epics using Jira’s built-in Export functionality.
Jira – Export more than 1,000 issues
Jira sets a default limit of 1,000 rows on the number of issues that can be returned in the issue navigator. Therefore, when exporting to Excel manually, JIRA will only export the first 1,000 issues.
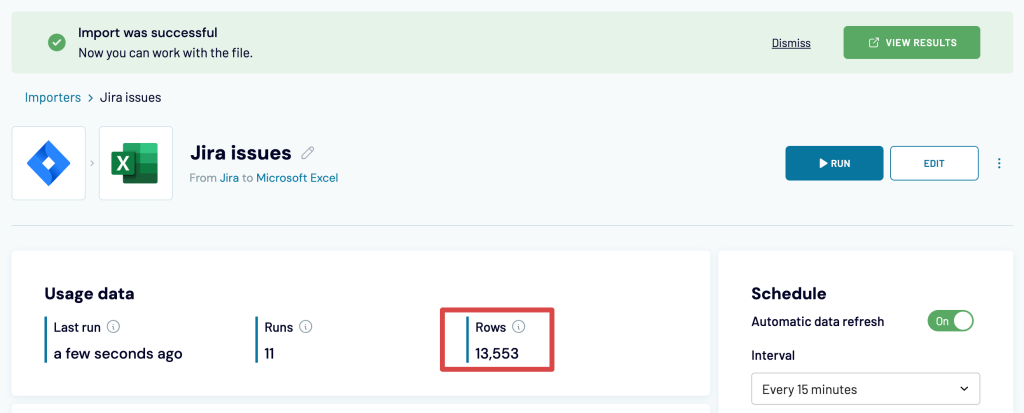
Coupler.io can easily help you with this challenge, eliminating the need to manually repeat the above-mentioned steps. The process is similar to that described in this section. In our example, we filter the issues that have been created over the last 60 days:
created >= -60d order by created DESC

Follow the same workflow as before to import your issues into Excel and see how the limitation is overcome. For instance, in the picture below, Coupler.io returns over 13,000 issues!

Exporting more than 1,000 issues manually
The following workaround will help you deal with this issue.
- Run a search on the issue navigator using the proper JQL functions to get all the issues you need to export. We would also recommend using the Order by option to sort the results in an ascending or descending order, as they might appear messy.
- Export the first 1,000 issues using the standard export feature. Let’s choose all fields, for example.

- For the next thousand issues, right-click on the same option above and open it in a new tab. You should get a URL string like:
https://railsware.atlassian.net/sr/jira.issueviews:searchrequest-csv-with-bom-all-fields/temp/SearchRequest.csv?jqlQuery=&atl_token=ff********************************_lin&tempMax=1000
- Append the &pager/start=1000 at the end of the URL string to instruct JIRA to export from index 1001 and above.
- Repeat the previous step for exporting the next batch of 1,000 issues, setting the index value to 2,000 (and so forth).
- Open the exported CSV files and manually consolidate them if necessary.
Manual vs. automated way to export issues from Jira
As we have discussed, exporting issues from Jira can be done in two ways: manually and automatically. JQL functions in Jira or custom ones boil down complex logic and make it easy to search for issues by multiple criteria. This method is good for one-time exports, for example, if you need to move the data to another software.
However, if you need to export data at a custom schedule, Couple.io’s automation is the way to go. Furthermore, its ability to connect to Jira’s REST API allows you to fetch any type of data from Jira using the multitude of JQL functions. For example, you can use this tool to export Jira issues with comments and attachments – critical data that cannot be exported using native options.
Get started with Coupler.io for free and let your Jira issue exports run like clockwork!
Automate Jira reporting with Coupler.io
Get started for free