What are the purposes you might have to extract data from Excel? Some users need to load it into a database to create a backup copy. Others want to simply transfer data to another workbook or spreadsheet. Based on the use case, you can extract your data in different ways. Let’s explore each of them from manual downloading to automated export on a schedule.
What are the main methods to extract data from Excel?
In Excel, data extraction is usually the process of extracting specific portions of data from a larger dataset. There are different methods that allow you to do this.
- Data extraction automation. You can connect your Excel workbook to another spreadsheet, database, or BI tool using Coupler.io. This integration solution can extract data from Excel automatically according to the schedule you set.
- Manual extraction. In this case, you manually select portions of data that you need to extract, copy them, and insert into another spreadsheet or app.
- Filtered data extraction. When you use this method, you apply a filter that extracts the necessary data according to your criteria. If you opt for the advanced filter, then it can also insert the filtered information into a new sheet.
- Functions and formulas. As an alternative to filters, you can extract specific data from a spreadsheet using Excel’s functions and formulas. The advantage of this method is that formulas can update your filtered information automatically if there are changes in the main dataset.
#1. How to extract data from Excel automatically
If you need to extract data from Excel often, then automation is a reasonable choice as it allows you to save time, streamline processes, build self-updating reports and dashboards, and more.
Coupler.io allows you to extract data automatically on a schedule to several destinations represented by:
- Spreadsheet apps (Excel, Google Sheets)
- Data warehouses (BigQuery, PostgreSQL, Redshift)
- BI tools (Looker Studio, Power BI, Tableau, Qlik)
As you noticed, with Coupler.io, you can both extract data from Excel and to Excel which makes it an ideal solution for different business users.
To automate exports of your Excel data, select the destination app in the form below and click Proceed.
You’ll be offered to create a Coupler.io account. You can do this for free with your Microsoft account. Then configure your connection as follows:
1. Collect data
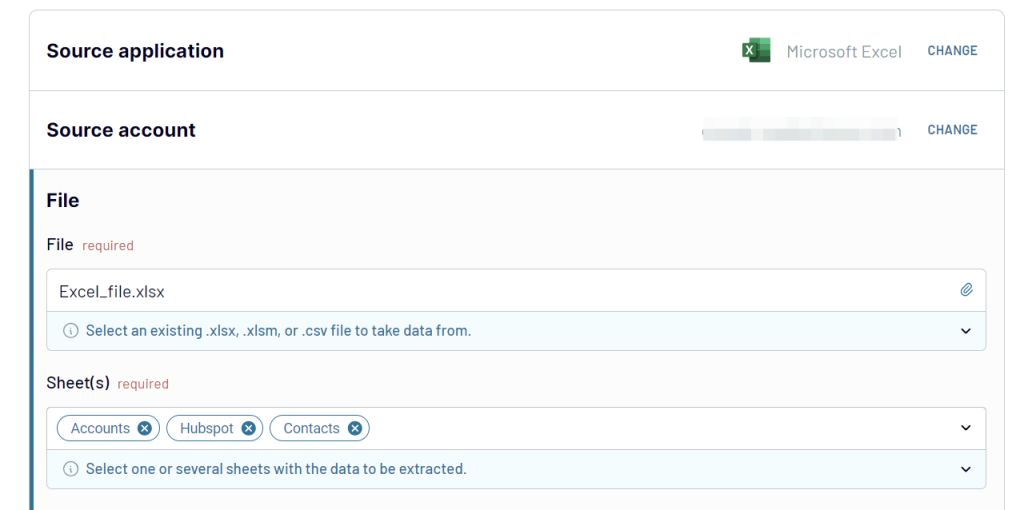
- Connect your Microsoft account. If you used it to sign up for Coupler.io, then it should be already connected.
- Then, specify the file and the sheet you need to extract data from. You can select multiple sheets – in this case, the data from them will be merged in one view.
If you want to export data from several spreadsheets to one place, click Add one more source and repeat the previous step for the new file. Alternatively, you can add other apps as additional data sources.
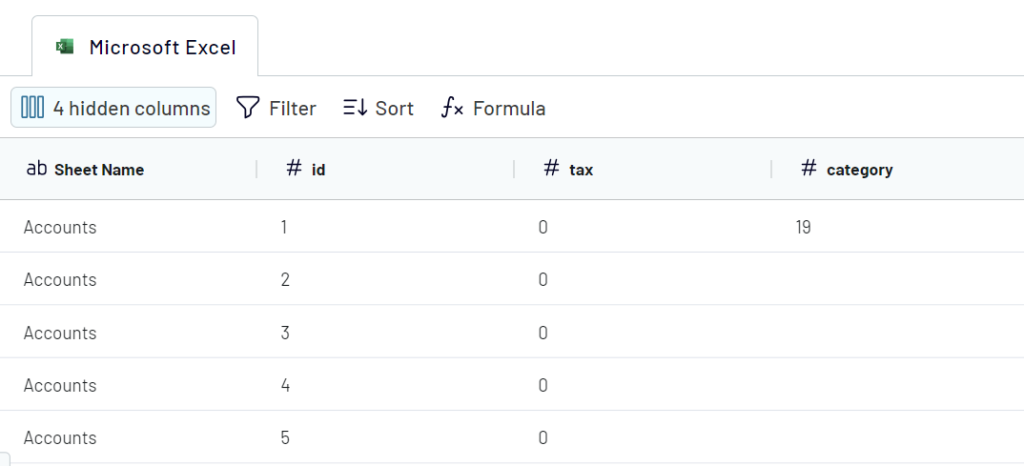
2. Organize data
The next step is to transform or organize your data. Here you can
- Rename, rearrange, hide, or add extra columns
- Apply filters and sort data
- Create new columns with custom formulas
3. Load data
Once you prepared the data you want to extract, go to the destination section. The setup flow will differ depending on where you want to load your Excel data.
- If your destination app is a spreadsheet, connect the app account and select a workbook and sheet
- If your destination app is a data warehouse, connect it and select a dataset and table
- For BI tools, the destination setup is not uniform, so check out our respective guides.
What is the same for any destination is the possibility to automate data extraction. Toggle on the Automatic data refresh and specify a schedule for the automated updates. You can have your data refreshed as frequently as every 15 minutes!

The final click is on the Run importer button which will initiate the integration and load your data to the destination.
#2. How to extract data from Excel manually
As we’ve already mentioned, manual extraction is the simplest extraction method. To use it, you need to open your dataset and select the data you want to extract.
For example, we have a comprehensive marketing campaign report, but we want to extract only the list of campaigns and their statuses. It will look like that:
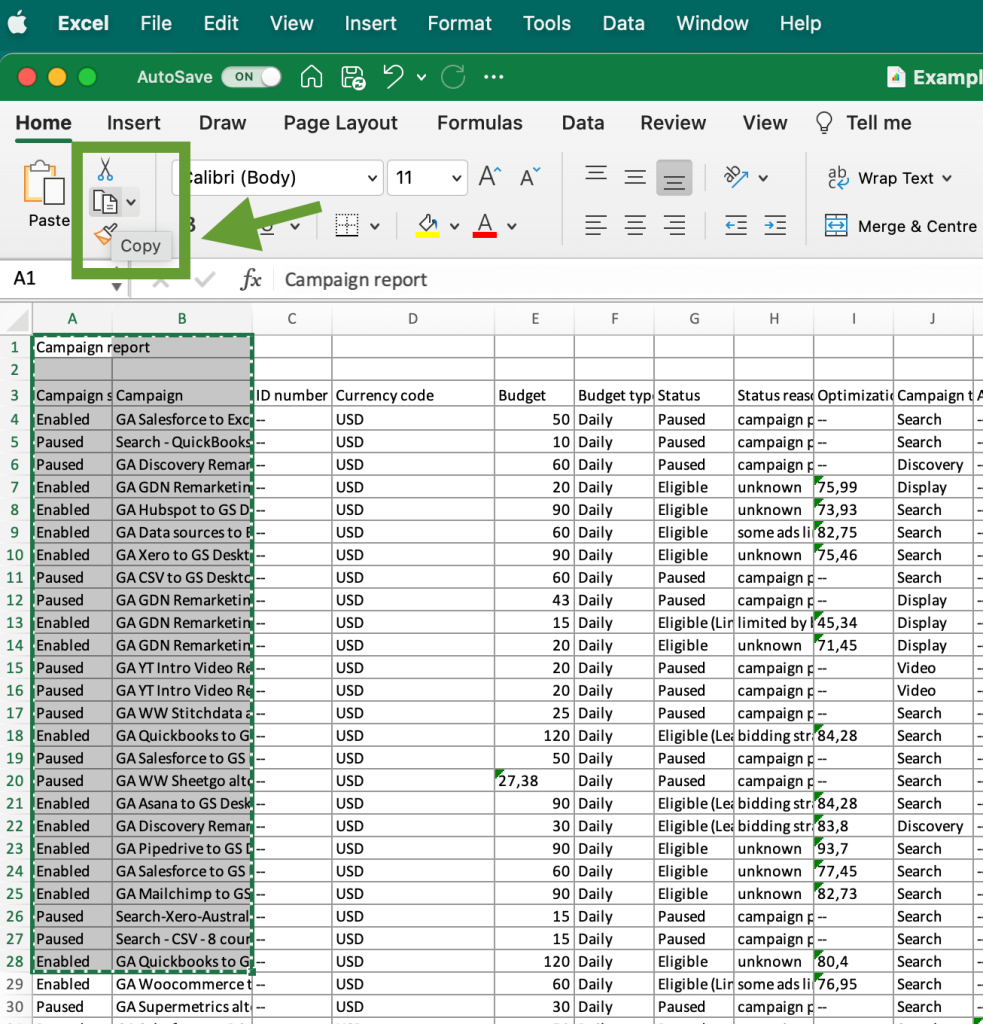
Then, copy the selected data and paste it into a new spreadsheet or another app where you need to work with that information.
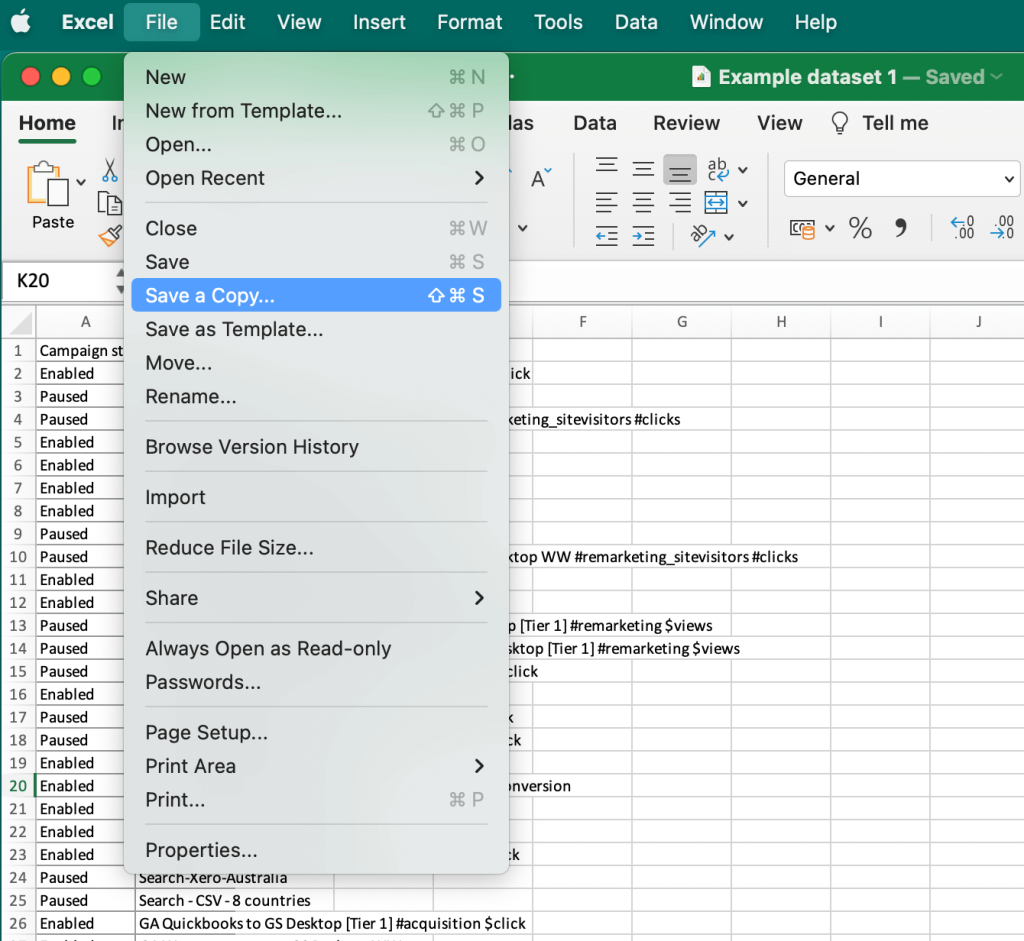
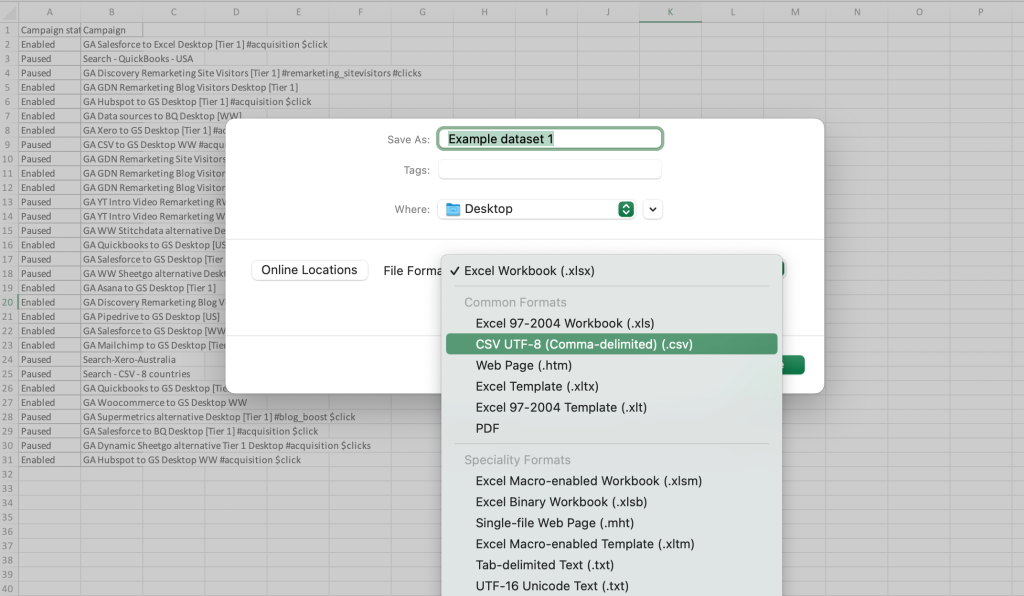
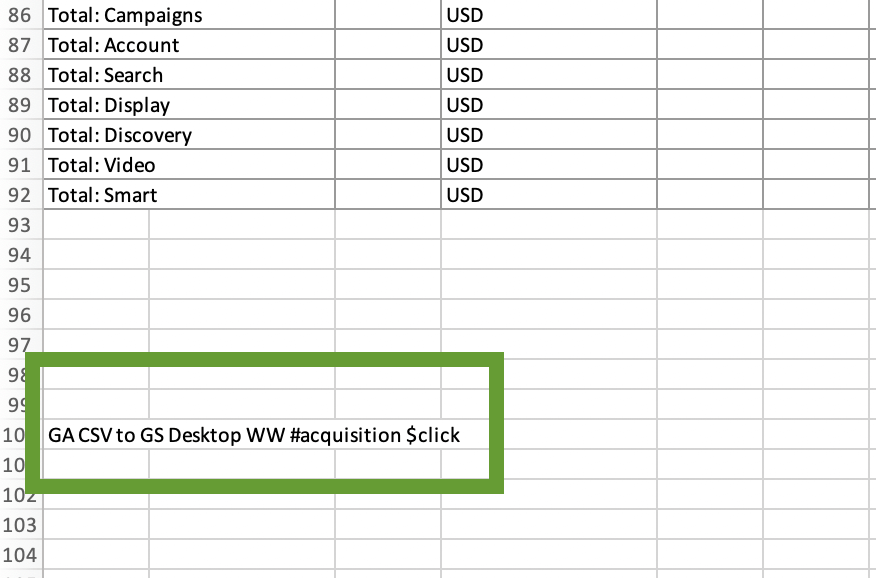
Alternatively, you can place the extracted data on a separate sheet and then export it in the CSV format. Then you will be able to import this CSV file into another app.To export data with this method, go to the File in the main menu, and then select Save a Copy.
In the next step, select the data format you need. In our example, it’s CSV, but you can find many other options on the list, including .TXT and PDF. Choose where you want to save the file and click Save. The CSV file will appear in the selected location.
#3. How to extract filtered data from Excel
Method 1 – How to use the basic filter and the FILTER function
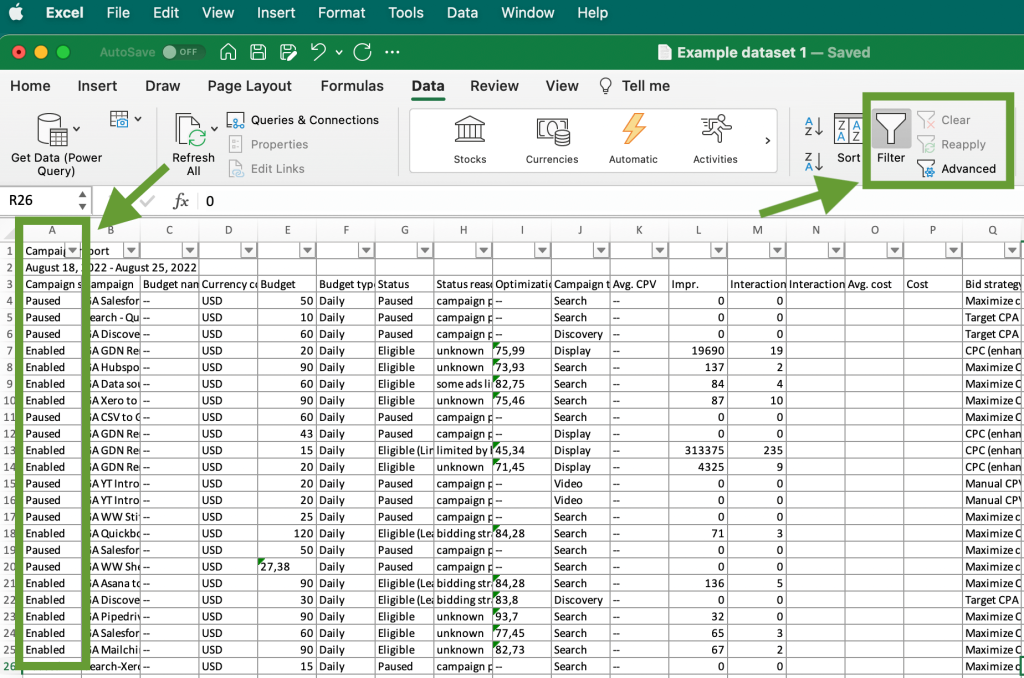
One of the simplest ways to extract filtered data from an Excel spreadsheet is to select the filtered information, copy it, and paste in a new worksheet or another app. Let’s see how to do this. In the screenshot below, you can see an example dataset listing ad campaigns with different statuses.
Let’s filter only Paused campaigns to transfer them to another sheet. Press Filter in the main menu and then click the drop-down arrow above the column with the filter criteria – in our case, it’s the column with the campaign statuses.
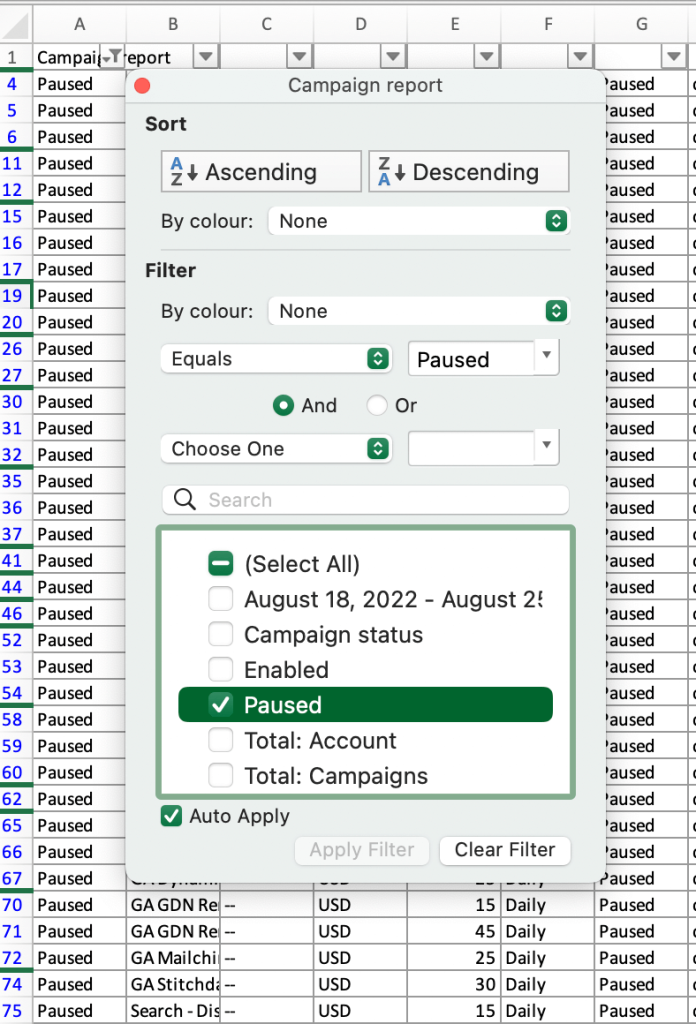
In the next step, we need to select the filter criteria. In this case, it’s the paused status. Then you can press Apply Filter or just close this window if the Auto Apply option is enabled.
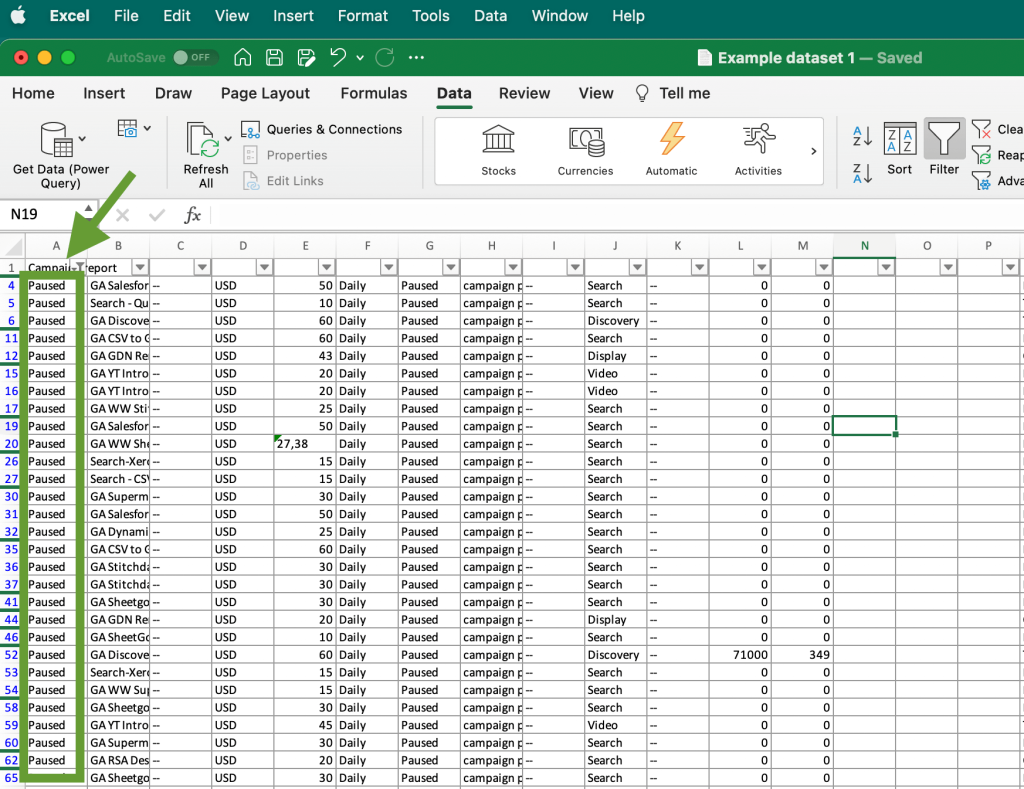
Once this is done, you can see the filtered data. Now we have only paused campaigns on the list.
Another option is to do this with the FILTER function. For this, you can use the following formula: =FILTER(range;include;[if_empty]). Here, “range” stands for the range of cells you want to filter, “include” stands for the value you are looking for. Instead of [if_empty] you can just put zero.
For example, =FILTER(A1:A65;E1:E65>20;0) will return the list of the campaigns with a budget over 20.
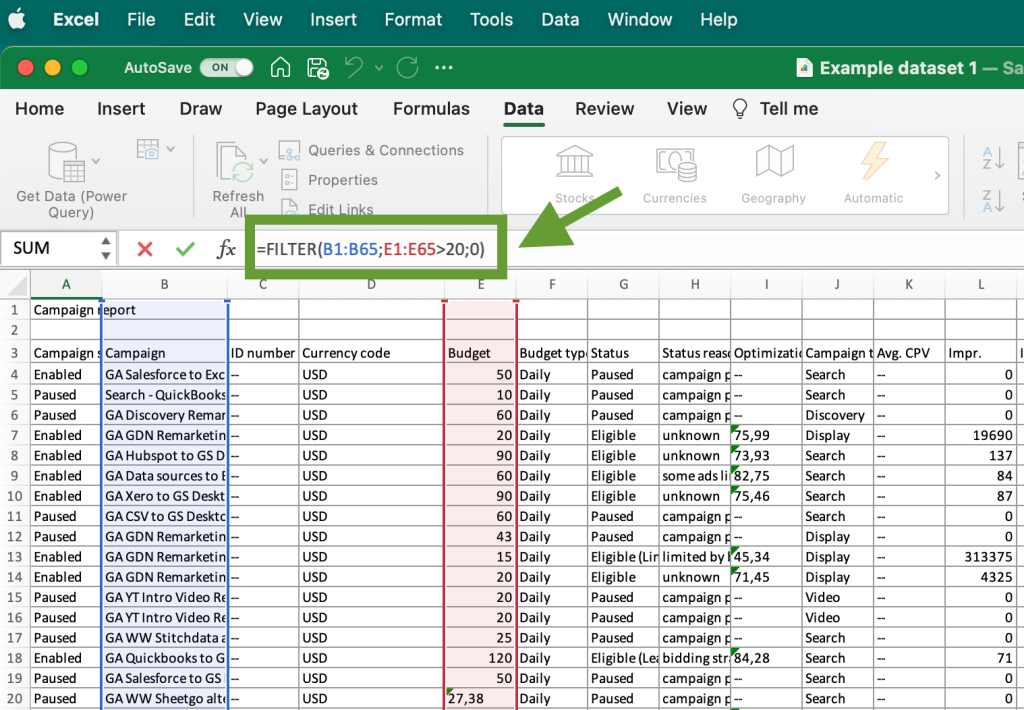
Here’s the filtered data:
The filtered data can be copied and pasted into a new spreadsheet or document. Alternatively, you can extract the filtered information in other formats using the instructions in the section above, How to extract data from Excel manually.
Method 2 – How to extract data from Excel based on criteria with advanced filtering
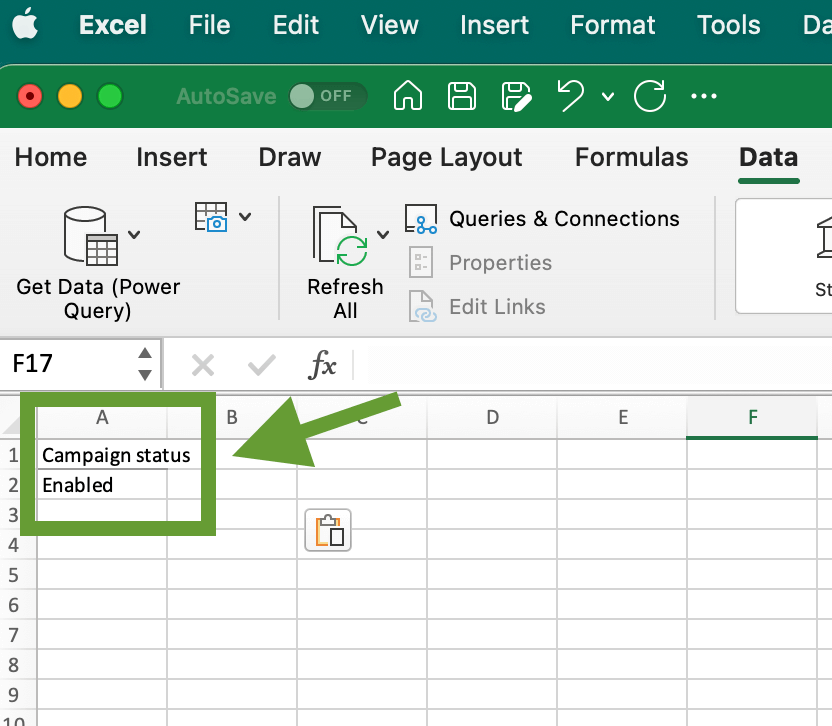
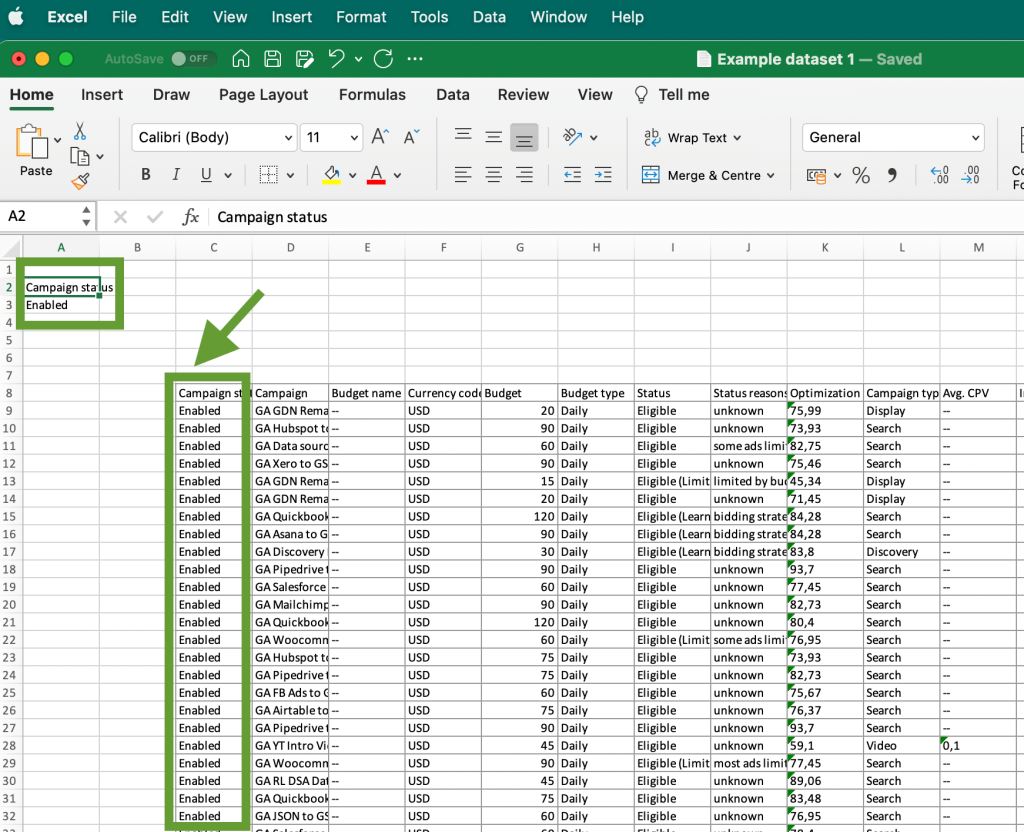
Another method is to use the Advanced Filter functionality. To do so, create a new sheet in the workbook with your dataset and place there filter criteria. In our example, we want to extract only enabled campaigns. So our filter criteria consist or label – Campaign status, and the desired value – Enabled. Here’s what it looks like:
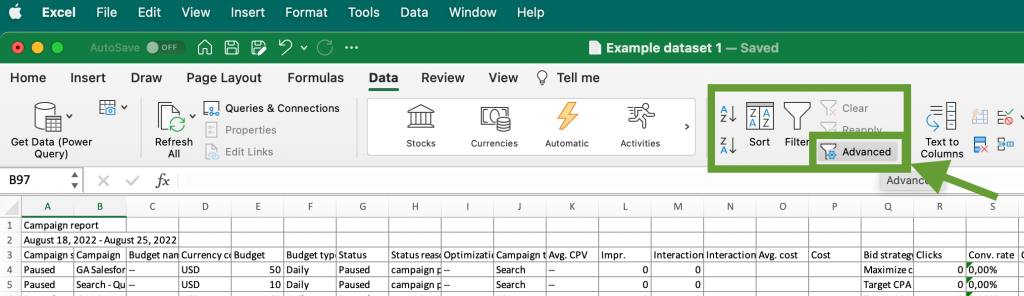
After this, go to the Data tab and click Advanced in the Sort and Filter section.
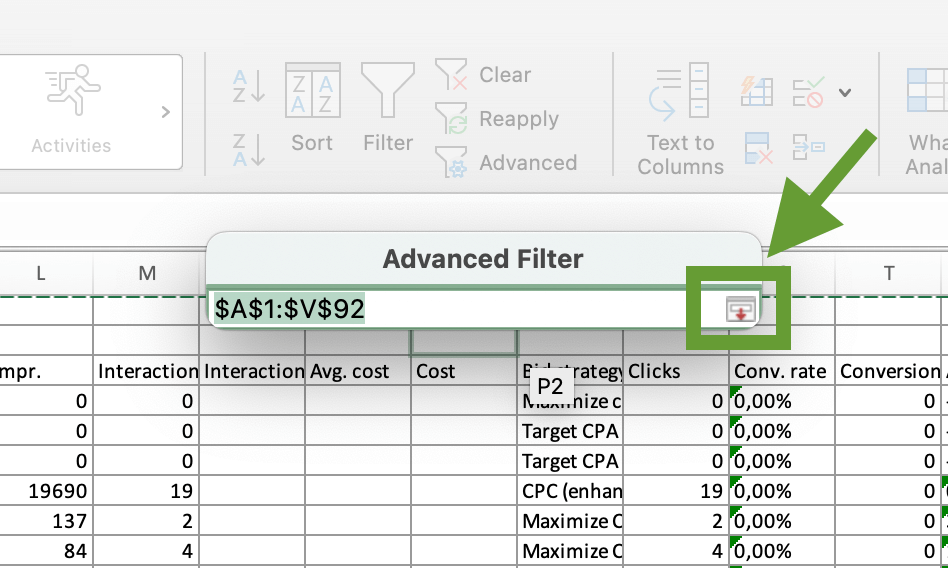
You will see the Advanced filter menu. Select Copy to another location, then click the arrow on the right of the List range field. Then, select your whole dataset. The cell range in the List range field will appear automatically.
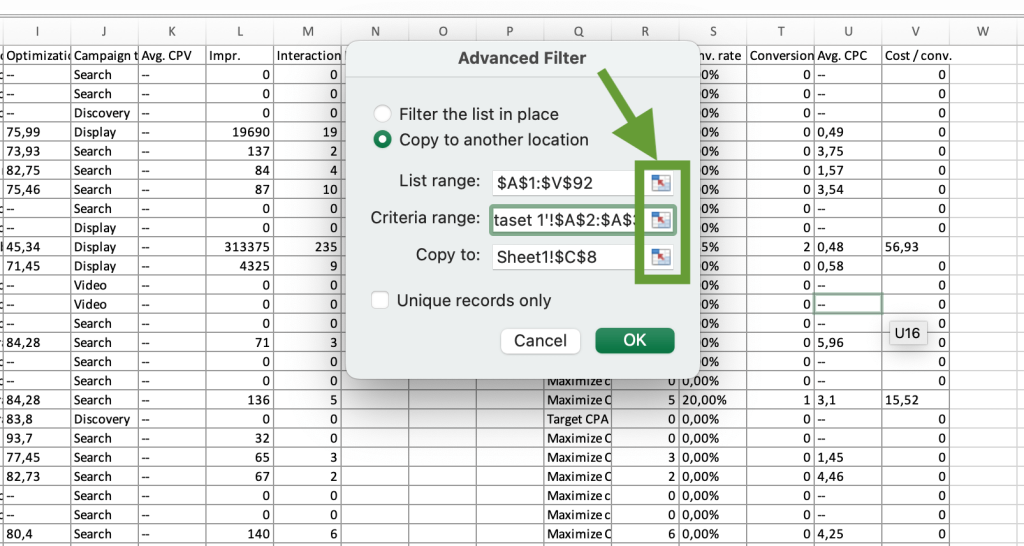
Then, click the down arrow on the right to return to the previous menu.
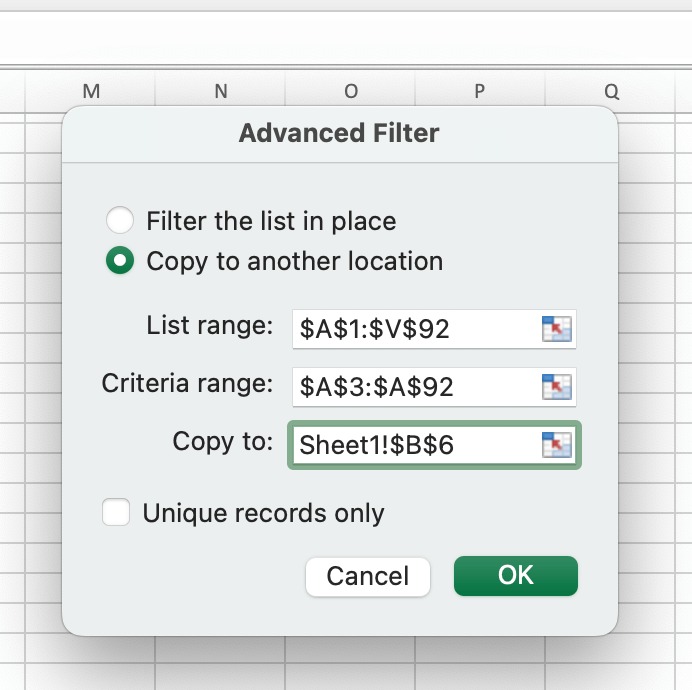
After this, press the arrow on the right from the Criteria range field. Switch to the new sheet where we already placed filter criteria and select the two cells containing the label and its value (in this example, Campaign status and Enabled).
Finally, click the arrow on the right from the Copy field and select any empty cell on the new sheet with the criteria. Then, press OK.
After this, the filtered data will be imported into the new sheet. In our case, we got the list of all campaigns that have the enabled status:
Now you know how to use the advanced filter and extract data from Excel based on criteria. But it’s worth remembering that data filtered in this way won’t be updated automatically when your dataset changes. However, you can achieve this if you filter data using functions and formulas instead.
#4. How to extract specific data from a column in Excel
There are several ways to extract specific data:
- Filtering data. You can check the instructions from the previous section to see how to filter data in Excel and transfer it to another place.
- Using functions. There are various functions that can help you with that, from VLOOKUP to such as LEFT, MID, and RIGHT. Which function to use, depends on the complexity of actions you want to perform with your data.
As an example, let’s see how to extract specific data using the INDEX and MATCH functions. When we use these functions together, we can, for instance, look for a campaign number in one column and extract the matching campaign’s title from another column.
The formula syntaxis: =INDEX(column_to_extract_from,MATCH(value_to_match, column_to_match_against,0))
Here, column_to_extract_from is the range of cells in a column from which you want to extract data, and value_to_match is a corresponding information you use for the search – in our example, value_to_match is a campaign number. And column_to_match_against is the column where you need to find your value_to_match – in this case, it’s the column with campaign numbers.
For our dataset, we can use the following formula to extract the title of the campaign with the 117 ID number:
=INDEX(B4:B20;MATCH(117;C4:C20;0))
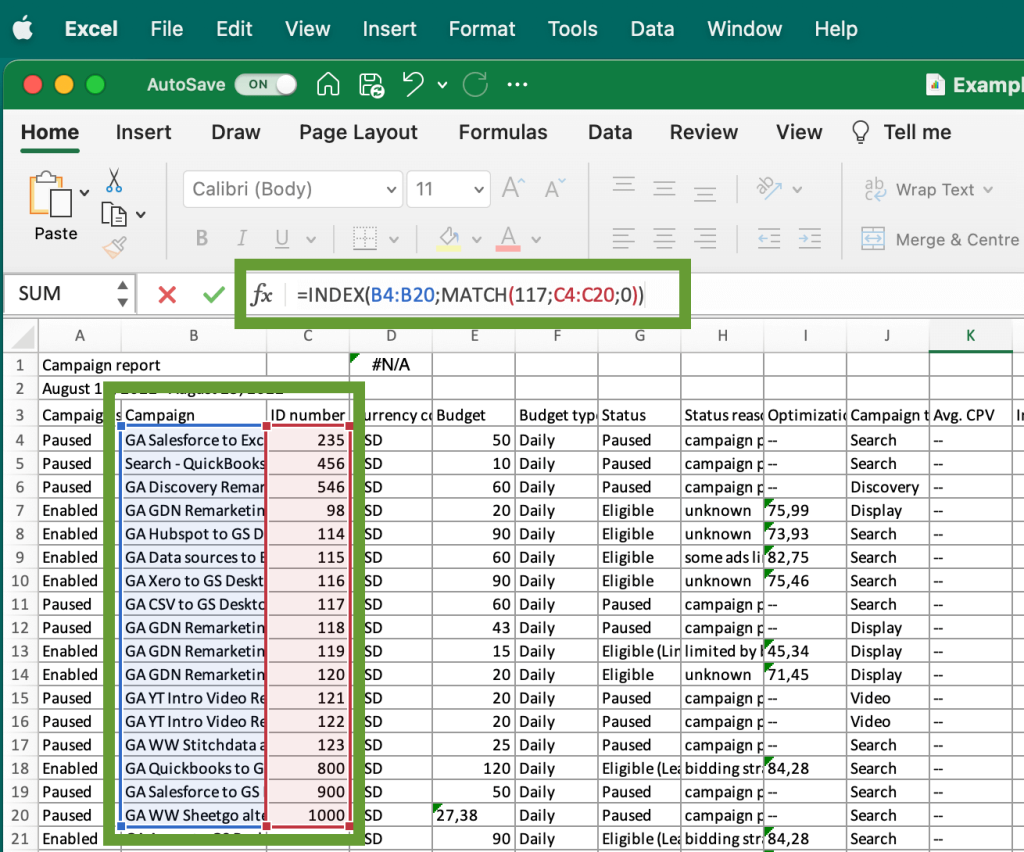
As a result, the formula returned the title of the campaign 117 in the cell containing the formula:
This is a useful method when you need to extract specific information from a column. However, if the column contains several items matching the specified value (for example, several campaigns with the same ID number), this formula will only return the first item. If you want to get a list, it’s better to use filtering.
#5. How to extract data from an Excel cell
In addition to extracting data from the columns, you might need some tips for transferring data from a particular cell. In some cases, you might have mixed data in a cell and need to extract only part of this data. Let’s have a look at how to do this.
How to extract partial data from an Excel cell
For example, you have a cell containing several words – like name and surname, or name and position, or a good type and its price. In such a case, you can extract data from an Excel cell by using such functions as LEFT and RIGHT.
Here’s how to use the LEFT function. The basic syntax is simple:
=LEFT(cell_number;number_of_characters)
For example, =LEFT(A3;4) will extract the first 4 characters on the left from the A3 cell.
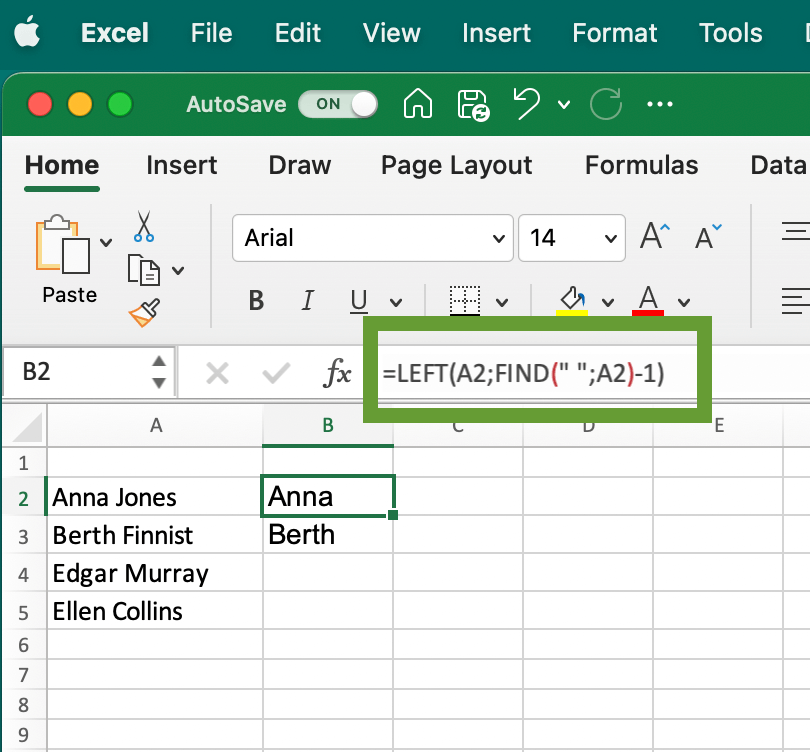
But what if you need to extract the first word from every column, but the number of characters in these words are different? Then, it’s better to use a more complex version of the formula:=LEFT(cell_number;FIND(" ";cell_number)-1)
For example, =LEFT(A2;FIND(" ";A2)-1) will find the first space character in the A2 cell and return all the characters on the left to the space.
In this example, we used this formula to extract the first name from the cell.
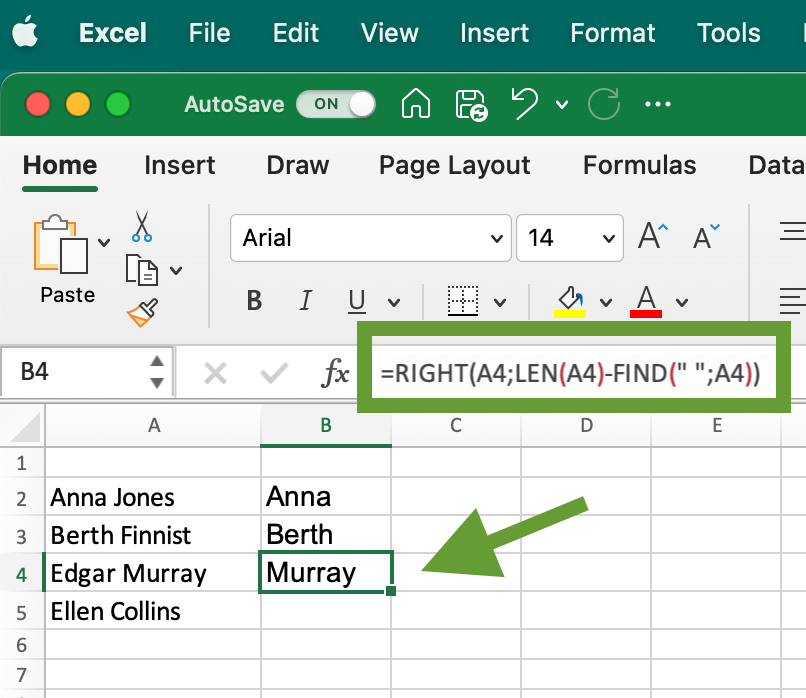
You can also use the RIGHT function to extract the last name from the cell using this formula: =RIGHT(A4;LEN(A4)-FIND(" ";A4)), just place your cell number instead of A2. In this case, the LEN function determines the total length of the string in the A4 cell, and then we subtract the first word, which we determine in the same way as in the previous case.
As a result, the formula extracted the second name from the cell:
Which data extraction method is the best?
When should you use each of these methods? This depends on your specific needs and situation. For instance, manual selection is the most simple and straightforward of the methods, but it’s not very convenient for large datasets or repetitive tasks. Filtering data is a good way to extract exactly what you need when there are a lot of different criteria. At the same time, using filters is a one-time action. If you want your filtered data to be updated automatically and your dataset changes all the time, then functions and formulas will be a better fit here.
If your goal is to transfer the extracted data from Excel to another app and you need to do it regularly – then you can consider using Coupler.io. It allows you to quickly export data to another Excel workbook, Google Sheets, data warehouses, and BI tools – for example, from Excel to Tableau.
Automate data export with Coupler.io
Get started for free