Distributing Power BI reports within and outside your organization can enhance collaboration and improve decision-making. Power BI provides various sharing options to suit different needs. These options differ based on the license you have. We’ve compiled all of them in this all-in-one tutorial.
How to give access to a Power BI report inside your organization
Providing access to relevant Power BI reports keeps everyone in an organization informed of and aligned with shared goals. The platform offers various options for easily distributing reports internally. However, before you start sharing, you’ll need a Power BI Pro license. Your recipients will either need their own Pro licenses or access to a workspace with a Power BI Premium capacity. Learn more about pricing and licenses in your Power BI tutorial.
OneDrive is used to store files, documents, etc. If your organization uses OneDrive, it’s easy to save your Power BI report there and share it conveniently with others. To do this:
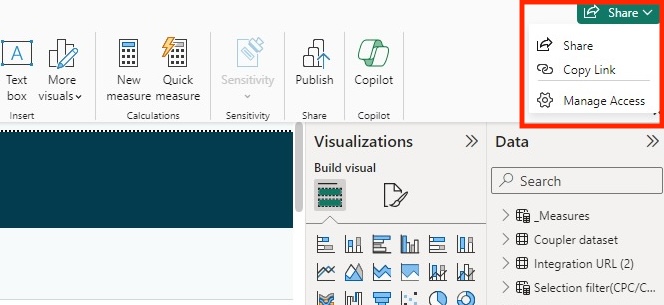
- In your Power BI desktop, open your dashboard and click the Share button at the top right of the interface.
- In the drop-down menu, you can either click Share or Copy Link.
- If the file hasn’t been saved yet, you’ll need to do this first.
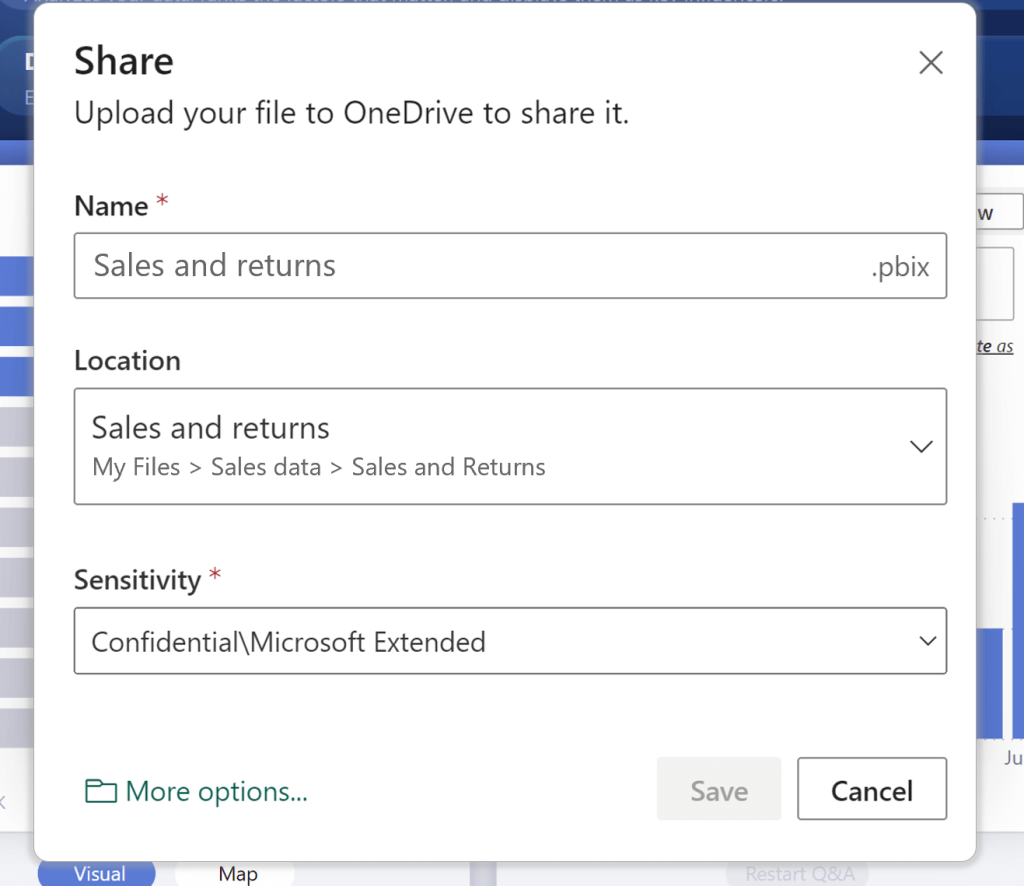
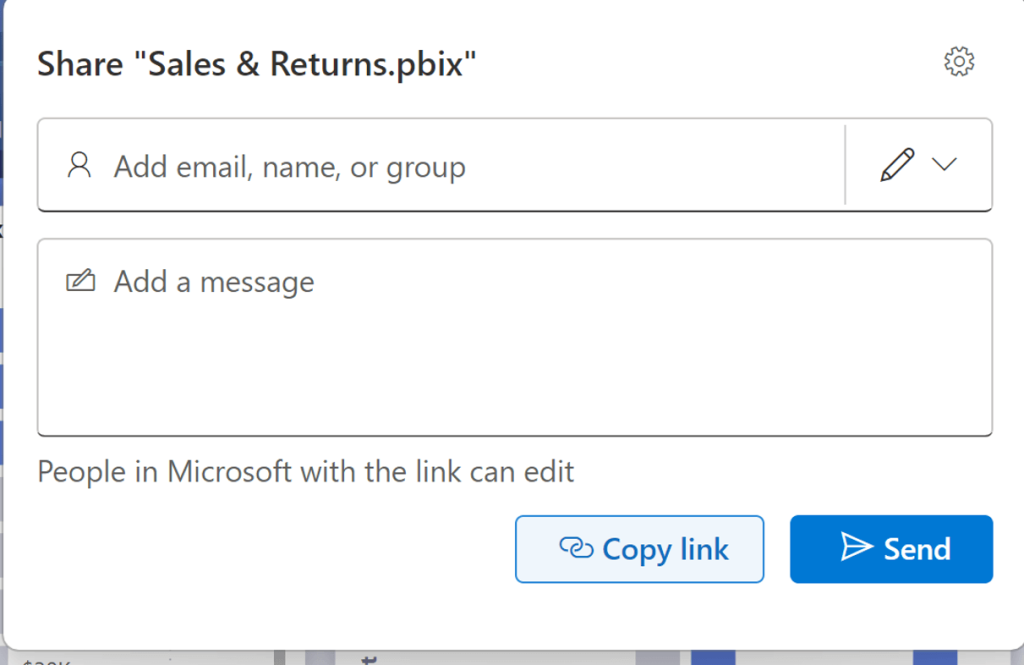
- Once saved, a dialog box will appear, prompting you to add the email, name, or group of the people you want to share Power BI report with.
- You can either send the file directly to the desired recipients or use the Copy Link option to send a link.
By default, end-users who receive this can edit your Power BI report. If you don’t want that, you can manage permissions by clicking on Manage Access.
Here, you can grant permissions based on how you want your recipients to interact with your report.
Workspaces offer a collaborative space where team members can work together on Power BI dashboards. You can share Power BI reports from your workspace with your colleagues to view and collaborate on. Here is how to do so:
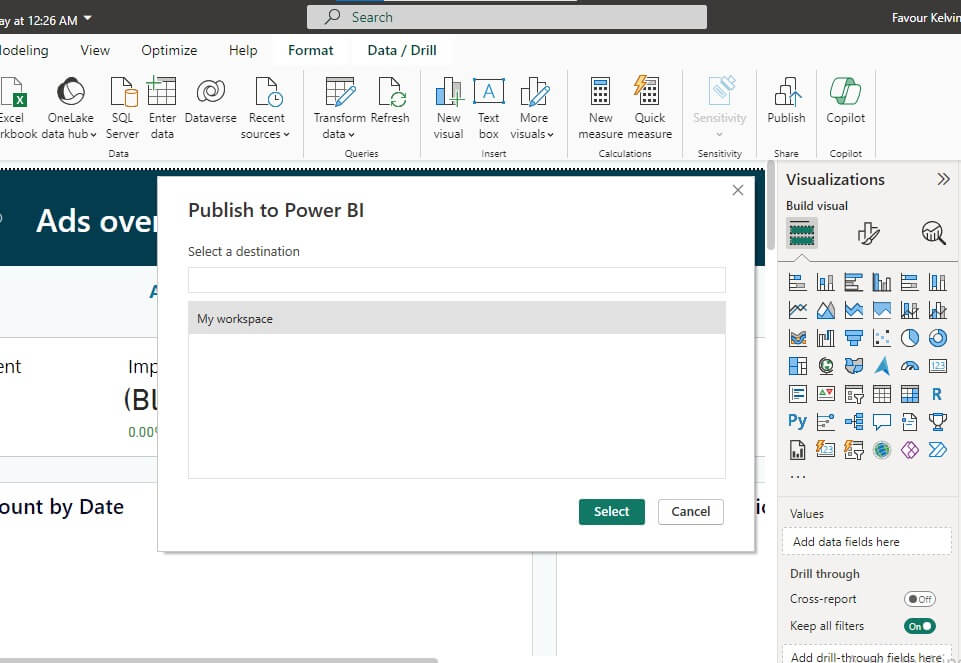
- In your Power BI dashboard, click Publish at the top right of the interface.

- Choose the workspace where you want to publish the report. By default, you will have My workspace selected.
- Click Select to publish the report.
- Once the report is published, you’ll see a confirmation message in a dialog. Click the first link you see in the dialog to open the report in Power BI service, which is also known as Power BI online.
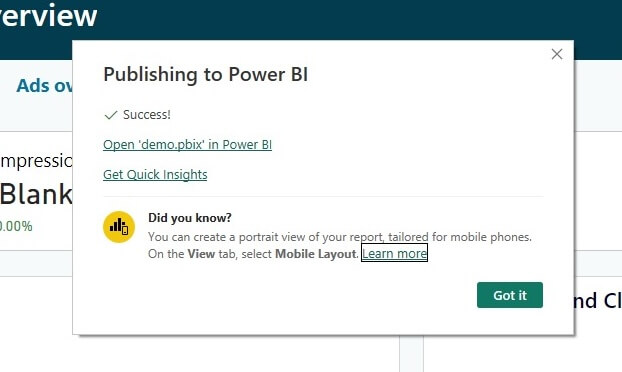
- Your published content will be located in My workspace.
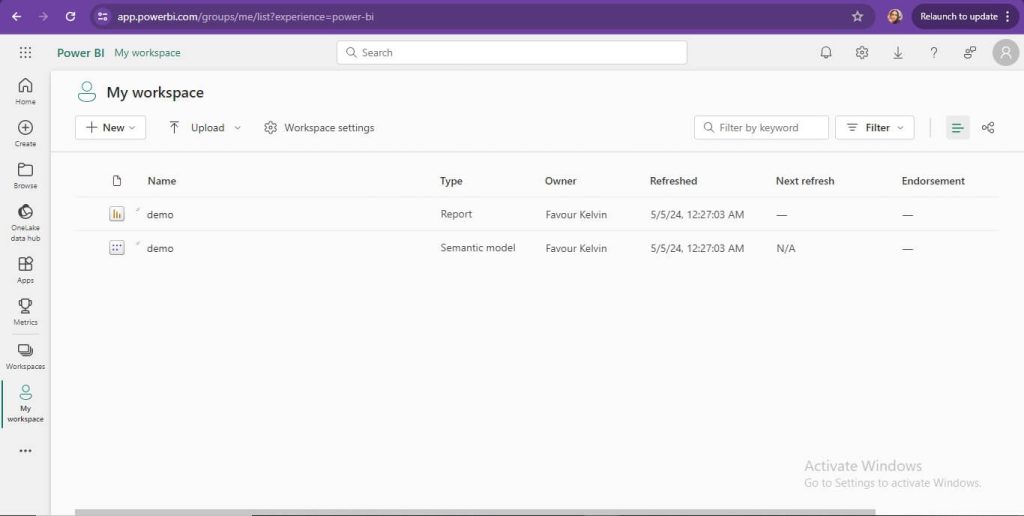
There are two ways you can share your report here:
- The first option is to select the report you want to share, then click the Share icon next to it.
- The second option is to open the report and click Share at the top of the report.

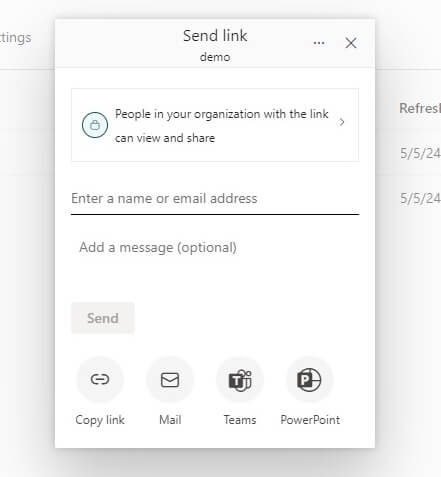
- Either of the two methods will open a Send link window. Before sharing the links, you can control access by setting the permission that you want; by default, people in the organization can view and share the report.
- Enter the email addresses of the team members you want to share with or use other options like:
- Copy link to manually share the link.
- Mail to share the report via email.
- Teams to share the report in Microsoft Teams.
- PowerPoint to embed the report in a PowerPoint presentation.
When the link is shared with the recipient, they will need to log in with their organizational account to view the report.
Distribute reports through Power BI Apps
If you need to share your Power BI report with a large audience, consider creating a Power BI app. Power BI apps allow you to bundle dashboards, reports, and datasets into one package, which simplifies sharing reports within a large organization. But before you start creating your Power BI app, you need to first publish your report to Power BI service, as this is where you’ll create your app.
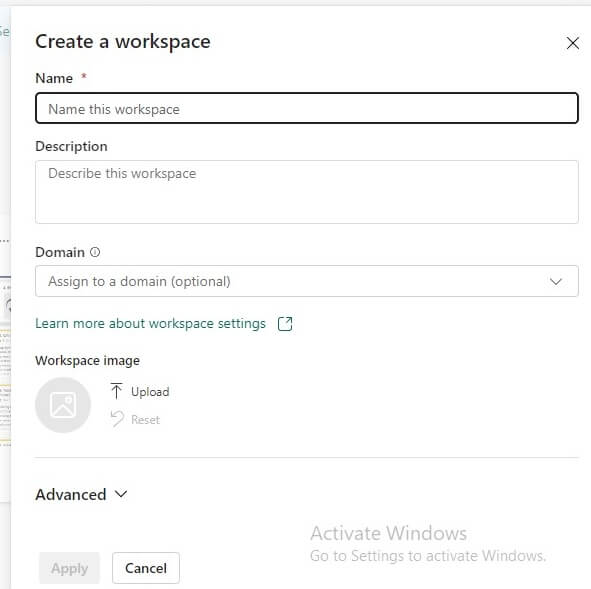
- In your Power BI service account, go to Workspaces and click + New workspace.
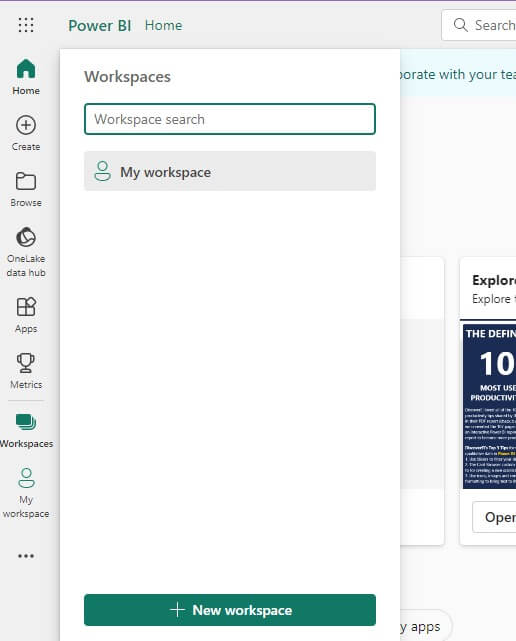
- Enter details for your new workspace, such as the name and description. Optionally, you can assign it to a domain and upload a workspace image.
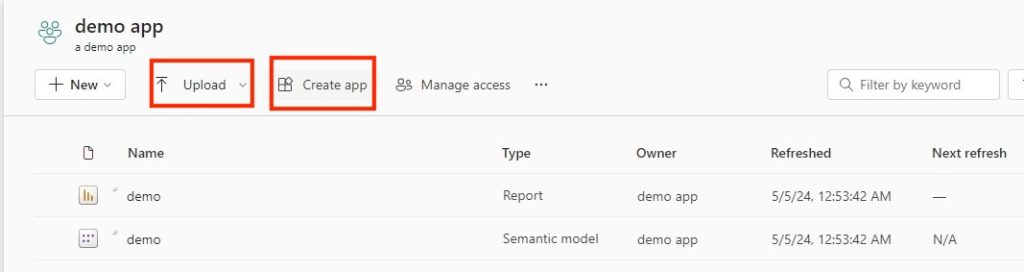
- In your created workspace, upload the content you want to publish, then click Create app.
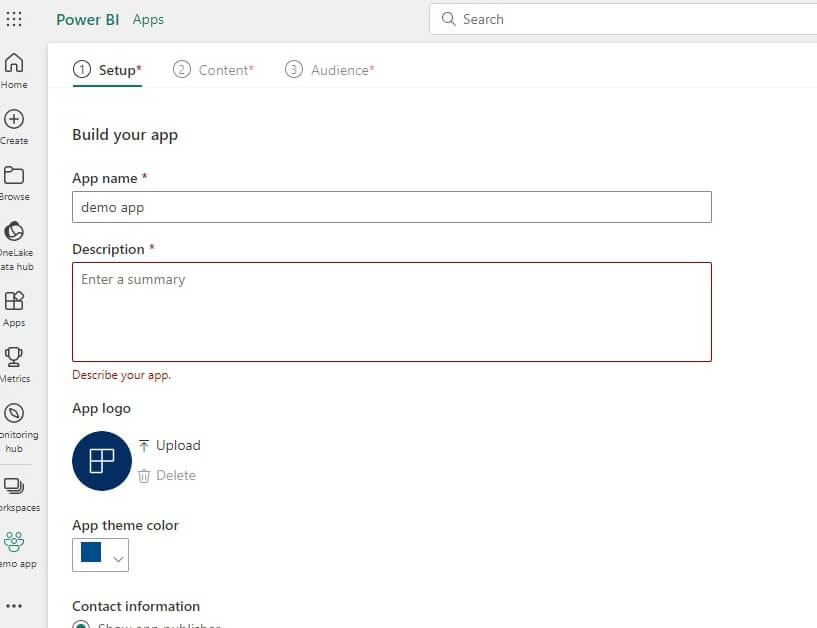
- Customize the app under the different tabs:
- Under the Settings tab, provide a name, description, logo, and theme color.
- In the Content tab, decide which reports or dashboards to include.
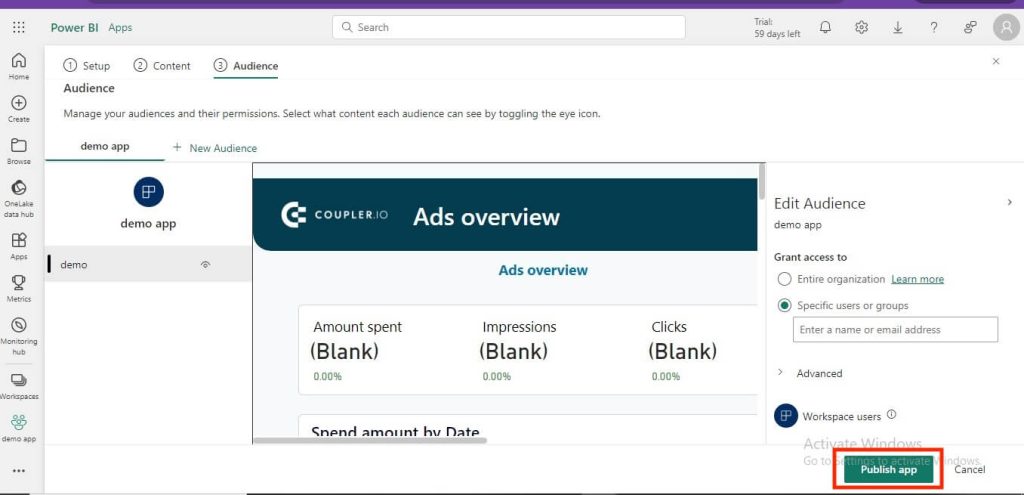
- In the Audience tab, specify who in your organization can see the app; making it available to the entire organization or restricting access to specific groups or individuals.
- Once you’re done, click Publish app.
- After publishing the app, you’ll get a confirmation dialog with the app link.
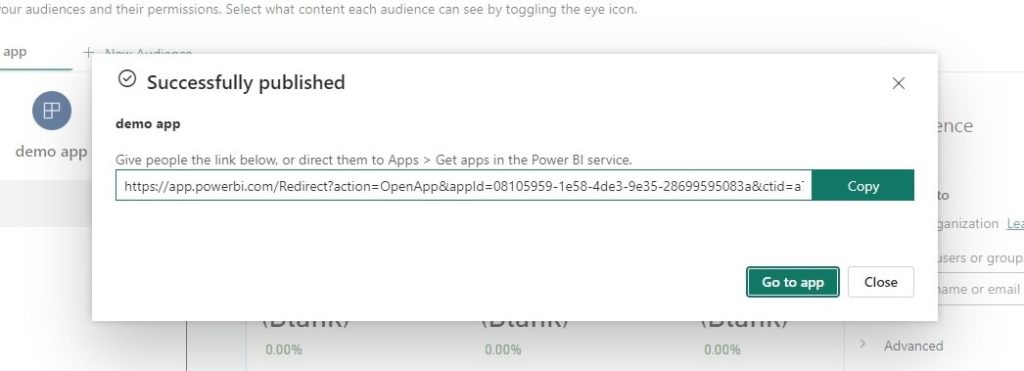
When you share this link with your colleagues, they’ll need to log in with their organizational credentials to access the app. Once logged in, they’ll be taken straight to the Power BI app. There, they can view all the reports, dashboards, and datasets you’ve added.
Embed report to website or portal
If you’re using tools like Jira, Notion, or Confluence, you can embed Power BI reports directly into these platforms. This comes in handy when you want to share important information or insights with your team without requiring them to switch applications. Here is how to get the embed link:
- Open the report in your Power BI Service account and select File > Embed report > Website or portal.
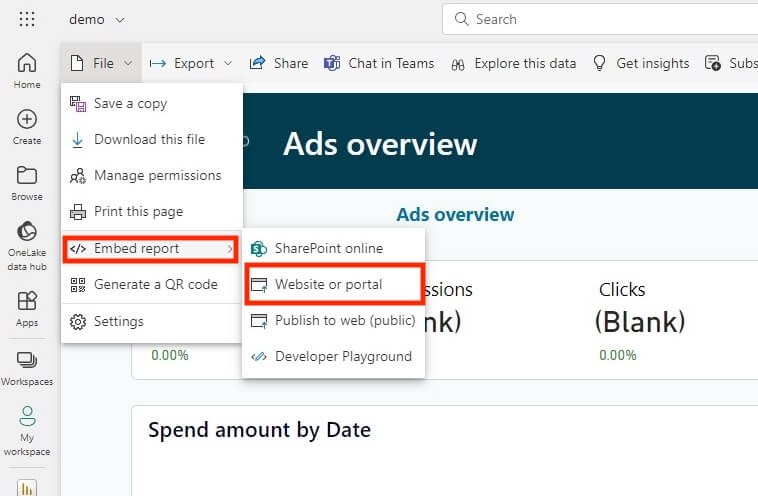
- From the dialog box, you can use either the link or the HTML code to embed the report on your website or portal.
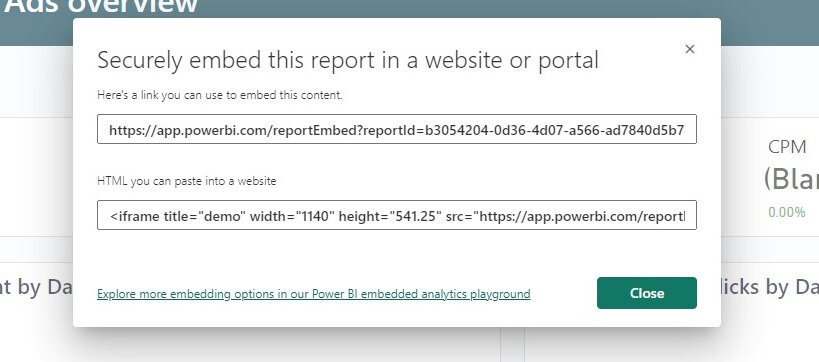
Here is what an embedded report may look like:
Many organizations use SharePoint as an internal portal. Embedding Power BI reports within SharePoint Online enables team members to access reports alongside other important documents and resources in a familiar environment.
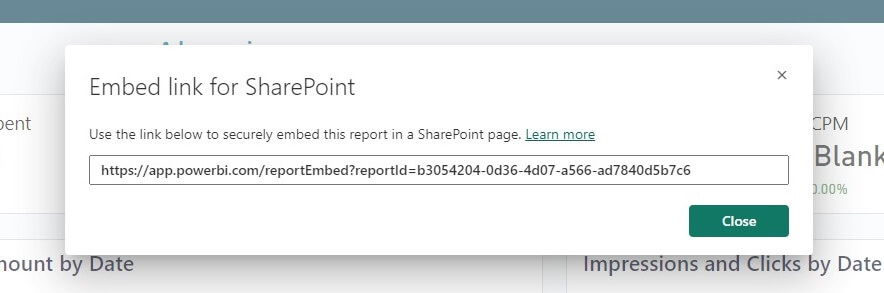
- In your Power BI service account, go to File > Embed > SharePoint Online.
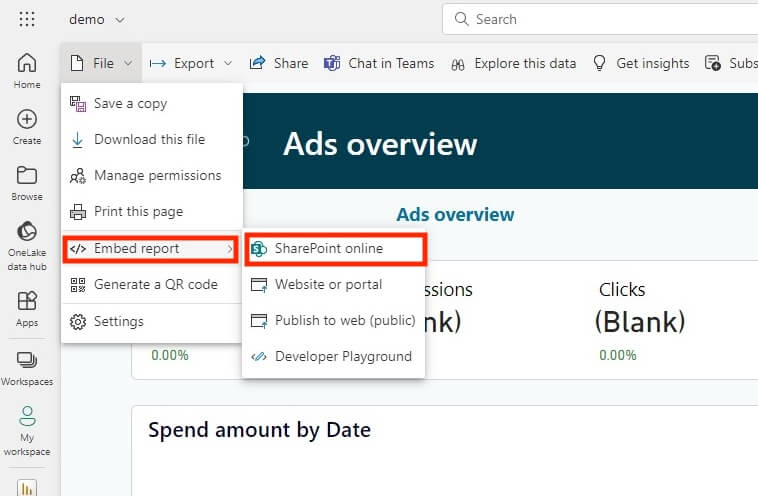
- A dialog box will appear with the Power BI report URL. Copy this URL for later use.
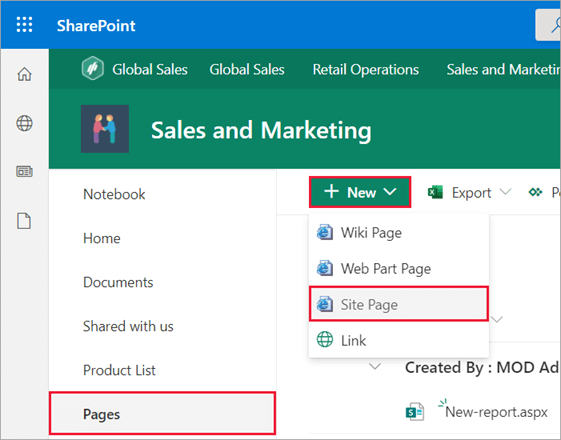
- Go to SharePoint Online and select Pages > + New > Site Page to create a new page.
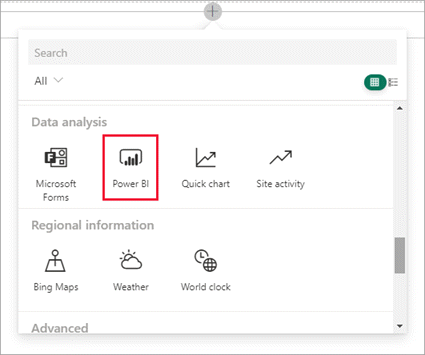
- Within the dropdown menu, click the + icon, navigate to the Data analysis section, and select Power BI.
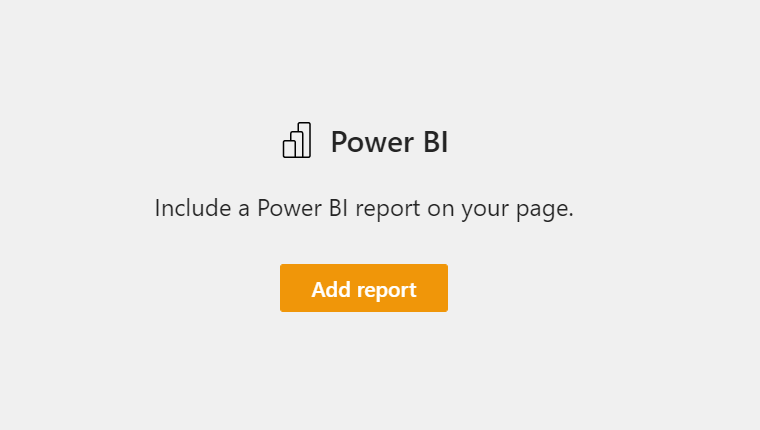
- Select Add report to include your Power BI report to the page.
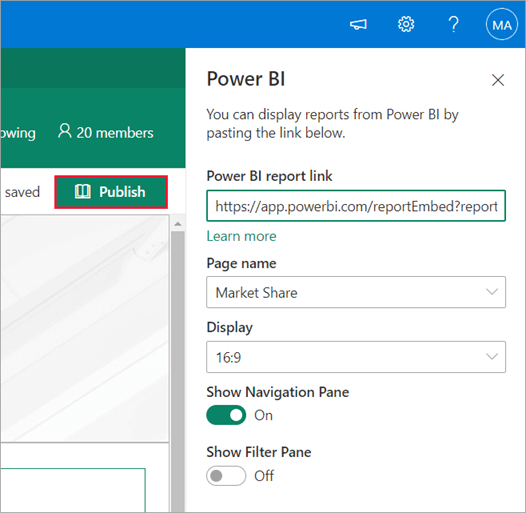
- Paste the previously copied link in the Power BI report link field.
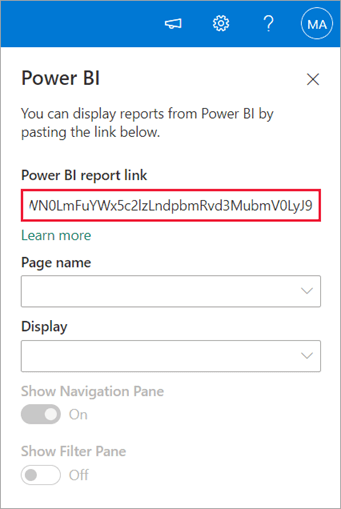
- Click Publish to embed your Power BI report on the SharePoint Online page.
Team members with SharePoint Online access can view and interact with the embedded Power BI reports along with other related documents and information.
External stakeholders, such as clients, vendors, or investors, often need access to key data or performance metrics to stay informed. Before you start sharing these reports, you need to know what license the external user has. This will help you determine the best sharing method to use. Power BI offers different options for sharing reports with external users who either have a Pro license or no license at all.
How to provide access to external Pro/Premium users
External users with Pro or Premium licenses can be invited as guests through Microsoft Entra B2B in the Azure portal or by adding them to your Power BI app.
Guest access through Microsoft Entra B2B in Azure portal
Within the Azure portal, the Microsoft Entra B2B feature offers a secure way to share Power BI report with external users without compromising data security. External Power BI users added as guests will gain direct access to Power BI reports within your organization’s tenant and view content that you share with them
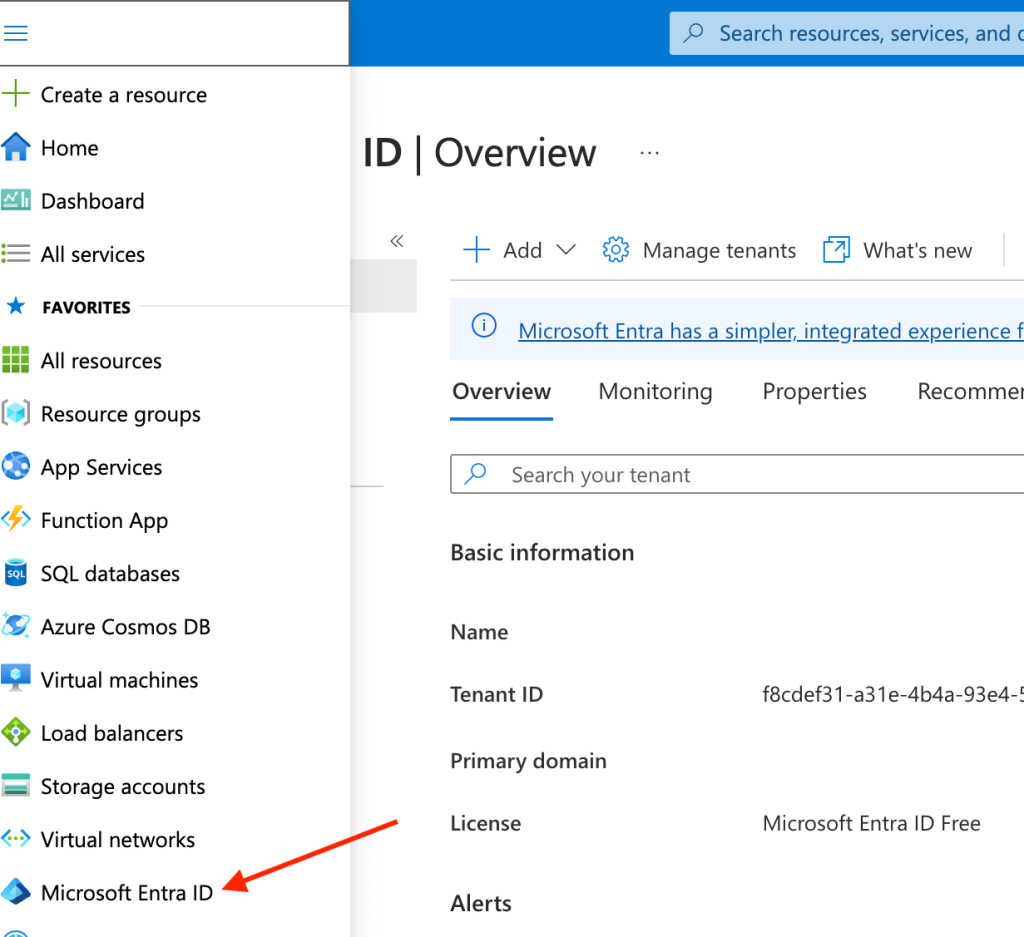
- Go to the Azure portal, click Microsoft Entra ID.
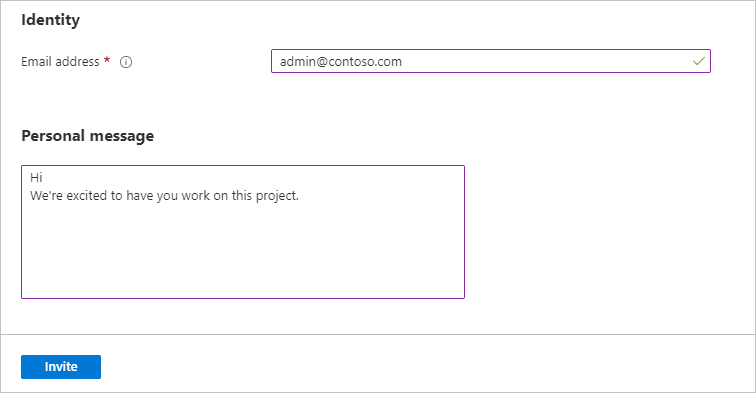
- Under Manage, go to Users > All users > New guest user.

- Enter the external user’s email address and a personal message, then click Invite.
Once the guest user receives and accepts the invitation, you can share content with them using any of the methods described above. They can access the content using their own credentials to log in. As a rule of thumb, you should set appropriate permission levels to control how people interact with your report.
Power BI has a couple of ways to make your reports accessible to external users without a Pro license.
Publish to web
This method makes your report accessible to anyone online without any restrictions. They don’t need to sign in or verify their account. Because of this, it’s important to ensure you’re not sharing any confidential or sensitive information.
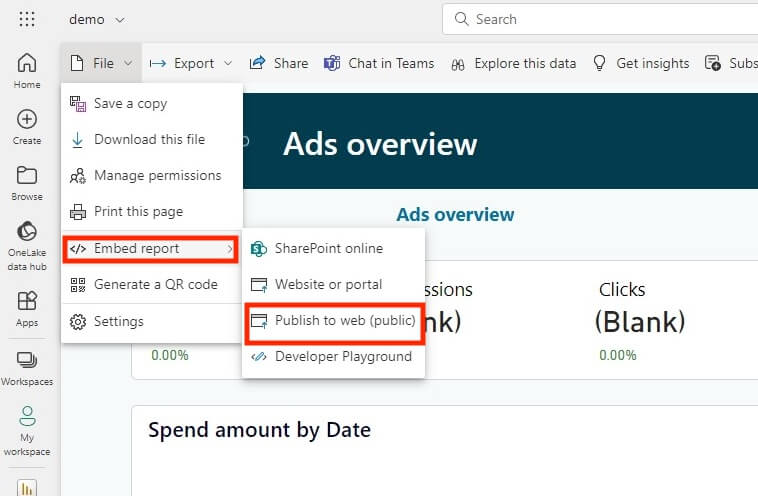
- In your Power BI service account, go to File > Embed report > Publish to web (public).
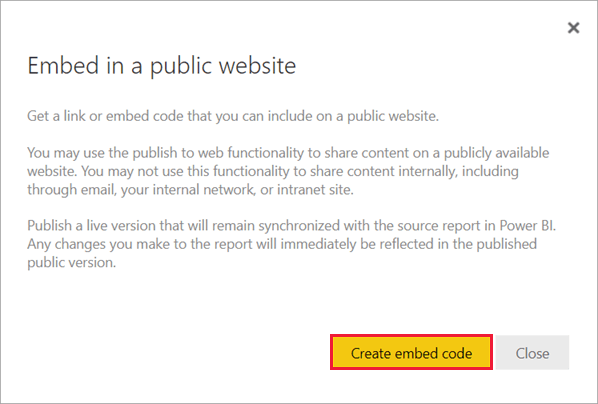
- If the data is suitable for public access, click Create embed code.
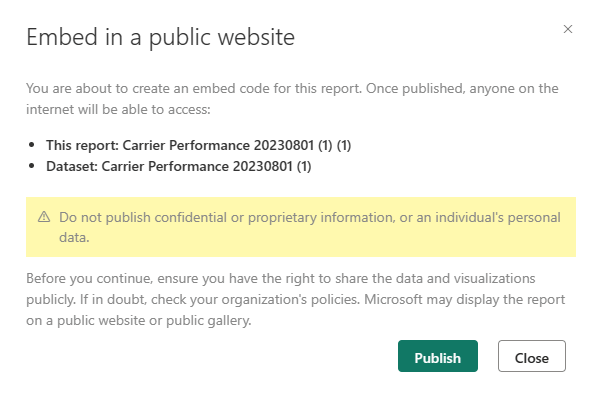
- Select Publish to make your Power BI report public.
- You can copy and share the link provided or embed the HTML code provided on your public websites.

Anyone with access to the link will be able to view your Power BI report.
Export to static format Excel, PPT, PBIX, or PDF file
Power BI reports can be exported to formats like PPT, Excel, or PDF files. Recipients do not need a Power BI account to access any of these report formats. This method is useful for one-time report sharing where interactive features are not necessary.
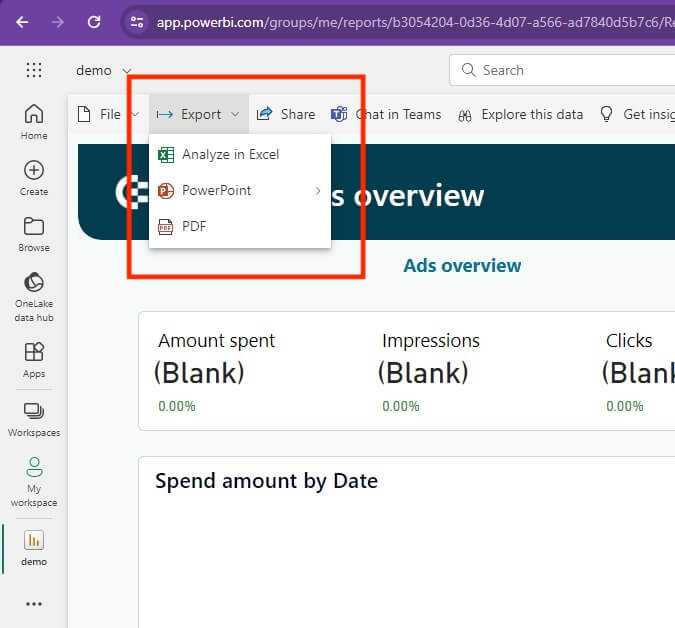
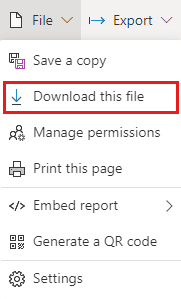
- In your Power BI service account, go to Export and select from the list of options: Analyze in Excel, PowerPoint, or PDF and save the file to your preferred location.
Alternatively, to download your report as a .pbix file, go to File > Download this file.
After exporting, you can easily share the data via email, cloud storage, or any file-sharing platform of your choice.
Share snapshots
Taking and sharing snapshots of your reports is another way to share key visuals or data points with free users. They are useful for quick updates.
- In your Power BI report, use the Windows Snipping Tool to grab the desired content.
- Save the snapshot, then share it via email or any file-sharing service.
What to consider before distributing your Power BI report
When you want to share report in Power BI, both inside and outside your organization, it’s good to keep these tips in mind:
- Ensure the people you’re sharing with have the right licenses. For internal sharing, they might need Power BI Pro or Premium licenses.
- Carefully check your report for any confidential information. Use features like row-level security (RLS) or data masking to protect sensitive data.
- Grant access based on each user’s or group’s needs. Power BI lets you set permissions for viewing, editing, or managing reports.
- Test your report to ensure it’s accurate and works properly. This prevents confusion or frustration when users access it.
- After sharing the report, monitor its usage to ensure only authorized users are accessing it. Power BI offers tracking and auditing features to help you stay in control.
- Make sure your reports and dashboards are up-to-date by using Coupler.io. It lets you automate Power BI reports data refresh according to your specified schedule.
How to make your Power BI reports self-updating with Coupler.io
Stakeholders with whom you share dashboards or Power BI reports expect access to the most up-to-date insights. To make this happen, your reports must be self-updating, i.e. automatically refresh the data from the source application. Coupler.io, a reporting automation platform, lets you achieve this by enabling automatic data refresh for your desktop reports and the dashboards published in the Power BI service.
Try it yourself – select the needed data source in the form below and click Proceed. You’ll be offered to create a free Coupler.io account and then configure the connections following the in-app instructions.
By following these tips, you can keep sensitive data secure and prevent unauthorized access. If you need a head start in creating reports to share, the Coupler.io Power BI templates examples can simplify the process. This way, you can focus on sharing your insights and making data-driven decisions.