You can connect Klaviyo to Google Sheets and export the data to get a complete view of the marketing performance. Let’s explore the ways to integrate Klaviyo into Google Sheets.
Different ways to integrate Klaviyo into Google Sheets
Klaviyo allows exporting data into .csv files, which can be later imported into Google Sheets. This method requires repeating the manual export-import process every time you need fresh data. Therefore, it is not a feasible method if you’re looking to connect Klaviyo to Google Sheets and integrate the data flow.
The best part of Klaviyo is its seamless integration ability with other platforms. The availability of API makes it possible to connect it with any other platform or tool. API (Application Programming Interface) is a mechanism that enables the communication between two applications through a common protocol.
Here are the ways to connect Klaviyo API with Google Sheets:
- No-code connector by Coupler.io – a user-friendly option that requires no technical expertise to connect Klaviyo to Google Sheets. Coupler.io is a reporting automation platform to turn data into simple reports. It allows you to easily connect the two apps within minutes and keep your Klaviyo data in Google Sheets updated on a schedule. The no-code connector is an ideal option for business users.
- Google Apps Script – a tech-savvy option. Programmatic method to pull data from Klaviyo to Google Sheets using Google Apps Script. Demands knowledge of Apps Script.
Both methods use the Klaviyo API to integrate Google Sheets (although with Coupler.io it happens under the hood). You can take reference from the Klaviyo API documentation to learn more about the data you can import.
Now, let’s take a look at both methods in more detail. But first, let’s see how to get a Klaviyo API key as we will need it for both of these methods.
How to generate a Klaviyo API key?
Your Klaviyo API Key is required to get the Klaviyo data through API. It works like a password to authenticate the request. To get your Klaviyo API Key, log into your account dashboard and follow these steps:
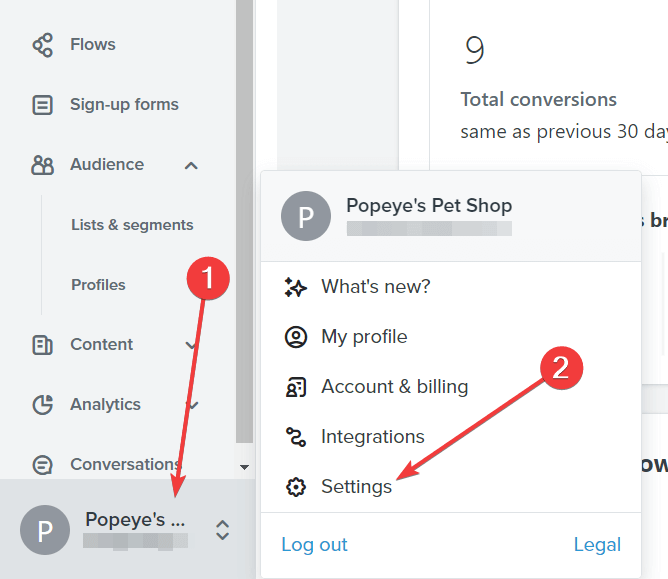
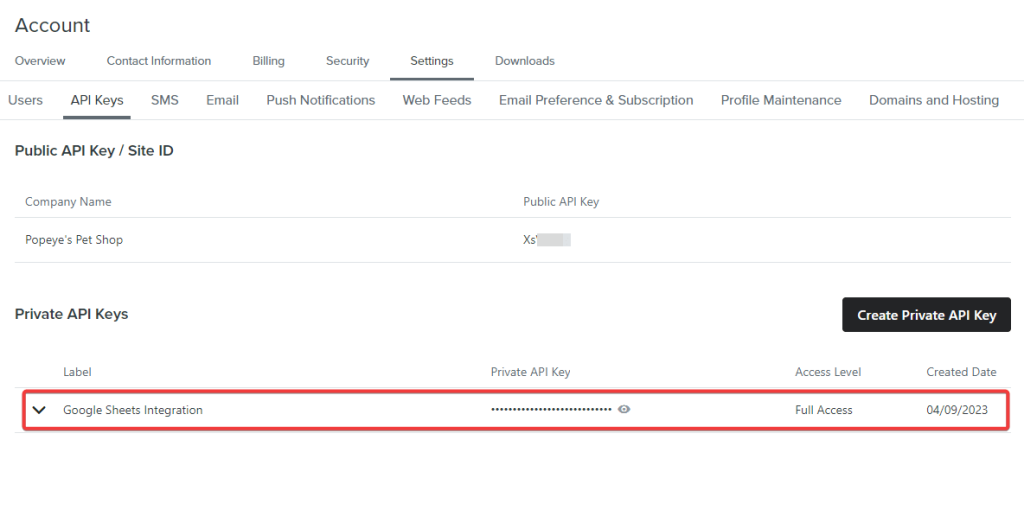
- On the bottom-left corner of the page, click on your profile and go to Settings.
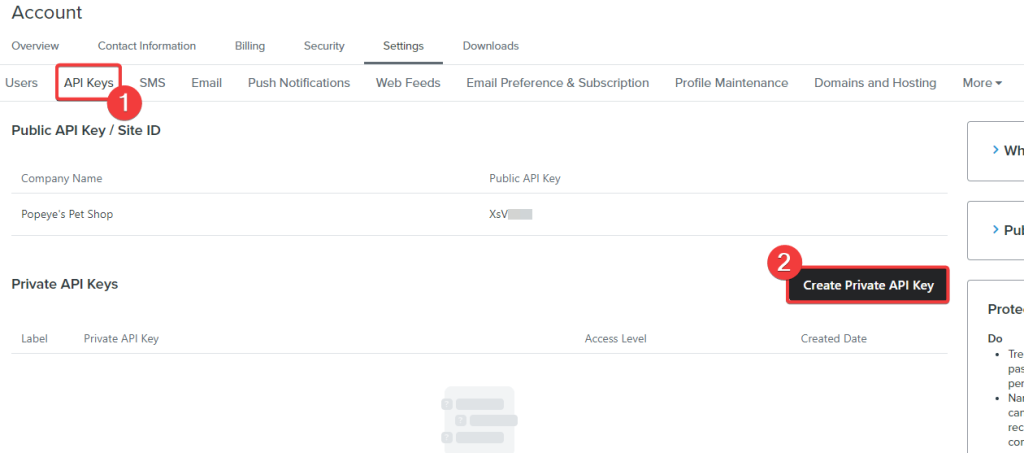
- In the Account Settings, navigate to the API Keys tab, where all your public and private API keys will be listed. We need the private API key to connect Klaviyo to Google Sheets. Click the Create Private API Key button.
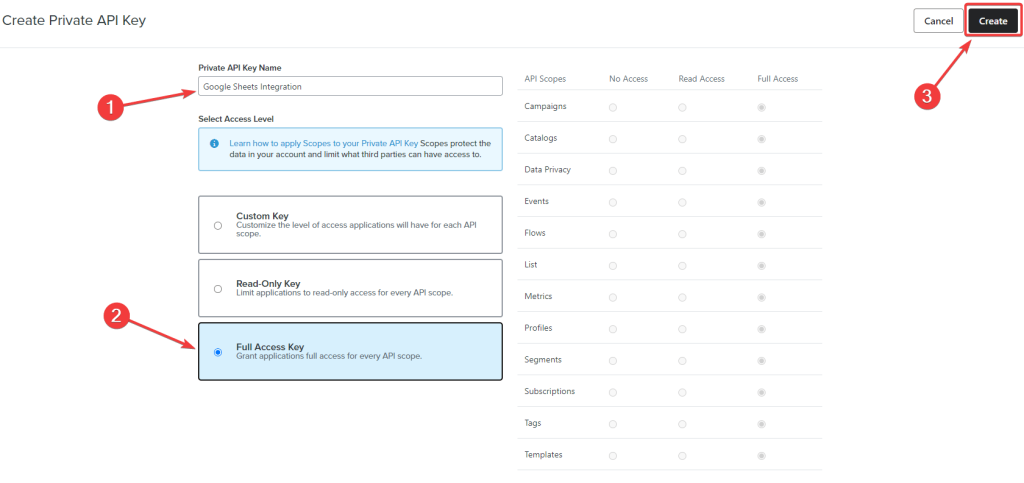
- Next, enter the Private API Key Name and select the Access Level, which will be the Full Access Key in our case. Choose Read-Only Key if you want to just import Klaviyo data into Google Sheets. Finally, click Create to get the Klaviyo API Key.
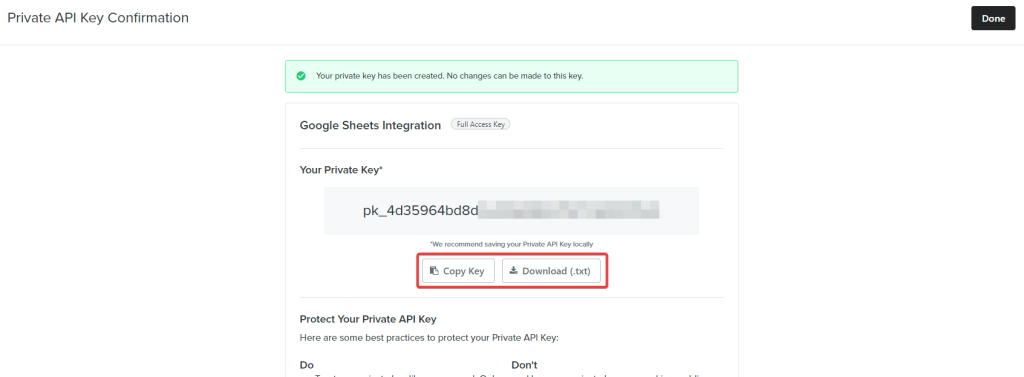
- Your Klaviyo API Private Key will be displayed on the screen. Copy the Key and download it for future use.
- You can also find the generated API key under the Private API Keys section in Settings > API Keys.
Now, we are ready to go for the Klaviyo Google Sheets integration.
How to integrate Klaviyo with Google Sheets using Coupler.io
1. Extract your Klaviyo data automatically
First, click Proceed in the form below to create a Coupler.io account for free and a Google Sheets connector for Klaviyo.
Then, connect your Klaviyo account by providing your API key. In the previous section of this article, we already explained in detail how to get it.
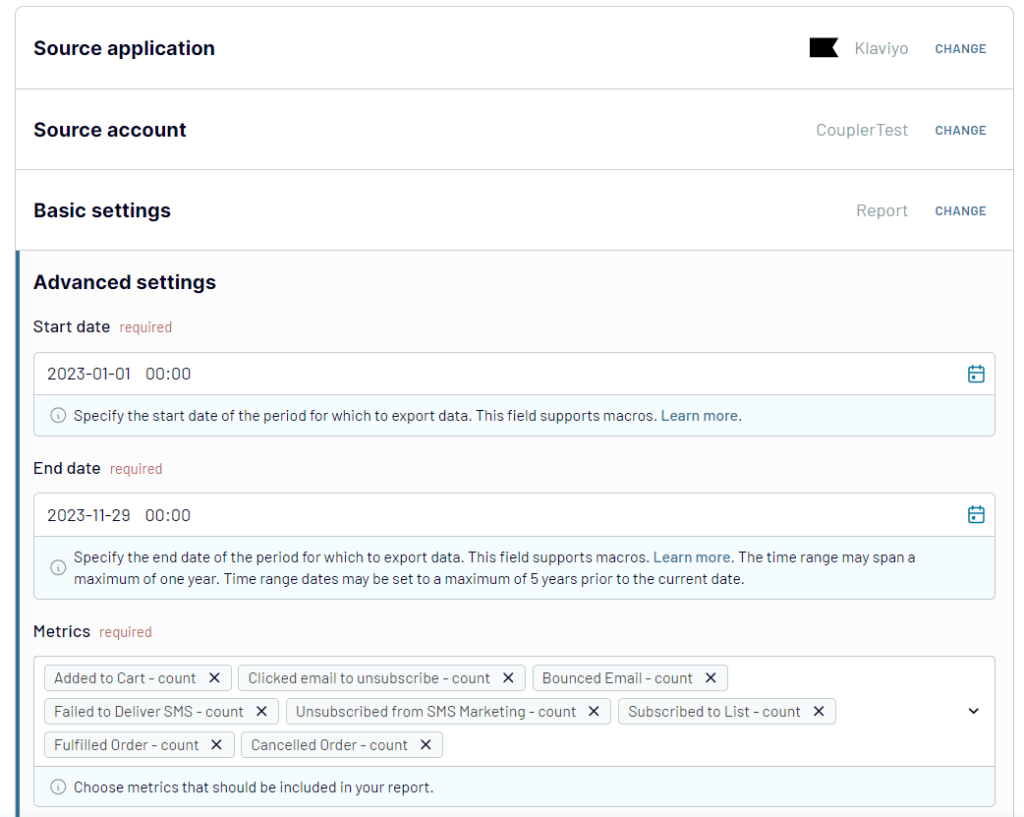
After this, select a data entity: Campaigns list, Profiles list, or Report. For the Report, you’ll also need to specify start/end dates and metrics to include.
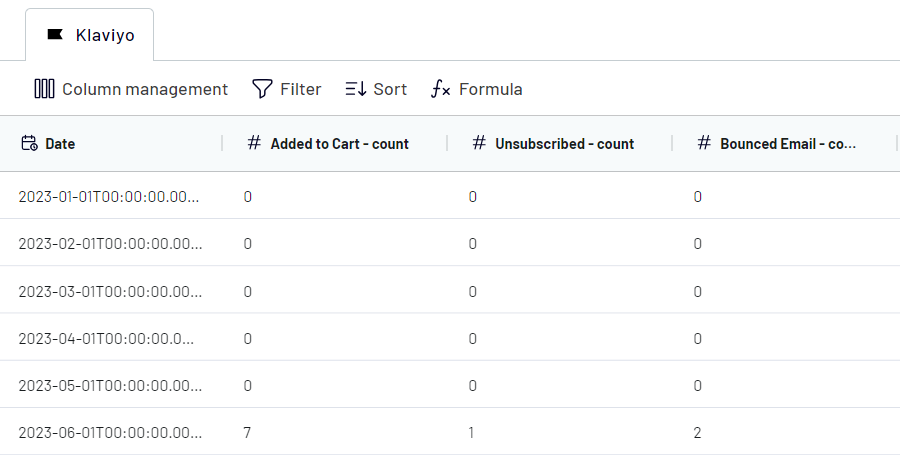
2. Preview and transform your data
In the next step, you can check the dataset that is about to be imported into Google Sheets and organize it to your liking:
- Rename and rearrange columns
- Hide columns you don’t need
- Perform formula-based calculations
- Blend data from several accounts or apps into one dataset
- Sort and filter data
3. Load data and schedule updates
Once this is done, proceed with the next steps and connect your Google Sheets account. You’ll also need to select a spreadsheet and a sheet to load data from Klaviyo.
The final step is what makes your report in Google Sheets self-updating. Specify your preferences for scheduled updates, and Coupler.io will keep refreshing your Klaviyo data in the spreadsheet.
You can schedule updates at intervals of up to every 15 minutes, so data flows into your automated report in near real-time.
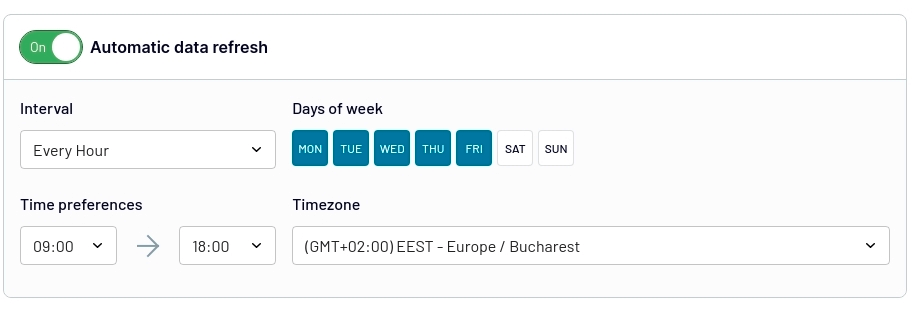
When everything is ready, save and run the importer. That’s it! Your Google Sheets – Klaviyo integration is ready.
Use Coupler.io as an add-on for Google Sheets to load Klaviyo data
Alternatively, you can also install a Coupler.io add-on for Google Sheets – then you will be able to go through the same steps directly from a spreadsheet. Once it’s installed, you can find the add-on on the Extensions tab.
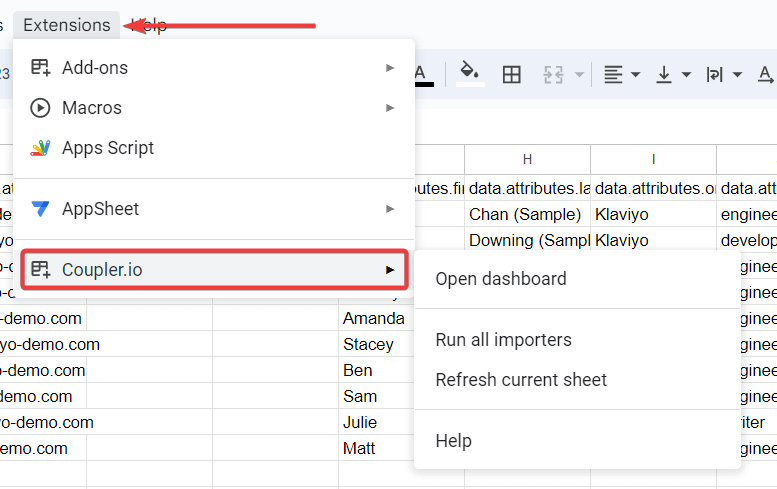
Now you can add, edit, and run importers from Google Sheets worksheets.
Visualize your Klaviyo data with ready-to-use dashboard templates
Integrating Klaviyo with Google Sheets is just the first step. To gain actionable insights from your data, you need proper visualization. Coupler.io offers multiple ready-to-use Looker Studio dashboard templates specifically designed for Klaviyo data. These dashboards automatically connect to your data source and provide real-time insights without any manual setup or design work.
Klaviyo analytics dashboard
This ready-to-use dashboard template helps you monitor and analyze your Klaviyo email marketing performance with intuitive visualizations. Perfect for marketers who want to quickly understand campaign effectiveness without building reports from scratch.
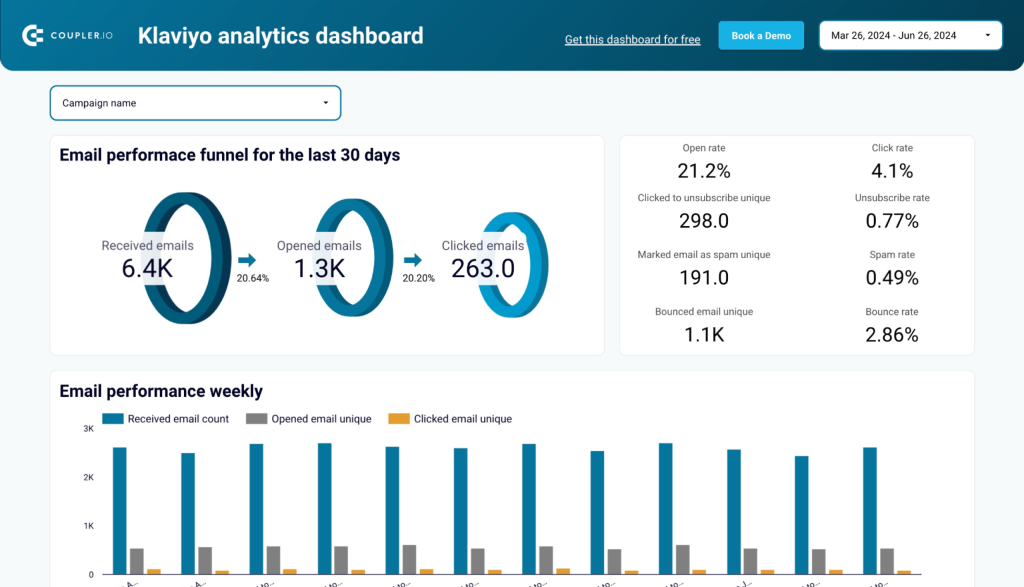
What insights you can get
- Email marketing funnel visualization: See how your audience moves from receiving emails to taking action
- Campaign effectiveness metrics: Compare open rates, click-through rates and conversion metrics across campaigns
- Audience engagement tracking: Monitor how subscribers interact with your content over time
- Performance trend analysis: Identify seasonal patterns and long-term trends in email engagement
- Campaign ROI measurement: Understand which email initiatives deliver the best return on investment
How to use this dashboard
To use this dashboard, simply follow the instructions in the Readme tab to connect your Klaviyo account and load data to the dashboard in Looker Studio. The process is straightforward and requires no technical expertise – just authenticate your Klaviyo account and the dashboard will automatically populate with your data.
Email marketing analytics dashboard template for Klaviyo
This dashboard brings together Klaviyo email data and Google Analytics 4 website data. As a result, it provides a complete picture of how your email campaigns influence user behavior on your website and drive conversions.
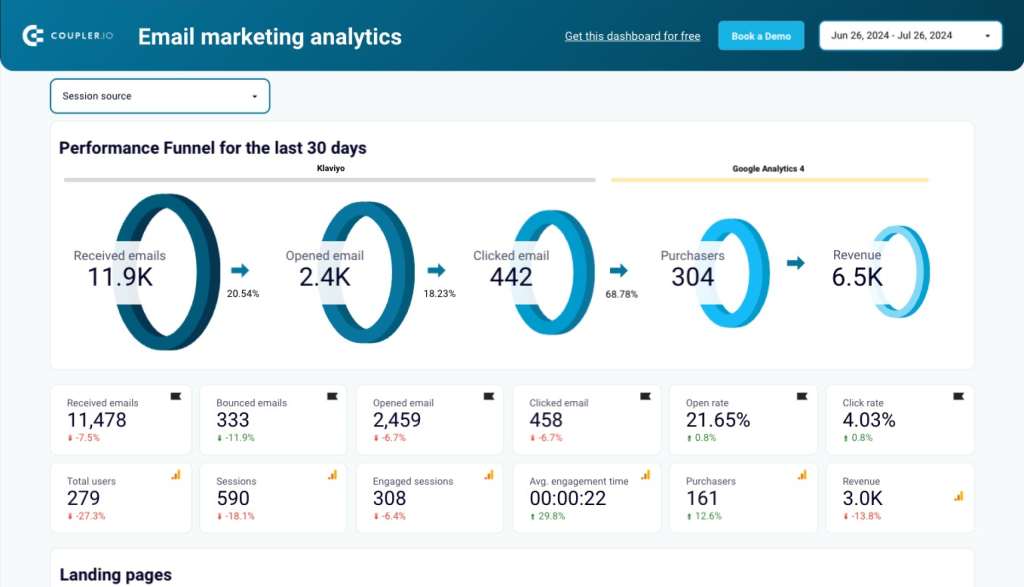
What insights you can get
- Email-to-website conversion tracking: See how email engagement translates to website traffic and conversions
- Landing page performance: Identify which pages perform best for visitors coming from your email campaigns
- GA4 integration metrics: Combine email performance data with website analytics for complete attribution
- Campaign traffic analysis: Analyze how each email campaign drives visitors to your website
- Cross-channel performance view: Understand how email marketing fits into your overall digital marketing strategy
How to use this dashboard
When you open this dashboard, check the Readme tab first – it contains all the necessary instructions to connect your Klaviyo and Google Analytics 4 accounts. The dashboard uses direct connectors to pull data from both platforms, eliminating manual exports and providing you with a comprehensive cross-channel view of your marketing performance that updates automatically.
Klaviyo email campaign performance dashboard for Shopify store
This specialized dashboard connects Klaviyo email campaigns directly to Shopify sales data, providing eCommerce businesses with clear visibility into how email marketing drives revenue and product purchases.
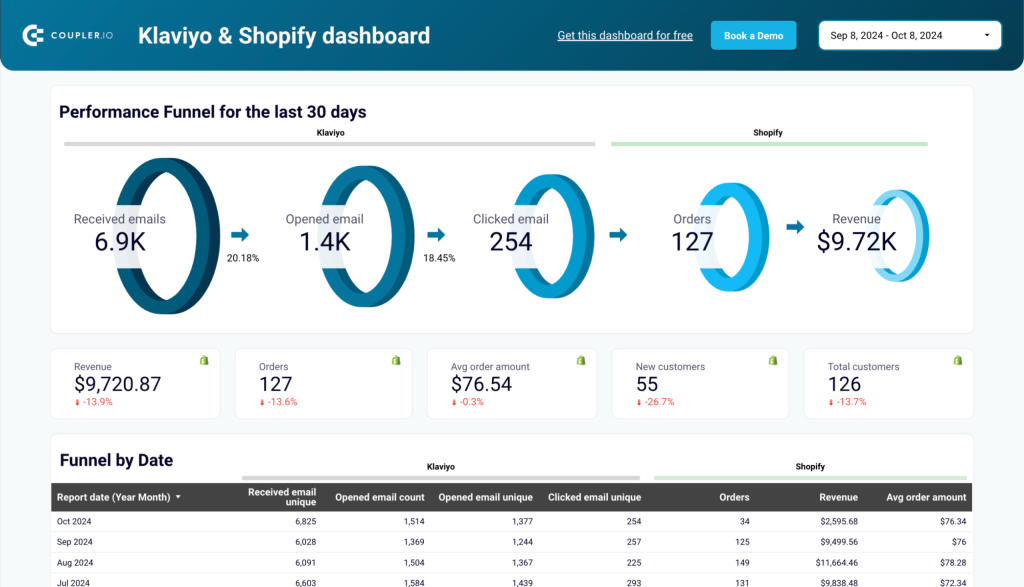
What insights you can get
- Revenue attribution: Track exactly how much revenue each email campaign generates in your Shopify store
- Email performance funnel with sales: Visualize the journey from email sends to purchases and revenue
- Product performance analysis: See which products sell best through your email marketing channel
- Campaign ROI measurement: Calculate the actual return on investment for your email marketing efforts
- Shopify sales trends: Monitor how email-driven sales patterns change over time
How to use this dashboard
This dashboard includes detailed setup instructions in its Readme tab that walk you through connecting both your Klaviyo and Shopify data sources. The configuration process has been streamlined to be as user-friendly as possible – you’ll authorize access to both platforms and the dashboard will automatically map relationships between your email campaigns and sales data, creating an integrated view of your eCommerce marketing performance.
Connect Klaviyo to Google Sheets using Google Apps Script
Google Apps Script is a JavaScript-based language supported by Google Workspace to integrate various applications. You can use the Google Apps Script to call the Klaviyo API, fetch the required data, and import it into Google Sheets.
This method demands high proficiency in the JavaScript language and working with APIs. Let’s say you want to get all the profiles from Klaviyo into Google Sheets. You can follow these steps to do that using Google Apps Script:
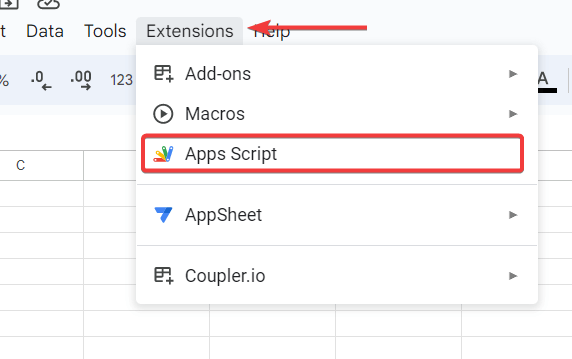
- Open the Google Sheet where you want to import Klaviyo data and go to Extensions > App Script.
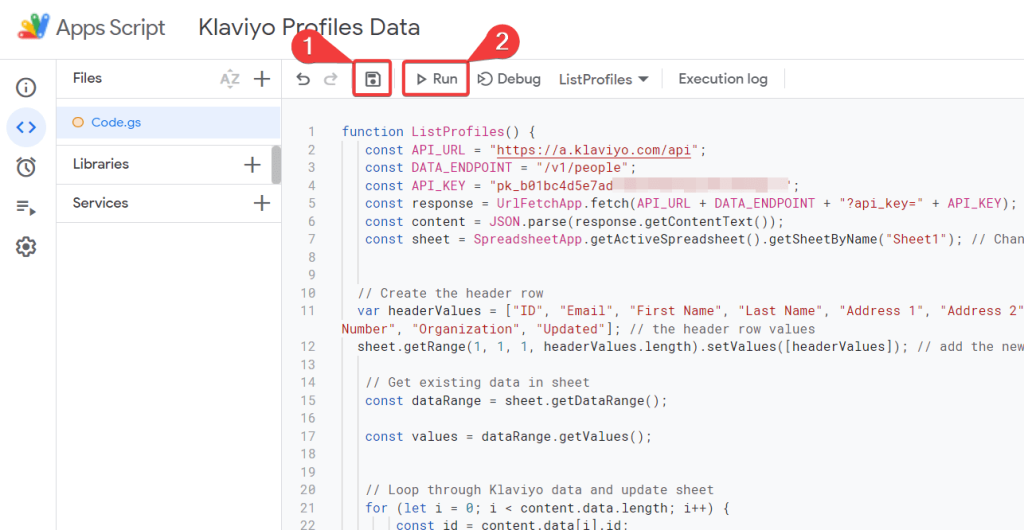
- In the script editor, copy and paste the following code:
function ListProfiles() {
   const API_URL = "https://a.klaviyo.com/api";
   const DATA_ENDPOINT = "/v1/people";
   const API_KEY = "Your_Klaviyo_API Key";
   const response = UrlFetchApp.fetch(API_URL + DATA_ENDPOINT + "?api_key=" + API_KEY);
   const content = JSON.parse(response.getContentText());
   const sheet = SpreadsheetApp.getActiveSpreadsheet().getSheetByName("Sheet1"); // Change Sheet1 to the name of your sheet


  // Create the header row
  var headerValues = ["ID", "Email", "First Name", "Last Name", "Address 1", "Address 2", "City", "Country", "Region", "Zip", "Title", "Phone Number", "Organization", "Updated"]; // the header row values
  sheet.getRange(1, 1, 1, headerValues.length).setValues([headerValues]); // add the new header row


   // Get existing data in sheet
   const dataRange = sheet.getDataRange();


   const values = dataRange.getValues();


   // Loop through Klaviyo data and update sheet
   for (let i = 0; i < content.data.length; i++) {
       const id = content.data[i].id;

       // Check if id already exists in sheet
       let existingRowIndex = -1;
       for (let j = 1; j < values.length; j++) { // Start at 1 to skip header row
           if (values[j][0] == id) { // Column 1 contains the id
               existingRowIndex = j + 1; // Add 1 to account for header row
               break;
           }
       }

       // If id exists, update other details in same row
       if (existingRowIndex > 0) {
           const rowToUpdate = sheet.getRange(existingRowIndex, 1, 1, 14);
           rowToUpdate.setValues([[id, content.data[i].email, content.data[i].first_name, content.data[i].last_name, content.data[i]['$address1'], content.data[i]['$address2'], content.data[i]['$city'], content.data[i]['$country'], content.data[i]['$region'], content.data[i]['$zip'], content.data[i]['$title'], content.data[i]['$phone_number'], content.data[i]['$organization'], content.data[i].updated]]);
       }

       // If id doesn't exist, add new row
       else {
           sheet.appendRow([id, content.data[i].email, content.data[i].first_name, content.data[i].last_name, content.data[i]['$address1'], content.data[i]['$address2'], content.data[i]['$city'], content.data[i]['$country'], content.data[i]['$region'], content.data[i]['$zip'], content.data[i]['$title'], content.data[i]['$phone_number'], content.data[i]['$organization'], content.data[i].updated]);
       }
   }
}
Remember to replace Your_Klaviyo_API Key in the above code with your Klaviyo Private API Key that we generated earlier.
- Next, save the script and click Run to execute the code.
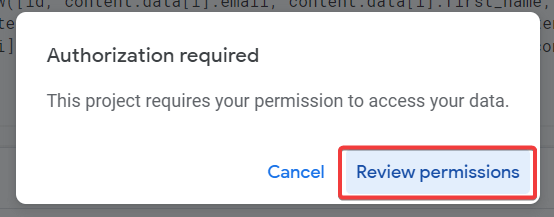
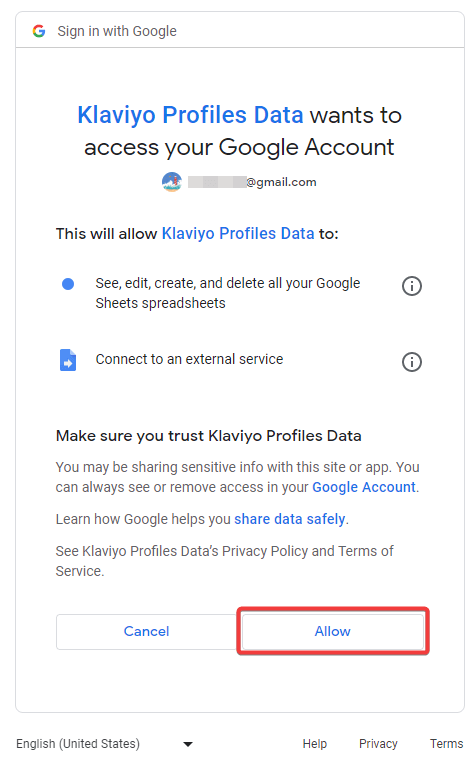
- You may be prompted to authorize the permission to run the script. Click on Review permissions.
- On the Google authorization popup, select the respective Google account.
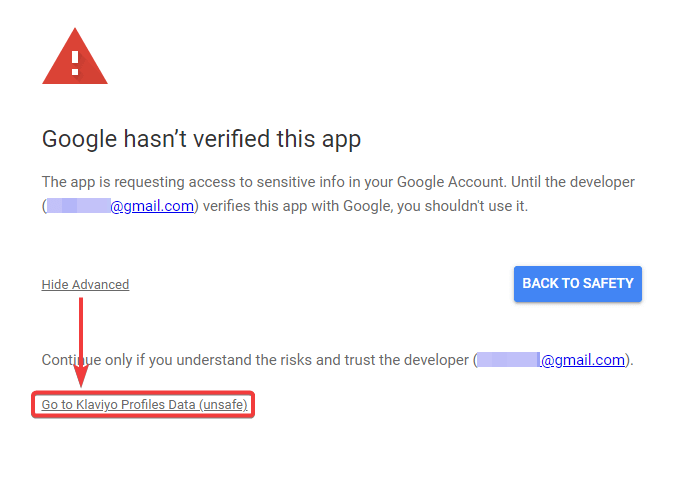
- Now, a warning message will appear on your screen. Click on Advanced and click on Go to {app name} to proceed further.
- Finally, click on Allow to grant app script access to your Google account data, which is required to import Klaviyo data to Google Sheets.
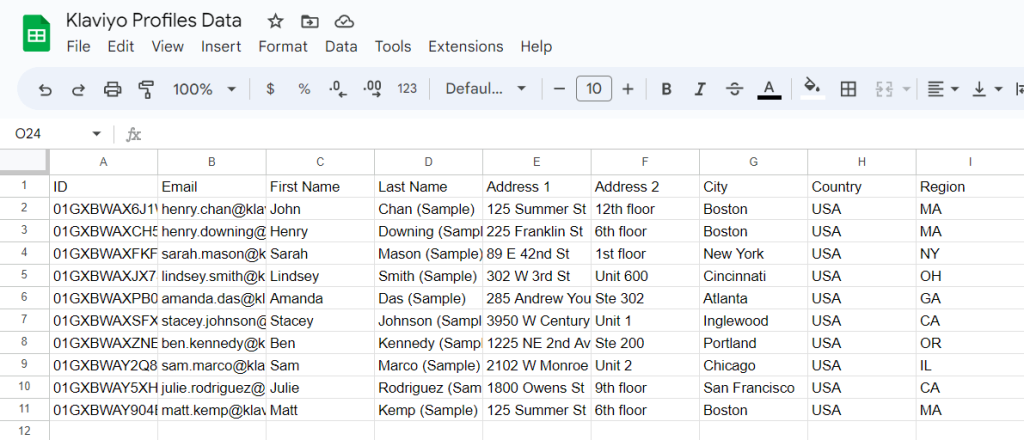
- On successful execution of the script, the required Klaviyo data will be successfully imported to the Google Sheet.
Please note that the above-provided code is just an example of fetching profile data from Klaviyo to Google Sheets. It is programmed to replace the existing data with a fresh one on each run. You may need to modify the code, use different API endpoints, and other functions to retrieve data and make it function as per your requirements.
Once everything looks good, you can configure the Google Apps Script to automate data importing. Let’s see how to do that.
Auto-update Google Sheets from Klaviyo at regular intervals
Google Apps Script supports various event-based triggers to auto-run functions. You can create a time-based trigger to automatically import Klaviyo data to Google Sheets at regular intervals.
Let’s say you want to update Google Sheets every minute for the latest data. You can follow these steps:
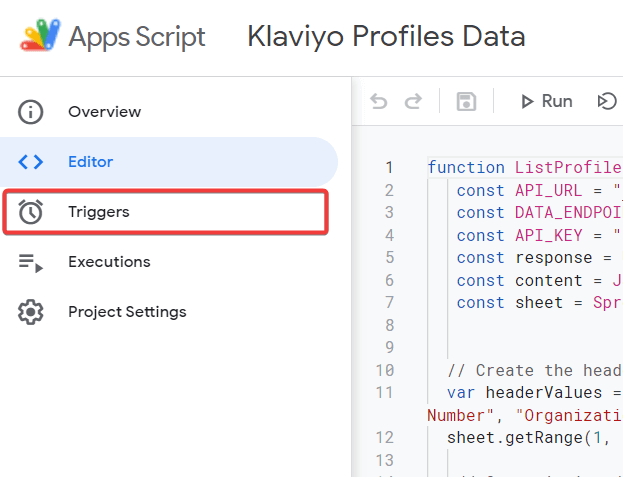
- In the Google Apps Script, click on Triggers in the left-most panel.
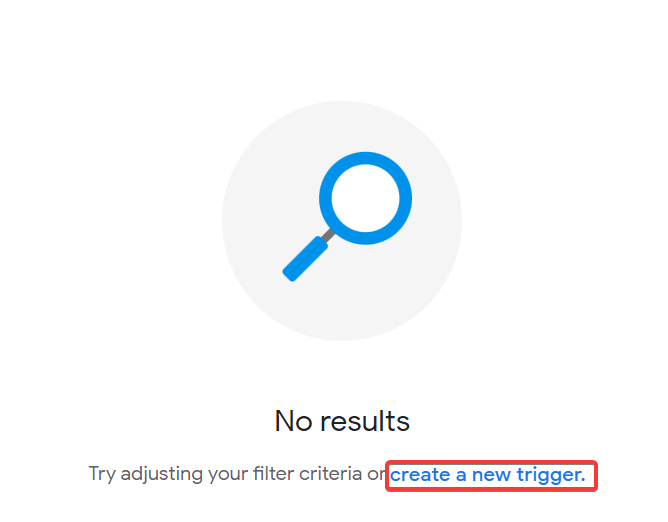
- In the Triggers section, click Create a New Trigger.
- Now, choose the function in the apps script which you want to call regularly.
- Select the event source as Time-driven, the timer as Minutes timer, and the interval as Every Minute.
- Finally, click Save to create the Trigger.

Optionally, you can also choose the frequency to receive notifications in case of apps script failure.
Now, Google Apps Script will run the script at regular intervals to auto-update data in Google Sheets from Klaviyo.
Which is the best method to build a Google Sheets – Klaviyo integration?
Connecting Klaviyo to Google Sheets can help you import data such as profiles, campaigns, and metrics to analyze your marketing performance. In this article, we learned two main ways to integrate Klaviyo into Google Sheets.
Klaviyo Google Sheets integration using the Google Apps Script method requires coding expertise. This can be challenging and is prone to technical errors. Therefore, the best method to connect Google Sheets to Klaviyo is using Coupler.io. The platform automates the integration with minimum technical knowledge. In addition to Google Sheets, you can connect Klaviyo to Power BI and other tools to make the most out of your data.
Automate Klaviyo data export with Coupler.io
Get started for free