The Power BI REST API opens up possibilities for reporting integration, customization, and automation for businesses. You can leverage it to integrate with your existing stack, automate specific tasks, and dynamically embed reports into custom apps for streamlined reporting.
This post covers how to use Power BI REST API with examples.
What is Power BI REST API?
Power BI REST API is a protocol by Microsoft that developers can use to access the Power BI platform and interact with it programmatically.
Generally, an Application Programming Interface (API) is the standard protocol for exchanging data between software applications. REST or RESTful is the most widely used web API that uses HTTP methods like GET, POST, PUT, and DELETE to interact with resources. The information is carried in JSON format.
What can you do with Power BI REST API? – Types of operations
The REST API in Power BI offers access to its service endpoints. This means you can use them to perform all the operations that Power BI Service allows.
For example, you can use Power BI REST API to build a custom app that allows users to access, refresh, or delete datasets. Similarly, you can use other Power BI API endpoints to implement other features, allowing users to gain complete control over the platform.
Learn more about how to use API for data analytics.
In a nutshell, you can use Power BI API to:
- Manage Power BI content: Perform operations like add, update, and delete on instances like datasets, reports, dashboards, and workspaces.
- Perform admin operations: Add or remove users and manage their roles, access, and permissions.
- Embed Power BI content: Integrate the Power BI charts into custom web applications and display visualizations in real-time.
It supports a wide range of operations across 17 different operations groups, including admin, apps, datasets, dataflows, and reports.
How to use REST API in Power BI?
To use Power BI REST API, you’ll need the app access token to authorize the requests. This access token acts as a credential (just like a password) that allows access to secured resources.
You’ll first need to register an application in the Azure Active Directory (Microsoft Entra) and get the access token. Here’s how to get it and use the REST API in Power BI:
- Get Power BI Access Token
- Step 1: Register an app for Power BI
- Step 2: Authorize the user using Application ID
- Step 3: Exchange authorization code for the access token
- Call Power BI API
- Step 4: Use the access token to authorize Power BI request
Let’s learn each step.
Step 1: Register an app for Power BI
To use the Power BI REST API, you’ll need to register an app in Azure AD (Microsoft Entra ID). This establishes the permissions you require to use the API.
Here’s how to do it:
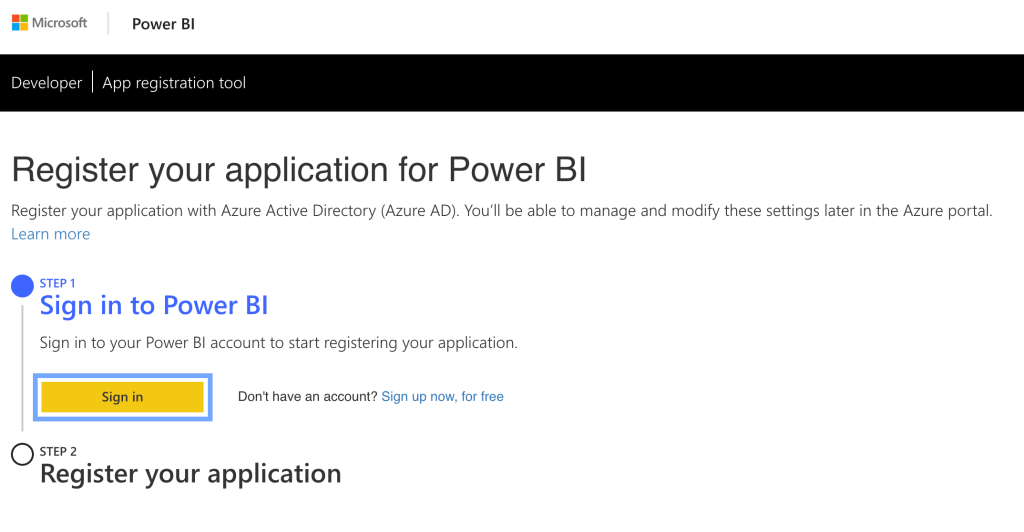
Go to the ??Power BI App Registration tool and sign in using your Power BI account.

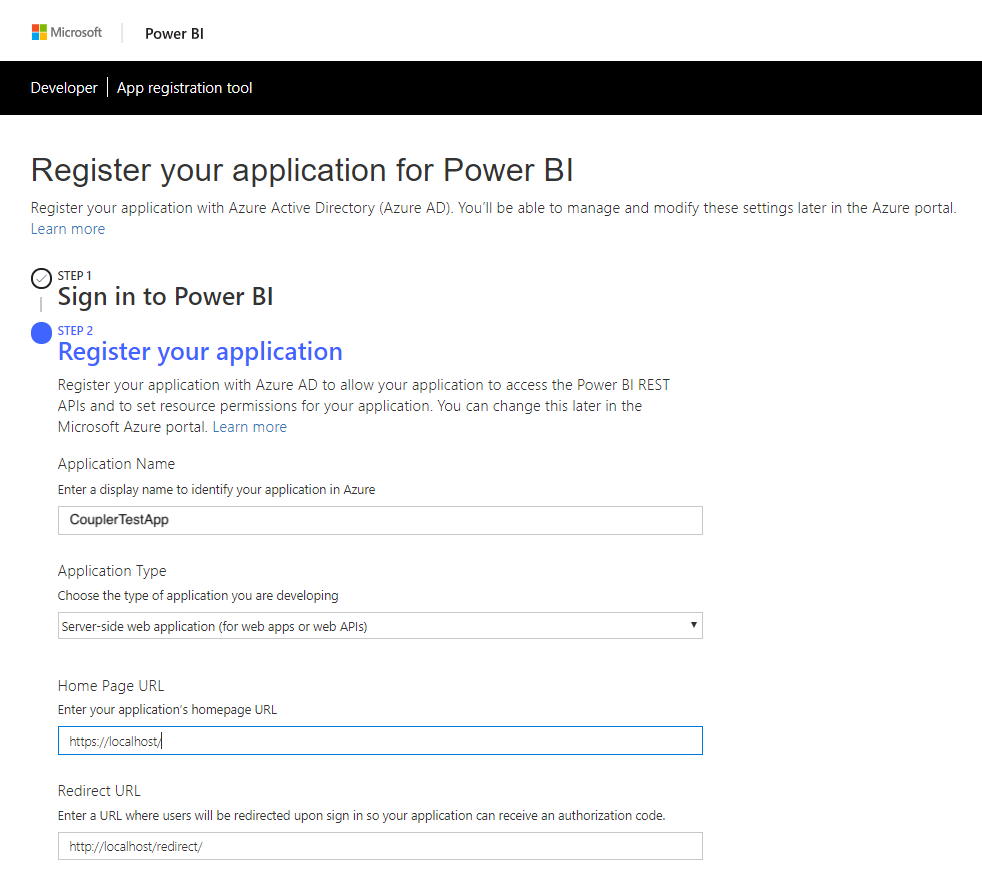
Name your application and choose “Server-side web application” as the app type.
Enter the home page address of your app and also the redirect URL, where the users will be sent with the authorization code.

Scroll down a bit.
Choose the APIs allowed for the application. You can define the API access level for the app (it can also be modified later in Azure).

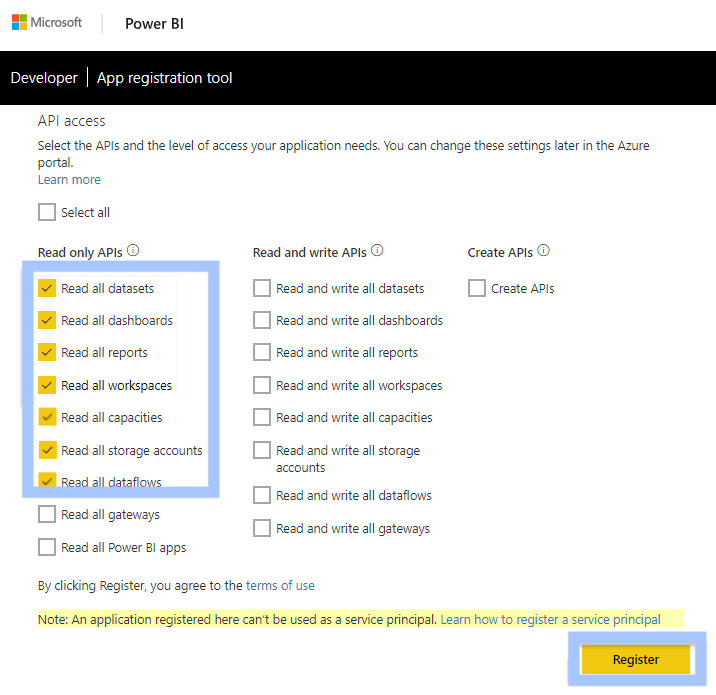
Click “Register” to save the app.
On successful app registration, you’ll get the Application ID and Application Secret.

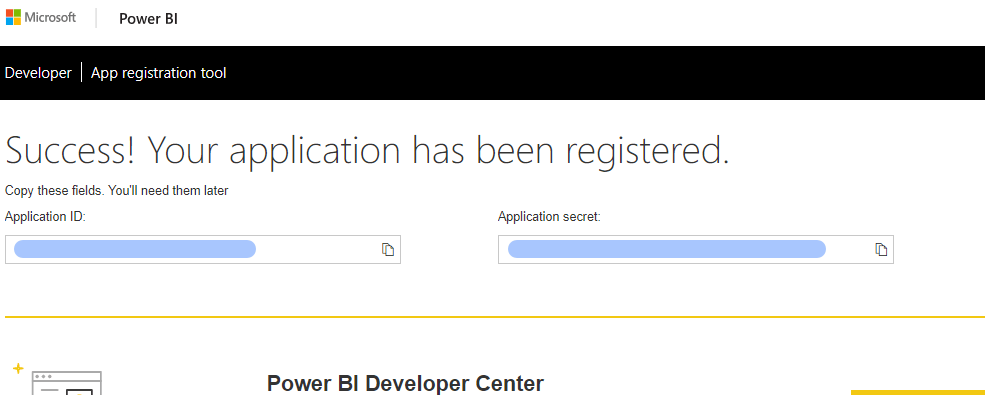
Copy these fields and save them in a safe place. You’ll need them in the upcoming steps to use the Power BI REST API.
Step 2: Authorize the user using Application ID
Once the app is registered, we need to sign in and retrieve the access token (which is required in later steps to call Power BI REST API).
To do that, access this URL: https://login.microsoftonline.com/common/oauth2/authorize with the following parameters:
- ClientID
- ResponseType
- RedirectURI
- ResponseMode
- Scope
- State (Optional)
The final URL will look like this:
https://login.microsoftonline.com/common/oauth2//authorize
    ?client_id={client_id}
    &response_type=code
    &redirect_uri={redirect_uri}
    &response_mode=query
    &scope=https://graph.microsoft.com/.default
Prepare the URL, enter it into your browser’s address bar, and hit enter.
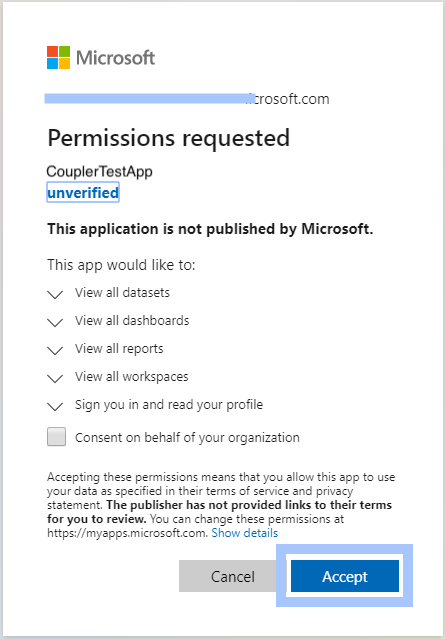
Grant the requested permissions to the app by clicking “Accept.”

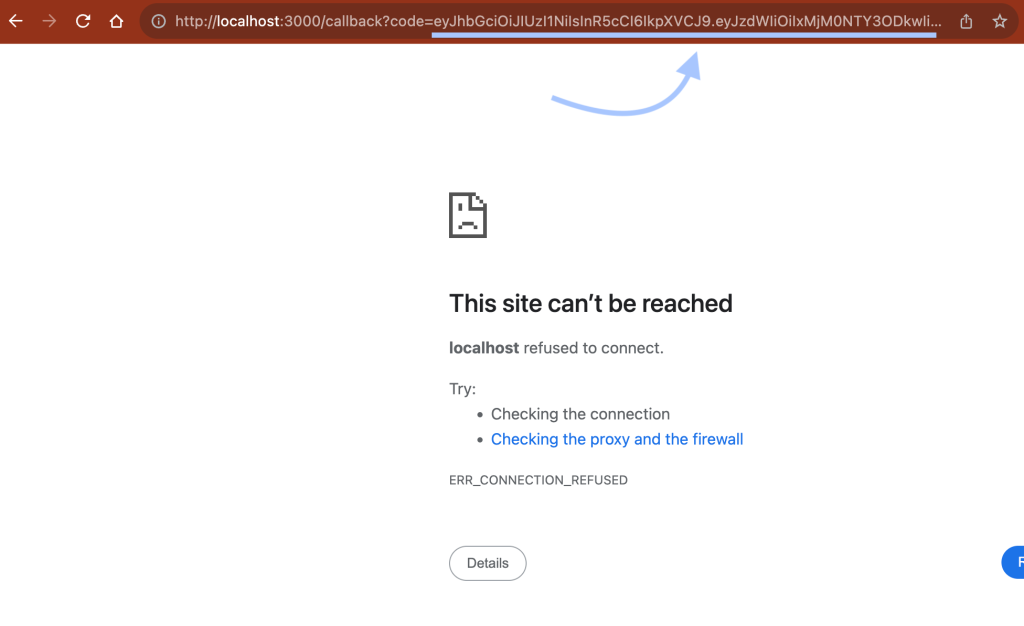
You’ll be redirected to the redirect URL with the authorization code. You can find the authorization code in the URL as shown below. Select the part of the URL that appears after code= until & and copy it.
That’s the authorization code.
(You will likely witness a “page not found” error here. That’s because, at this stage, you may not have set up an actual app at the redirect URL to handle the authorization request).

Step 3: Get Power BI API access token
Once you have the authorization code, you can exchange it for an access token.
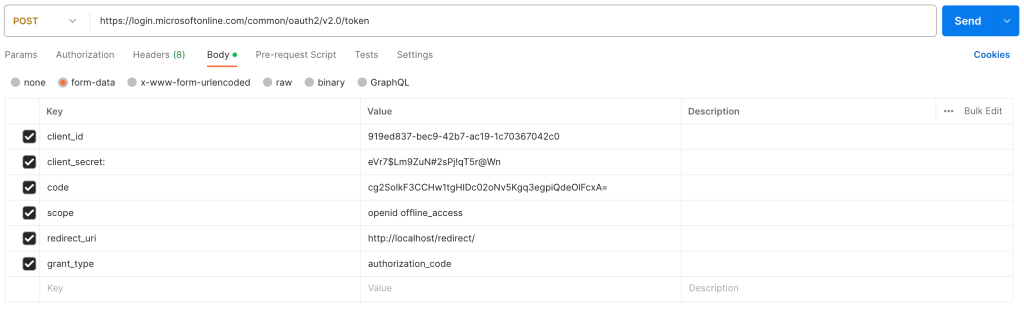
To get the token, make a POST request to the token endpoint https://login.microsoftonline.com/common/oauth2/v2.0/token with the code and the following details:
- Client ID
- Client Secret
- Code
- Scope
- Redirect URI
- Grant Type
Here’s what it looks like in Postman, a useful no-code tool to work with APIs and test them.

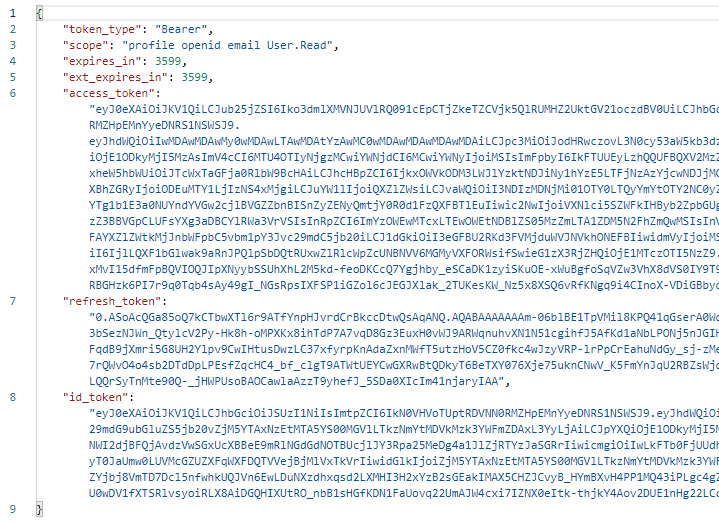
And it will return the access token in response.
Copy the access_token value from the response.

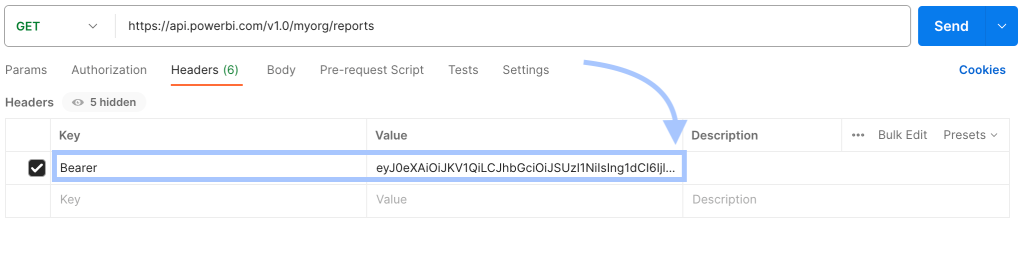
Step 4: Call Power BI API
Once you have the access token, you can use it to authenticate the Power BI API requests.
Add the following to the request header:
Bearer {access_token}

Power BI REST API examples
Microsoft Power BI offers API support for basic to advanced operations. The official API documentation lists 17 different operation groups.
You can also try each of the APIs in the browser without any additional setup.
Here are a couple of Power BI REST API examples.
Example #1: Power BI REST API get datasets
Here’s the Power BI REST API call request to get a list of all datasets.
- Method: GET
- Request URL:
https://api.powerbi.com/v1.0/myorg/datasets - Header:
Bearer {token}

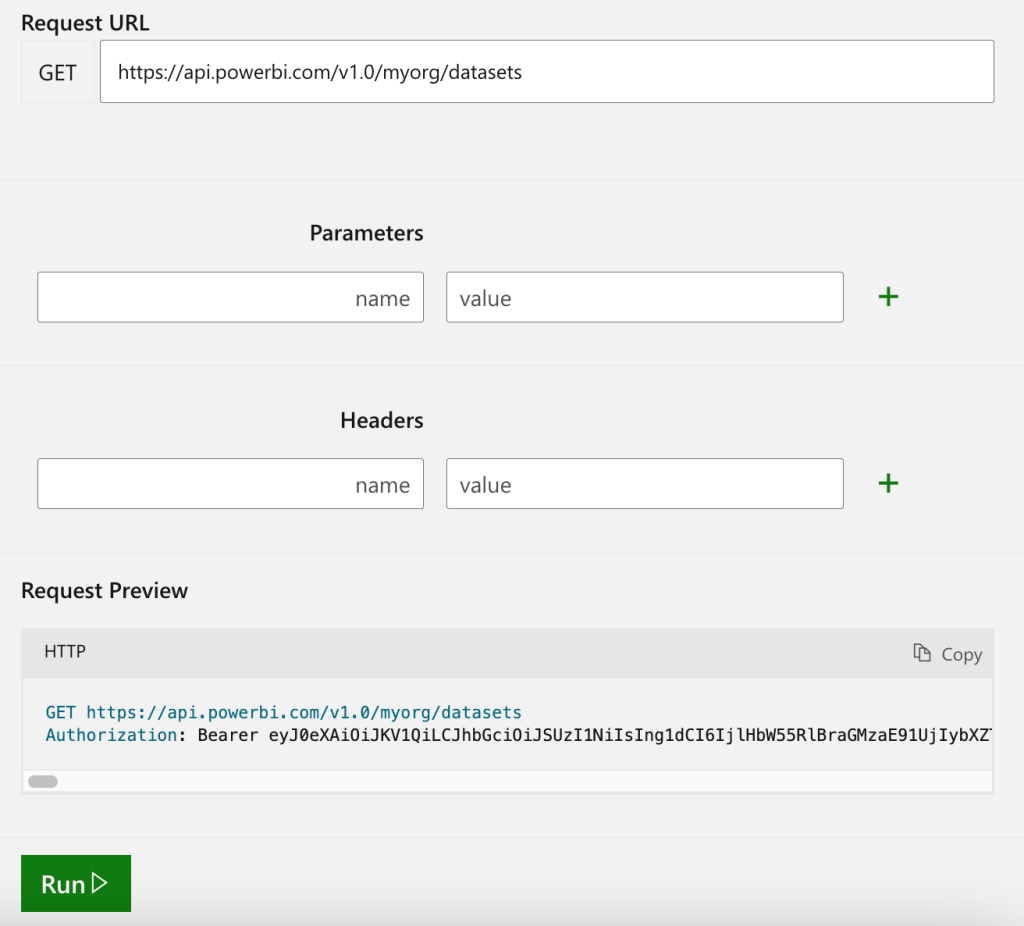
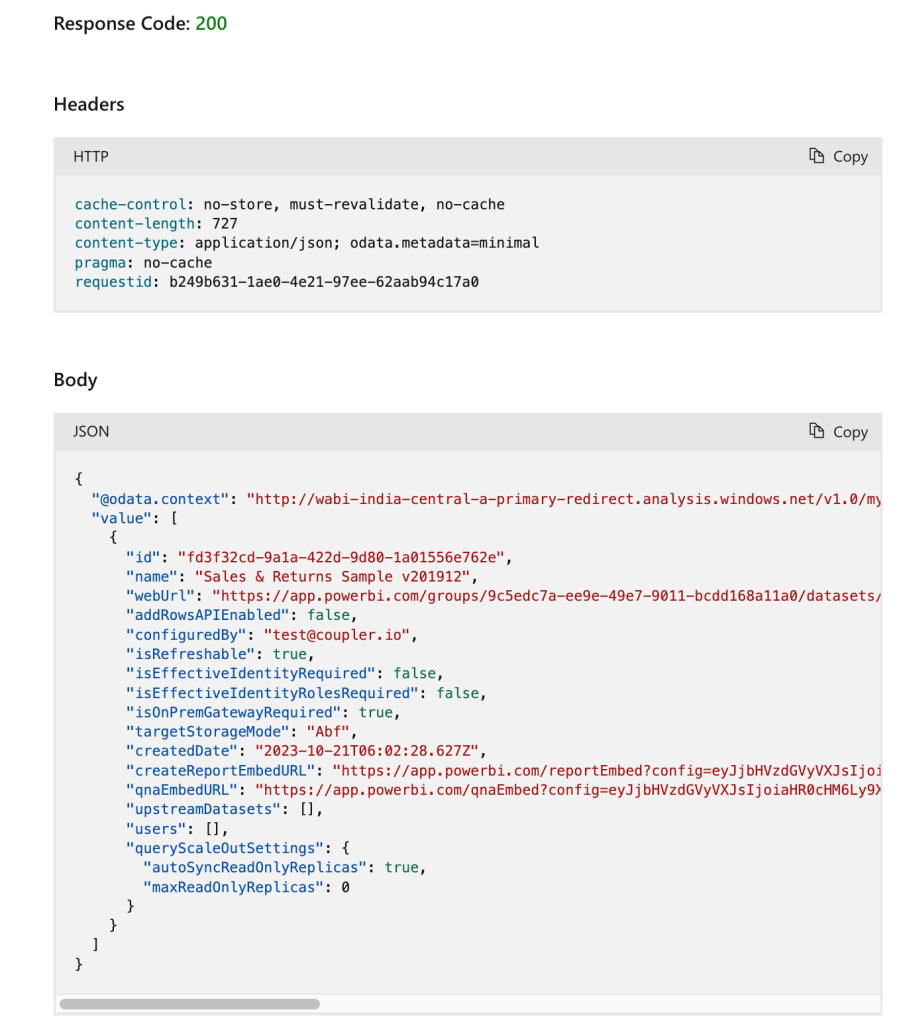
This will return all the datasets available in the My Workspace.
Here’s the response.

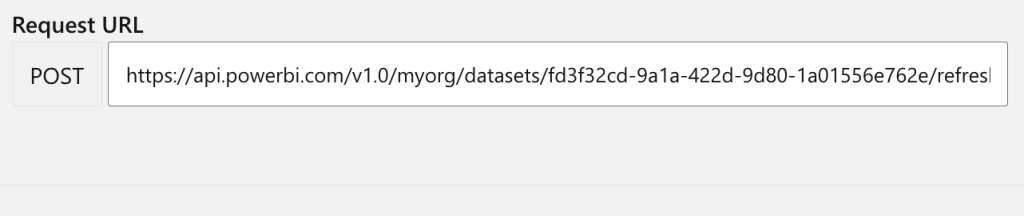
Example #2: Power BI REST API refresh dataset
Here’s an example of Power BI REST API refresh dataset request:
- Method: POST
- Request URL:
https://api.powerbi.com/v1.0/myorg/datasets/{datasetId}/refreshes - Header:
Bearer {token}
Remember to replace the datasetid in the request URL with that of the dataset you want to refresh.

It will respond with a blank body and a 200 status code on a successful refresh.
You can also use various other parameters and modify the API calls as per your needs. Learn more about all the available API endpoints through the official documentation.
Is it possible to connect REST API to Power BI?
Yes, it is possible to connect API to Power BI. The “Web” data source in Power BI Desktop can help you get data from any web API endpoint. Here, you’ll need to enter the JSON URL and the access token (if required).
Let’s say you want to import users from a web API endpoint.
Here’s how to do it:
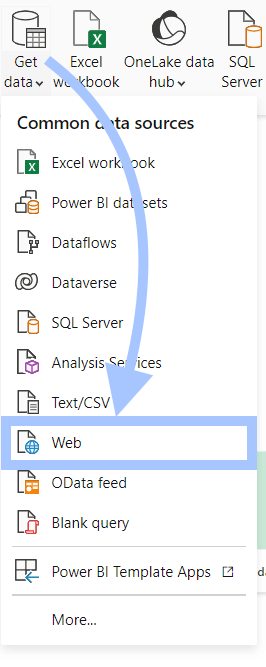
In Power BI Desktop, go to Home > Data and click “Get Data.” In the dropdown, select “Web.”

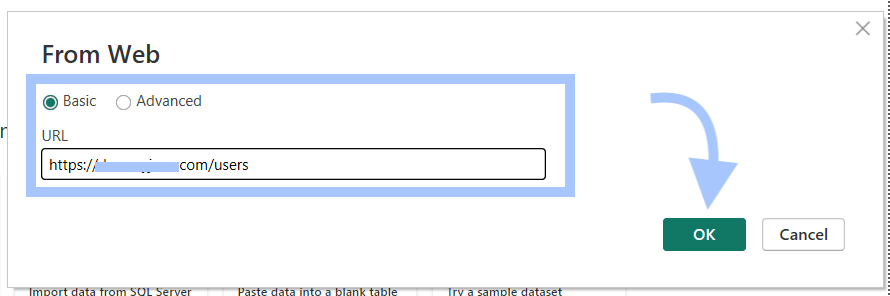
Enter the web API endpoint URL and click “OK.” (You can also switch to advanced to add specific parameters and headers, if required.)

Based on the required authentication type, proceed with one of these steps:
- Anonymous: If it requires no authentication (i.e. a public API).
- Basic: Authenticate the request using username and password.
- Web API: Enter the access key to authorize the API request.
In the example, we use a public API requiring no authentication.
Click “Connect.”
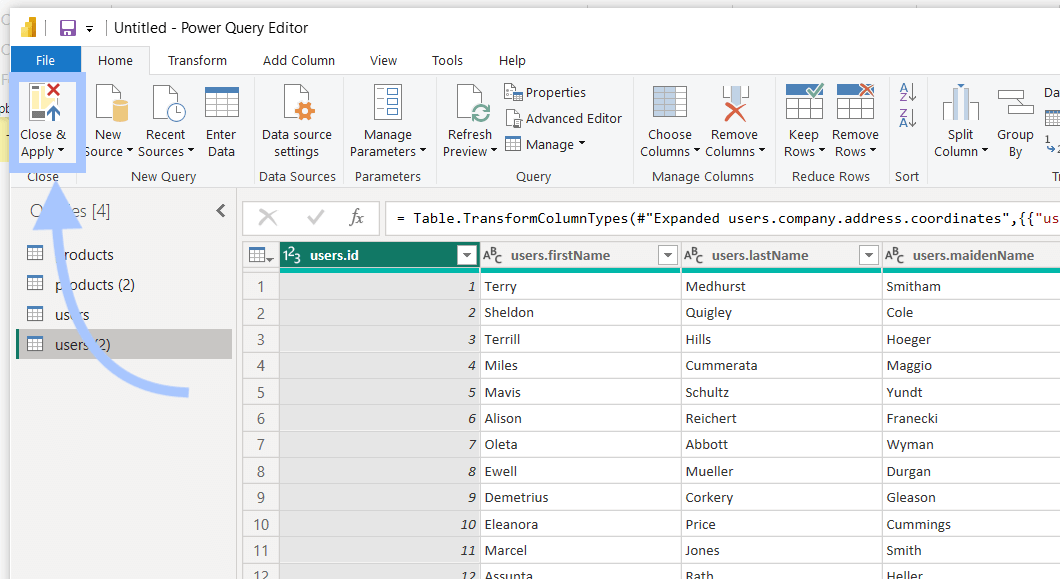
Edit the results in the PowerQuery editor (if required) and click “Close & Apply.”

And that’s it!
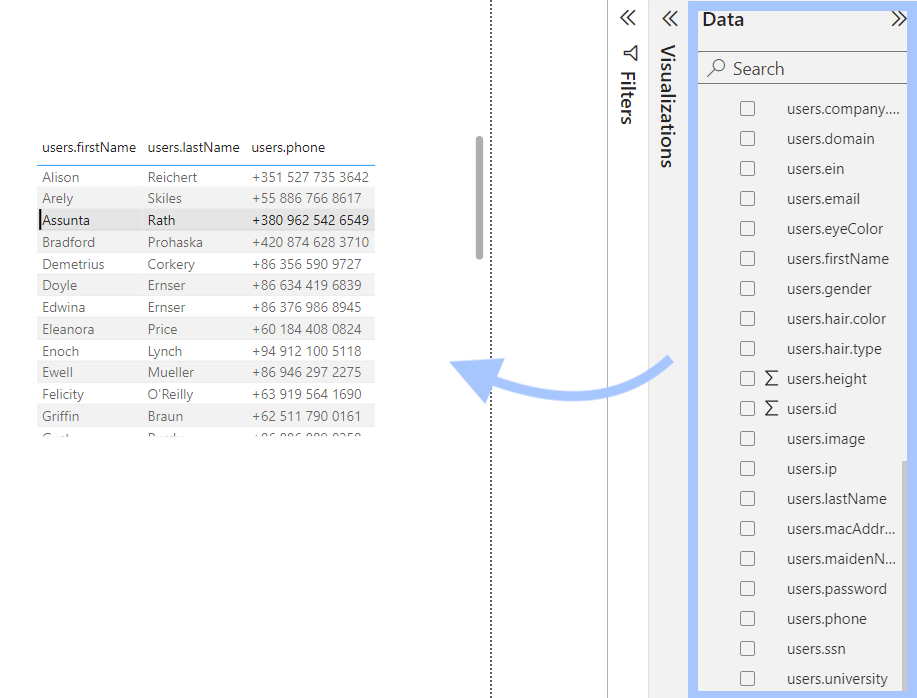
The data from REST API will be successfully imported to Power BI. You can use it to create visual reports, as shown below.

Connect Power BI to REST APIs to automate dataflow
Power BI lets you use web data sources to connect to any REST API data source. But there is a better and more accessible alternative to this. You can use over 60 ready-to-use Power BI connectors by Coupler.io. This reporting automation platform allows you to connect Power BI to Facebook Ads, Google Analytics, Google Search Console, and many other apps without the complexities of API. In addition, you can also use the JSON connector to connect any REST API to Power BI.
The main benefit here is its built-in data transformation and automation features. It allows you to organize your data like removing unnecessary columns, sorting data, and adding new columns. In addition, you can automate the connection to refresh the data at regular intervals.
Here is how you can connect load data from REST API endpoints to Power BI.
1. Collect data
Click Proceed in the form below where we’ve preset JSON as a data source and Power BI as a destination. You’ll be offered to get started for free with no credit card required.

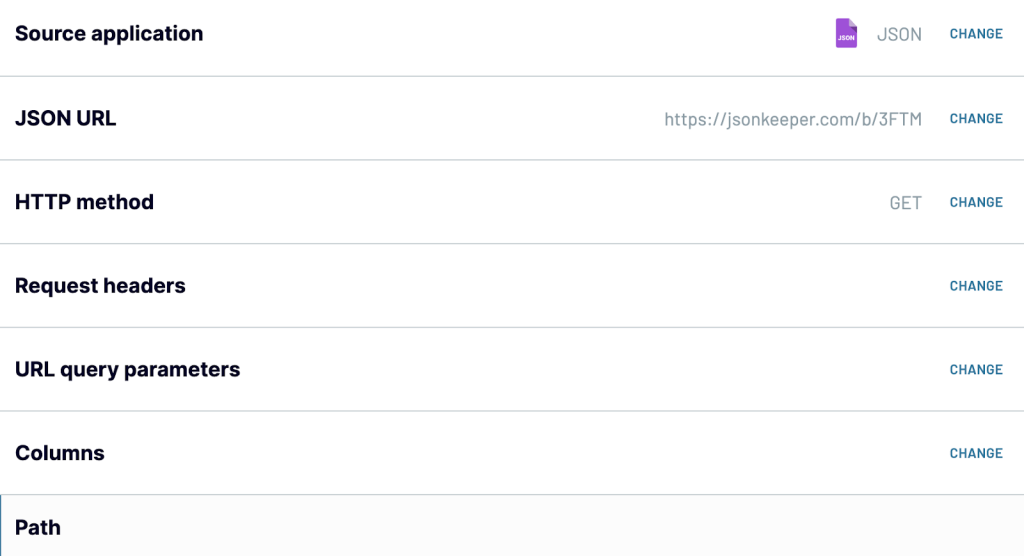
Enter the REST API URL in the source and configure it.

2. Transform data
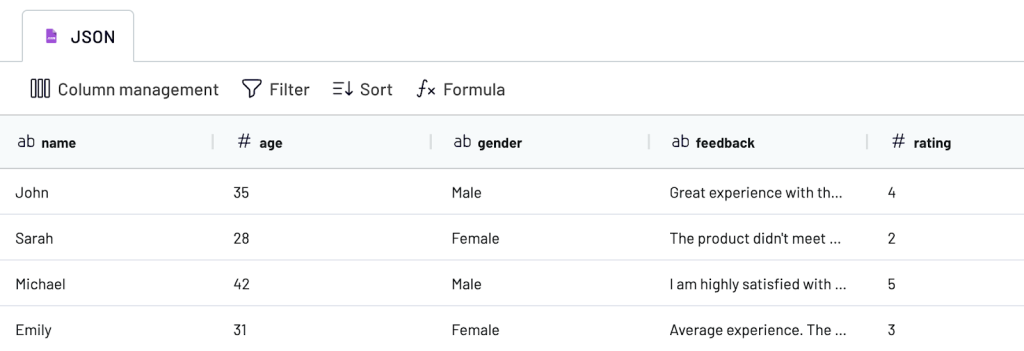
Once you’re done, move to the transformation stage, where the real magic happens. Coupler.io’s powerful transformation module allows you to perform the following transformations in the data before unloading it:
- Sort and filter data
- Hide specific columns
- Create new calculated columns
You can use this feature to cleanse the data and make it ready to use for Power BI. Here, we’ve hidden the unwanted columns from the data to import only the required data to Power BI.

Pro Tip: You can improve Power BI reporting performance by importing only the required columns by using Coupler.io’s transformation module.
3. Load data and schedule refresh
You’ll need to generate an integration URL, then navigate to the Power BI desktop and follow the in-app instructions to load JSON data to Power BI.
In the final step, you can configure the importer and enable data automation.

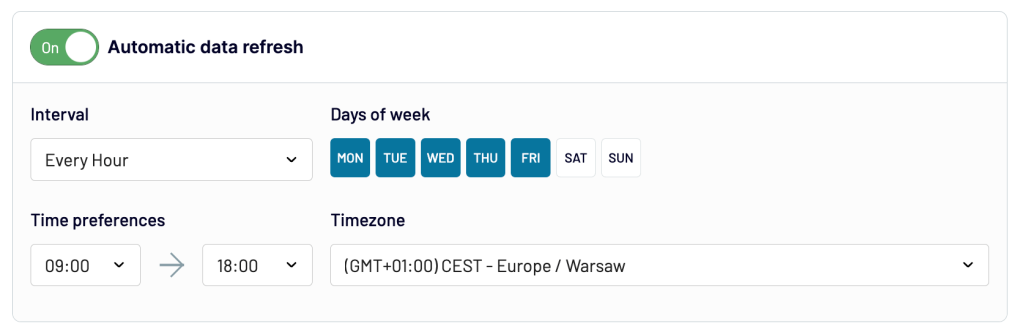
And that’s it! You’ll see the transformed data successfully imported into Power BI. Furthermore, Coupler.io will refresh the data at regular intervals so that you can always access ready-to-use data.
Power BI REST API limitations
Microsoft Power BI uses throttling to deliver performance and reduce its API abuse. It has set some time-based limits on the number of API requests (and rows).
Although not officially confirmed, here are some Power BI REST API rate limits:
- 120 POST requests per minute
- 10K rows per POST request
- 1M rows per hour
You may experience the 429 status code if you exceed these limits for a specific period.
Moreover, the push datasets (real-time updates) functionality also has some officially confirmed limits, such as:
- 75 max rows and columns each
- Max 10k rows per POST request
- 1M rows added per hour per dataset
- 5 Max pending POST request per dataset
- 120 POST rows requests per dataset per minute
- It does not work with service principal profiles
Frequently Asked Questions
What is Power BI embedded API?
Power BI embedded API is a client-side library to embed reports and charts using JavaScript or Typescript. Developers can use this library to show any visualizations directly from Power BI into web apps or websites.
How to set up Power BI REST API Service Principal?
To let the Azure apps use the Power BI APIs, you can also configure a service principal. This acts as a security identity for the application, which nullifies the need for other manual authentication methods.
Here are the steps to set up the service principal for Power BI REST API.
First, create a new app in Azure AD (Entra ID) and create a security group. Then allow service principals to use Power BI APIs.
In Power BI Admin Portal, go to Tenant Settings > Developer Settings and enable the “Embed content in apps” option as shown below.

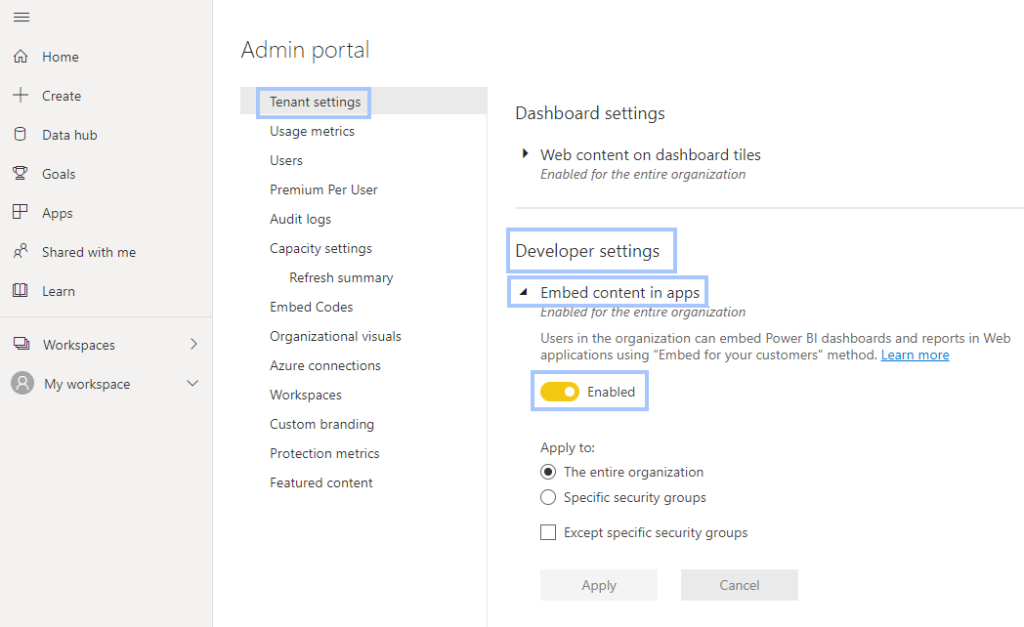
In the same section, enable the “Allow service principals to use Power BI APIs” option, as shown below.

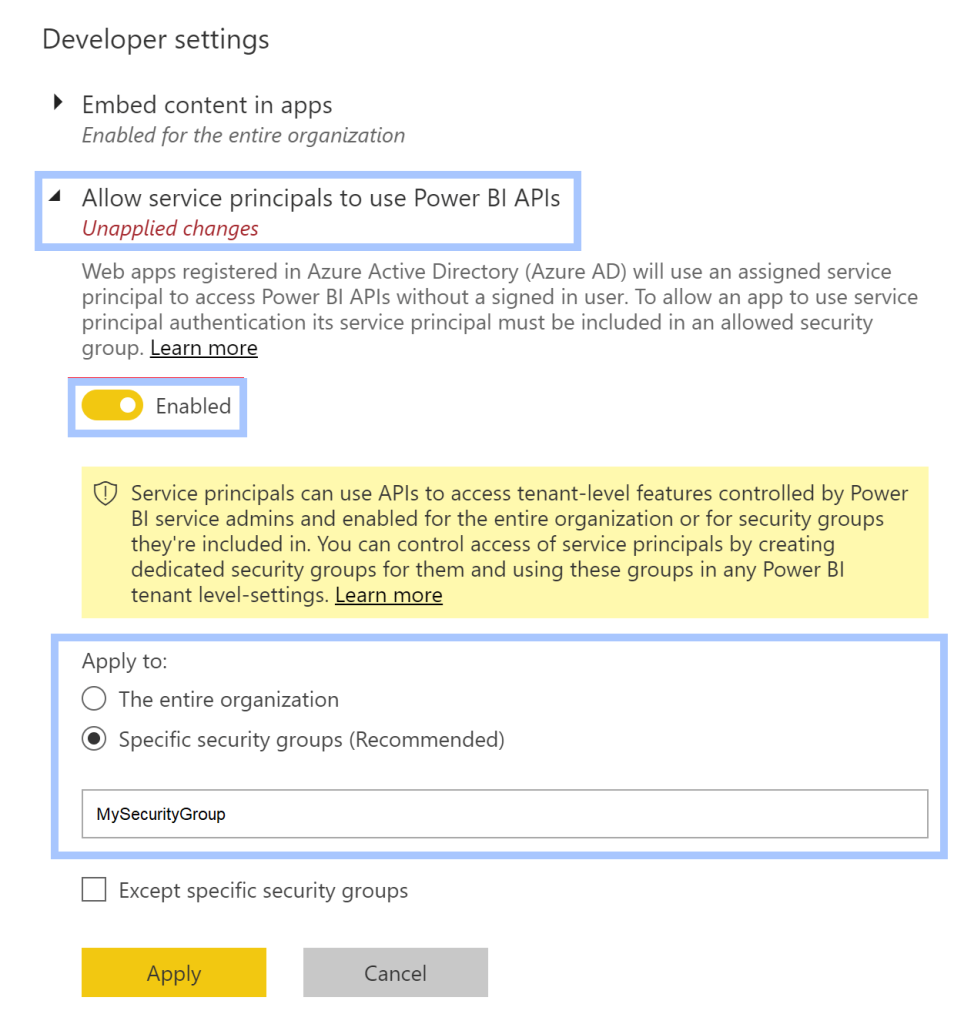
Click “Apply.”
The Azure AD app can only access the Power BI reports, dashboards, and datasets if it has access to the workspace.
To add a service account to Workspace, go to Power BI Service, and select More menu > Workspace access for the respective workspace.

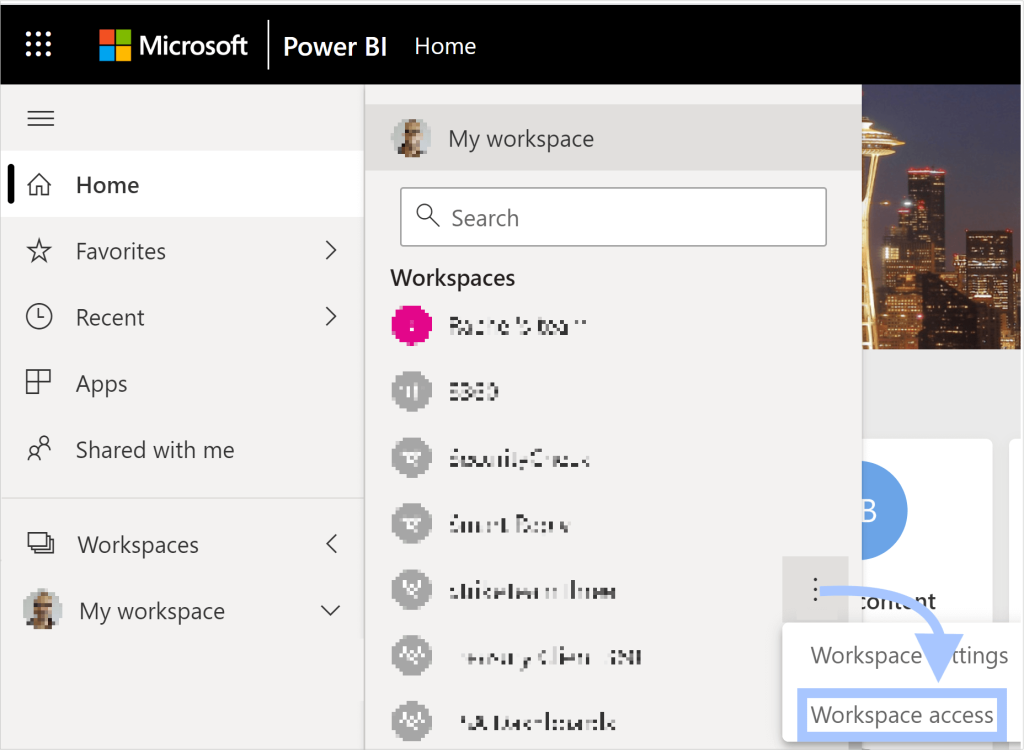
Now, under the Add admins, members, or contributors section, add the Service Principal to the workspace and click “Add.” The name of the service principal is the display name of the Azure AD app
That’s it! You’ve successfully set up a service principal. And you’re ready to use the Power BI REST API through it. And if you need to refresh your knowledge of this powerful BI tool by Microsoft, check out our Power BI tutorial. Good luck with your data!